This post may contain affiliate links.
We actually made the largest single modification to our RV a couple of months before we arrived in Oregon. This power upgrade is what enabled us to do our entire RV renovation off-grid. We made a massive upgrade to our power systems by adding lithium batteries, solar and a new inverter to our motorhome. This install took place in Wellington, Texas about two months prior to our official RV Makeover in Enterprise Oregon. Check out our system in this video and read on for more details.
In the video, you’ll get to see parts of our battery and solar installation, and see how we were able to put our system to the test with big power tools and appliances.
Disclaimer:We had already decided on Battle Born lithium batteries and Victron components for our power upgrade when Battle Born invited us to partner with them. We were not paid to produce this blog post or video and our opinions are our own, based on our experience. Battle Born supplied us with the major components and we organized the install (all free labor from fellow RVers) and purchased all other supporting components necessary for the install. Battle Born Batteries recommended Zamp Solar. Zamp supplied us with the solar panels as part of their sponsorship of the RV Nomads movie, which featured our rig/solar install and setup.
What We Cover In This Post
This power system upgrade was a huge project, and there is a lot to learn about the system to understand why we made the choices we did. Because this is such a big upgrade, with a lot to share, we’re going to break it up into multiple posts. We’ll start with the heart of our power system – our lithium battery system – and touch on the other components. In the interest of not overwhelming you with too much detail here, we will share more about those soon.
In this post, we will cover:
The Installation
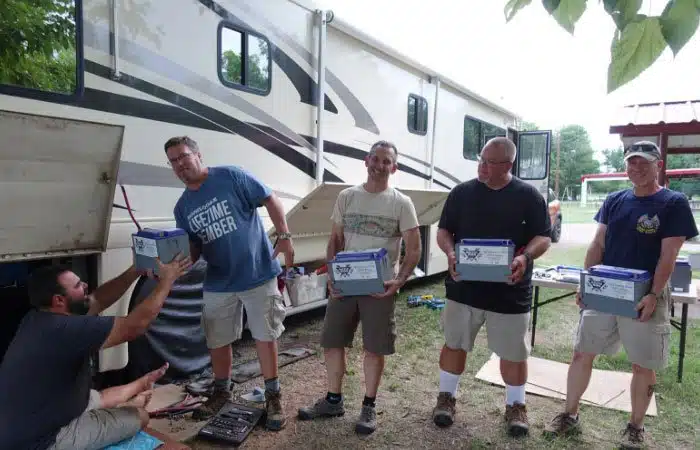
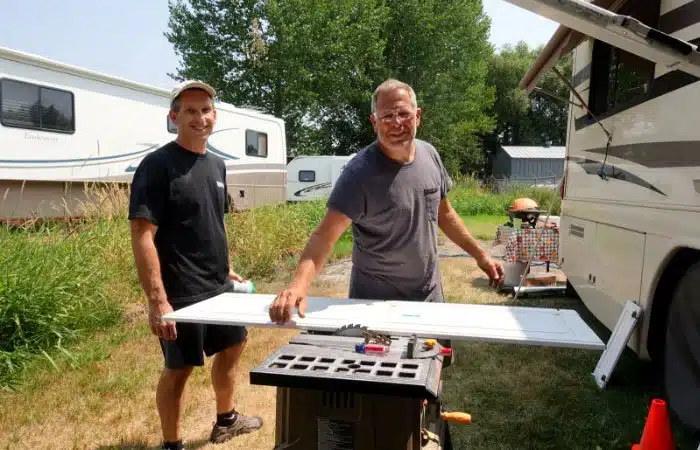
This is a BIG project and we had a great team helping us. Many hands made quicker work. Special thanks to Gary Quimby of Pau Hana Travels who led this huge installation. Thank you to Erik McCauley of Livinlite.net who drew up our schematic and parts list. And thanks to Justin Ford of Opting Out of Normal, Dan Brown from Always On Liberty , and John Nejedlo of GeoAstro RV who all helped a lot as well.
Having a solid plan, all the parts on hand, and a great team of people was critical to pulling this off in only a few days.
The entire installation (batteries/inverter/solar) took place over 3 days in 100 degree temperatures. Thankfully we had a nice shade tree to keep us out of the direct sun most of the time. Because once we cut the cord on our old inverter, the RV was completely dead electronically. There was no going back at that point.
We ran an extension cord directly from the power pedestal to run our residential fridge, but that was it for power to our coach. We were impressed that we were able to complete the new battery and inverter install in one long day. This brought our RV back to life electrically, but was only one piece of the installation.
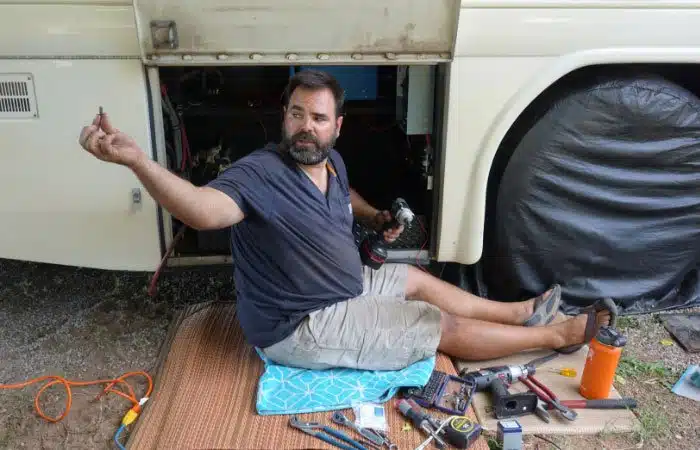
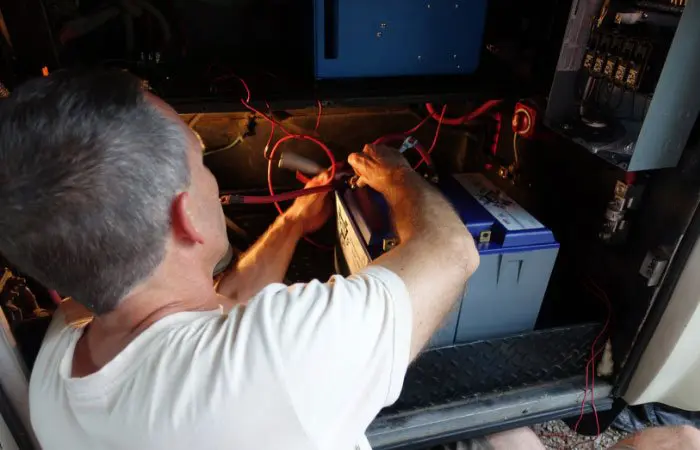
Gary Quimby (pictured below) did the bulk of the work in the main battery bay (and later on the roof installing the solar panels), but everyone bounced around on the project to help wherever there was a need.
Here’s what we did:
Re-wired the main electrical panel and added a new sub-panel
Strung new wiring needed through cabinets and new channels
Drilled many holes into and through the RV roof, cabinets, and floors
Wired and mounted solar panels
All the battery connection wires needed to be created by cutting to length, crimped, curved, and connected
Many people also don’t realize that installing a system like this often involves much more than just the main components in the electrical bay, like the batteries and inverter.
We spent an additional $1,000+ on all the cables and related accessories, most of which we were able to order online via Amazon. This was really important as we were situated in the small town of Wellington, Texas, which was limited in terms of the electrical supplies and parts we needed. We will put together a complete parts list soon. In the meantime, most of them you will find in the links below:
Click here to view products available directly from Battle Born (lithium batteries, inverter etc). Coupon Code RVLOVE saves $50 per battery. See details at the end of the article.
Click here to view our Amazon page with most of the components we used in our renovation
Why We Chose Lithium Batteries
We began our extensive research on our battery upgrade options as soon as we bought our motorhome CC. It was evident from the day we bought the coach that the old batteries were terrible. And this was confirmed during our pre-purchase RV inspection.
We asked ourselves questions about our RV – along with our needs and desires for more power and travel goals – to help us narrow down to what we felt would be the best setup for us.
We wanted to:
Do a lot more off-grid camping ie. boondocking / dry camping
Upgrade the old RV fridge to a (power hungry) residential refrigerator
Replace the microwave with a microwave/convection oven for cooking
Be able to leave our RV unplugged, yet still powered, while we left it in storage to enjoy other forms of travel eg. air travel, cruises, hotels
Reduce “battery anxiety” without having to constantly worry about maintaining, draining or damaging them
Close and seal our (dirty and dusty) battery bay to keep it cleaner and protect our batteries, inverter and related cables, connectors and components
Renovate our RV and make it feel more ‘residential’ with the ability to use more power without having to worry about it
Install solar panels and have an adequate battery storage system on board to store all the power generated by the sun
A final factor in our decision was that we planned on doing a major renovation on this RV and had every intention of keeping it for several years. CC is a quality motorhome, and although 20 years old, we believe she’s got quite a few more years left in her yet.
During our research, we came to understand just how far lithium batteries have come over the years. Yes, they are more expensive as an initial investment. But they also offer significant advantages. Especially when you consider the bigger picture and longer term cost benefits.
Here’s what we learned about the pros and cons of lithium batteries:
Advantages of Lithium Batteries
- Lighter weight and smaller size (29lb each compared to 150lb on originals)
- No need to have ventilation for off-gassing
- Faster charging rates
- Greater ability to handle large spikes in power draw
- Longer lifespan, thus reducing need to replace them as often
- Low maintenance
- Able to use more of total capacity without damage to the battery
Disadvantages / Other Considerations
- Temperature sensitive (but storing them inside reduces this concern)
- Higher initial cost (but actually less expensive over the long run)
Discount Coupon Code: RVLOVE
Battle Born Batteries offers RVLOVE readers discounts when using coupon code RVLOVE at checkout. The coupon offers $50 off per battery. And also 25% off of merchandise like clothing. Coupons cannot be used in addition to sale pricing or other coupons.
9 Advantages and Dis-advantages in More Detail
1. Battery Weight and Size
One of the biggest factors in increasing the off-grid capabilities of your RV is the weight involved. When we looked at increasing our solar and battery capacity in our first RV, we didn’t have enough available weight capacity to make a sizable upgrade safely. At the time, lithium batteries were not as prevalent and they were also a lot more expensive.
We also needed to consider the weight of solar panels and related gear. We didn’t even drive our RV with a full water tank, as it would make the coach overweight. That’s why, when we switched our RV, we wanted to ensure our ‘new to us’ motorhome would have plenty of space and weight capacity for a battery and solar upgrade.
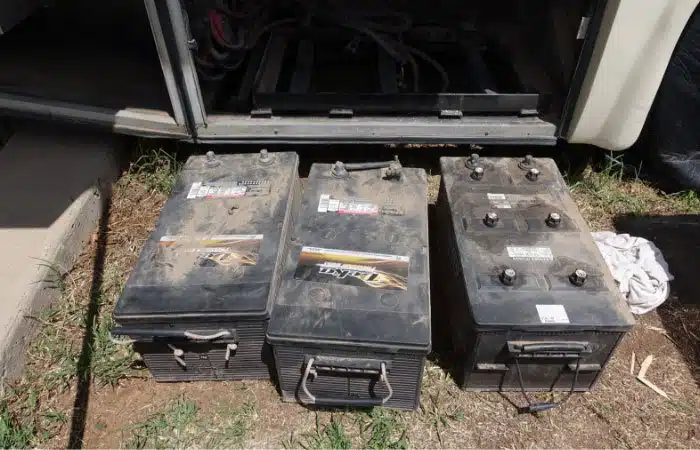
Ironically, because we were able to install lithium, we experienced a significant weight reduction in battery weight. Our RV originally came with three 8D batteries which weighed approximately 150 pounds each, so around 450 pounds in total. They were also a terrible choice of battery for how they were being used.
One was for the chassis, and the other two powered the “house” of the RV. Being “starter” batteries, the original batteries in our RV did not show their amp hours. But I did a little research and estimated they were rated at about 200ah each. Being lead acid batteries, we also knew we could only count 50% of that power as usable, which means that two of those 8D batteries when combined, made about 200Ah available.
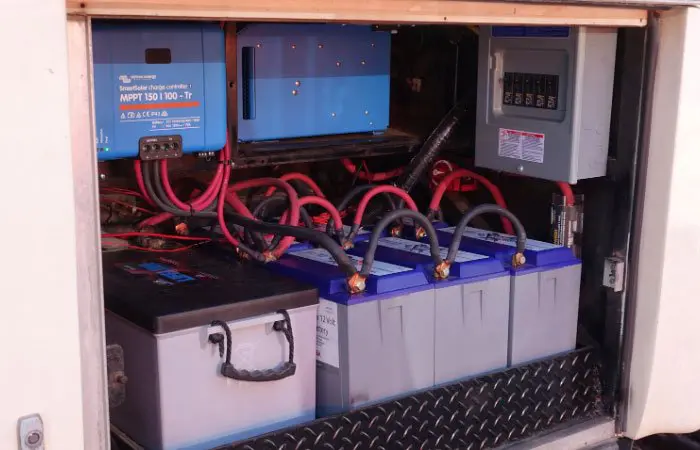
Replacing all the batteries
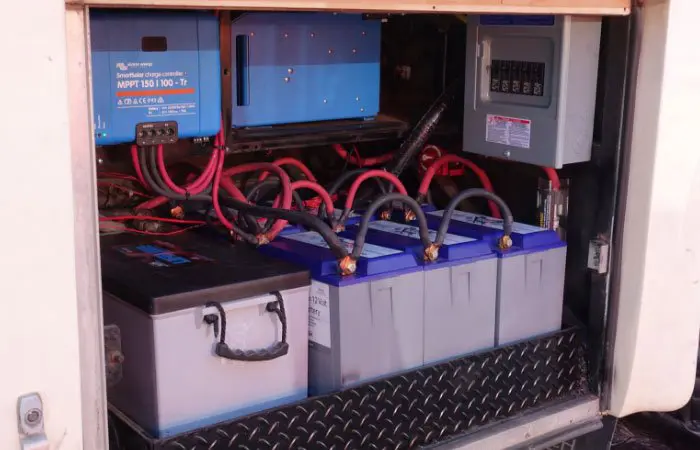
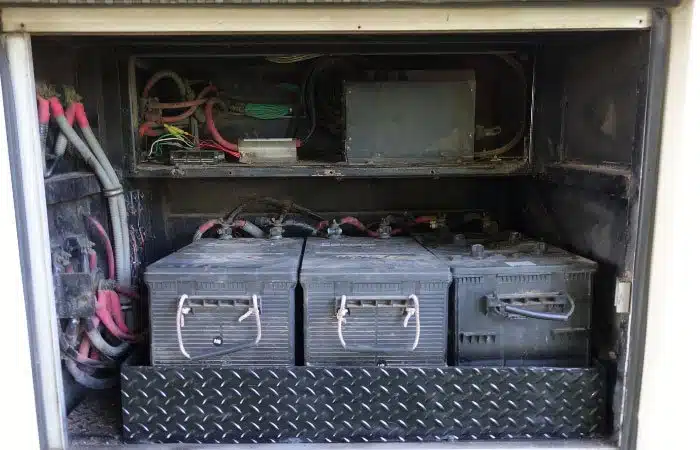
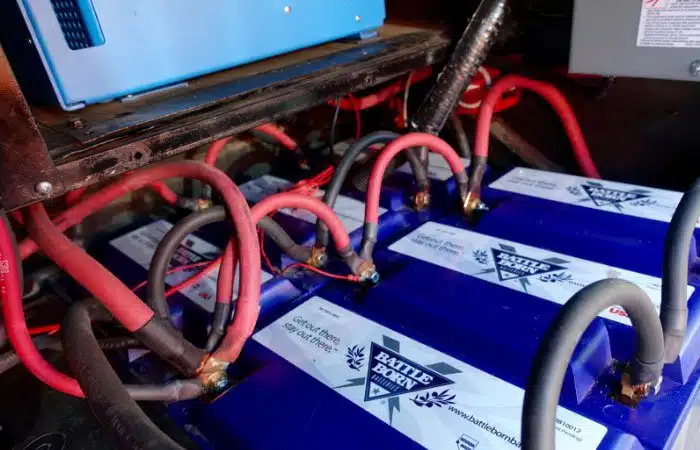
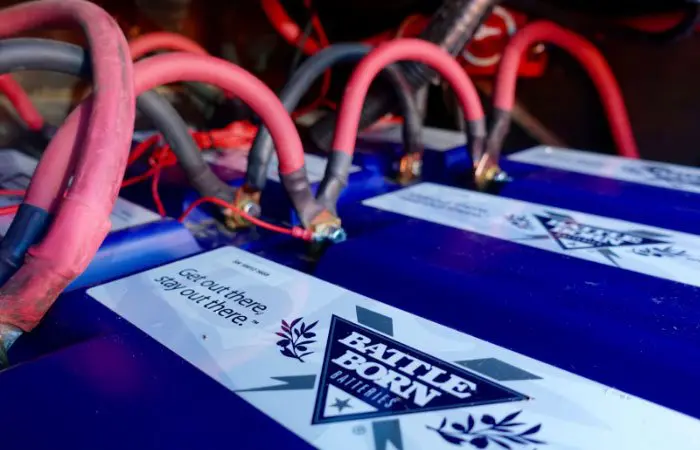
We replaced all three of the original batteries. We purchased one new Lifeline GPL-8DL battery to use as the new starter battery. And we replaced the other two original 8D batteries with six (6) 100 amp-hour lithium-ion phosphate batteries from Battle Born Batteries, giving us a total of 600 amp hours.
The six Battle Born batteries weighed a combined total of less than 180 pounds (174lb, to be exact). This saved us about 120 pounds on the two lead acid batteries they replaced. And they took up approximately the same amount of space.
But this is not a 1:1 comparison. Because our new battery bank had THREE times the available power, being 600 amp hours instead of around 200. But that’s not all. Remember, lithium batteries are more power efficient than lead acid. So the increase in available power is even more than that. More on that in point 5 below.
2. What About Ventilation?
Another big benefit of lithium, compared to lead acid batteries, is that they do not off-gas poisonous and corrosive gasses and therefore do not need ventilation.
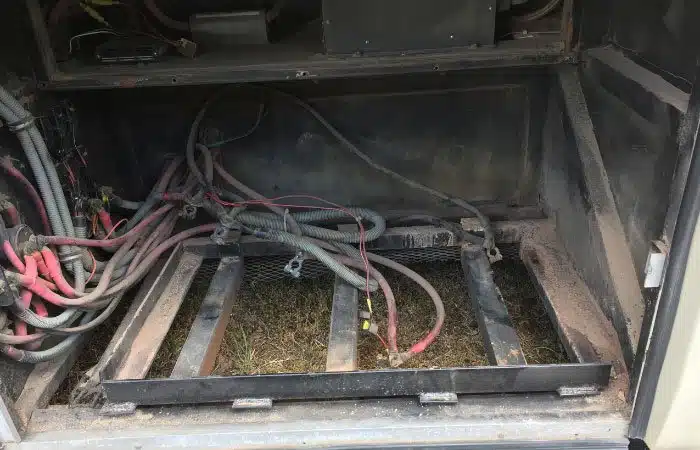
Our original batteries needed to have an open floor in the basement bay and ventilation holes in the walls of the bay to keep consistent airflow in the area.
This, of course, opens up the area to dust and dirt in the best conditions. But even worse, our battery bay was located directly behind our rear dual tires. This area would get dusty and dirty just traveling along the highway. But if we drove on any dirt roads (which, of course, we do when we go boondocking), the area would quickly become filled with a shocking amount of dirt. When driving in rainy conditions, we would even get some water kicked up into the bay.
Part of our installation required reconfiguring our battery bay to fit the different sizes and shaped batteries and also to seal off the open areas. Some of the metal supports for the battery bay had corroded and looked pretty bad. We hired a local welder in Wellington, TX, who fixed the rusted areas by adding new metal supports. He also built an awesome new diamond plate battery tray. This is now much stronger, looks great, and really showcases our new system.
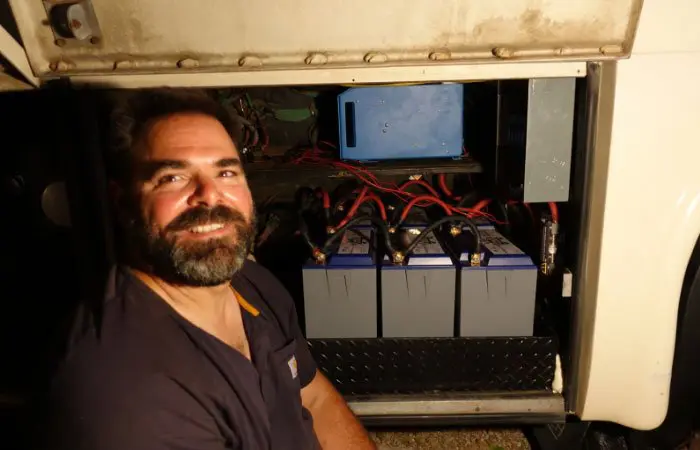
Sealing up for protection
When installing all of the new and expensive batteries, inverter, and components, we wanted to seal off the area from the outside to help keep it clean and running smoothly. Sealing off the bay would also allow us to control the temperature in that environment better. Lithium batteries are so safe now that we have known many people who install their batteries and components inside the cabinets of the living area of their RVs.
We elected to install our new lithium batteries in the existing battery bay. However, depending on your RV setup, it might make sense and be more efficient for you to wire your batteries and inverter inside the living area.
One of the primary reasons people do that is to protect their system from the elements. Partly because lithium batteries are more sensitive to temperature than other types of batteries. We go into more detail on that in point 8 further down.
3. How Fast Do They Charge?
Since there is lower resistance, lithium batteries can accept a charge up to five times faster than lead acid batteries. This is a huge advantage because it means you are able to fully capitalize on external power for charging. If you only have a few hours of sun for solar panels or are only able to run your generator for a few hours, you want to absorb every ounce of power possible. Lithium batteries allow you to capture more energy faster which means fewer hours of charging time. Less fuel is needed to run your generator. And maximum gain from solar or shore power.
Some lithium batteries are designed to be drop-in replacements for lead-acid batteries. But, with the different charging profiles, you should not mix lead acid and lithium batteries together. In our application, we use our lithium batteries for the house, plus an AGM starter battery that can all be charged from our inverter/charger. But we have special battery isolation components to keep them safe. You can see these components, which came with our kit from Battle Born.
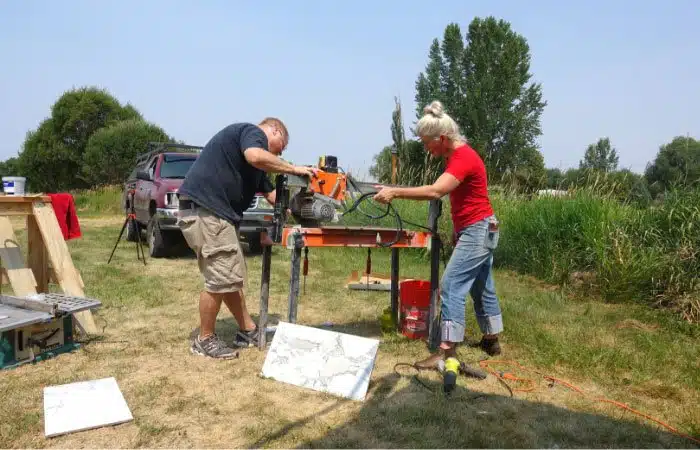
Photo above: Running a tile cutting saw during renovation
4. Handling Spikes in Power Draw
Not sure how many of you are audience are familiar with the Peukert Scale. Until recently, it was a foreign concept to me, too. I don’t want to get too technical here, so will do my best to explain it in a way that made sense to me.
In a nutshell, the Peukert Scale shows the long term impact of a short term spike in power draw. Here’s an example. Imagine comparing two batteries (one lithium and one lead acid) that each have approximately 200 usable amp hours available.
Both batteries will perform relatively similarly, when using low power draw items like LED lights. But, if you start hitting the batteries with a large power draw, say from a microwave oven, hair dryer – or in our case with this RV renovation, a tile cutting saw – things change. This high draw spike won’t damage a lithium battery. But when you hit a lead acid battery hard with a power draw, it takes more of a hit and can’t bounce back as well.
So, let’s say your draw is 20 total amp hours, your lead acid battery will effectively have lost 25% more than that, so around 25ah.
By comparison, the lithium battery would be more true to the actual power used, being 20ah. It basically treats all amp hours the same – whether it is used in a whole lot at once, or using a little over time.
Hope that makes sense. If you’re more familiar with the Peukert Scale and have a better way of explaining this, please leave us a comment below!
5. Ability to Use More Available Power
Continuing on with the power delivery discussion. Lead acid batteries should not be depleted below 50% of their power. If depleted below 50%, the volts drop below 12 volts, and will cause long term damage to the battery. This significantly reduces the lifespan of the battery. Depending on the type and how you use/maintain them, on average, you’ll need to replace your lead acid batteries every 3-5 years. It’s not uncommon to have to replace lead acid batteries much sooner. Especially if you drain them, don’t top them up, or live in a harsh climate.
Lithium batteries can use nearly 100% of their available power without causing damage to them. They also have in-built protection to shut off the power draw when they get too low, which prevents damage.
Lithium batteries also offer more stable delivery in watts. The power curve on lead acid batteries consistently drops from 12.6 down to 12.1 and lower.
Lithium batteries hold consistent volts through most of their entire capacity. This consistency is important to your sensitive electronics because they will prefer consistent power voltage.
6. Low Battery Maintenance
Lead acid batteries need to have their water levels checked and filled regularly. We needed to add distilled water to our lead acid batteries at least once per month in our previous RV. This can be reduced depending on the type of charger you have, or if you have an advanced watering system.
But, lithium batteries are completely maintenance free. You can just set up the system and let it run. Sure, you still need to monitor power usage to make sure you are recouping what you use. But maintenance of lithium batteries are a fraction of the maintenance required by other battery types.
7. Longer Lifespan
The lifespan of a battery is often measured in lifecycles. A battery life cycle is how many times it can be depleted and recharged back to original strength.
A typical lead acid battery might have 1000 life cycles. A lithium battery might have 3000 lifecycles. Once you’ve reached that, either battery still holds 75% of its original energy.
What this means, over time, is that over the course of say 10-15 years you would likely need to purchase 3 sets of lead acid batteries, but would only need one set of lithium batteries.
So in the long term, lithium batteries are actually less expensive. And less old lead acid batteries will end up in landfill, too.
I like to compare it to LED lights. When LED lights first came out, many people felt they were expensive. But over time, they pay for themselves. They don’t need to be replaced as often, and are so much more power efficient. LED lights end up paying for themselves in reduced electricity bills.
In a similar way, lithium batteries have become much more affordable than when they first came out. And their lifespan is much longer, so even though they are a more expensive initial purchase, they are less expensive over time.
As mentioned above, every time a lead acid drops below 50% you also significantly reduce the number of remaining life cycles. Lithium can be used down below 10% without any damage to the battery.
8. Temperature Sensitivity
A potential drawback of lithium batteries, depending on application, is temperature sensitivity. Our Battle Born lithium batteries have an operating range between 24–135 degrees Fahrenheit. It’s important not to expose the batteries to temps lower or higher than this range.
Fortunately, as full time RVers, we generally spend about 95% of our time in a much more pleasant temperatures. We aim to follow the best weather all around the country, “chasing 70s”. Typically temperature ranges on our travels fall between 40–100F.
That said, we have, on occasion, found ourselves in areas with overnight lows below 20 degrees. Our bay is sealed from the outside to prevent exposure to cold. And we keep temperature sensors in the bay to keep track of temps. We also routed some heating ducts from our rear bedroom down into the battery bay. We will also place an incandescent bulb in the bay during very cold temps, to keep our batteries warm.
At the opposite end of the spectrum, we are also mindful to avoid overheating. Our batteries are mounted close to our engine bay. And with much less ventilation than in the past, they could potentially get hot in that bay. Some small vents from inside out RV allow some fresh air into the bay, but not a lot. Fortunately, the bay is relatively large, so there is still some airflow for the inverter, charge controller, and batteries. Our temperature sensors allow us to monitor the temperature in the battery bay so we can keep an eye on it.
Others we know have chosen to add a heating blanket in their battery compartment during cold weather. The power draw of the heating blanket is offset by keeping the battery in operating range, which allows it to continue to accept a charge.
As mentioned earlier, some people choose to install their battery bank inside the living space of the RV. This is possible because lithium does not expel dangerous gasses like lead acid batteries. Of course, keeping the lithium batteries inside the living space makes it even easier to maintain optimal temperatures.
9. Higher Initial Cost
Perhaps the biggest downside (and barrier to entry) of lithium batteries is the higher cost of the initial investment. We specify “initial investment” because lithium batteries are actually far less expensive over the long run. With longer lifespans and greater capacity, lithium batteries are much more efficient in power delivery and charging.
So, though they are more expensive at first, this expense can be recouped if you keep the batteries longer. And only you can put a price on the value of the other advantages relative to what is important for you. Things like reduced maintenance, faster charging and more available power. Not to mention fewer old, lead acid batteries ending up in landfill.
Note: See below for details of discounts available with coupon code RVLOVE
Why Battle Born Batteries?
By now, it’s pretty clear why we were so interested in lithium batteries. There are a number of companies that build them. So, why did we choose Battle Born Batteries?
While Julie and I have many friends in the RV community with extensive knowledge about solar and batteries, we felt we still had a lot to learn when we were first shopping around for our system needs. We actually began our battery research a year ago – right around the time we changed our RV. From the day we first looked at CC, we knew a battery upgrade would be high on our “must upgrade ASAP” list.
Battle Born kept coming up left and right. Not just for having the best products. In particular, we liked what we were hearing and reading about their stellar reputation for customer service. Both before and after a sale.
When we spoke to the team at Battle Born about upgrading our system, they were very educational and helpful. They defined the specific components we would need to meet our needs. Not only in terms of batteries, but also the inverter and solar charge controller. We discussed the size of the system, how we wanted to use it. And how best to make it all work together, seamlessly and low maintenance.
Battle Born batteries is based in the USA – in Reno, Nevada. So we liked that a lot. We also learned about their quality control and battery management systems. We got the chance to meet with their founders and were also very impressed with their greater vision. Not only for the company, but for the entire energy industry, and the environment. So when Battle Born invited us to partner with them on our power upgrade, we accepted their offer to provide the major components, at no cost to us. We were NOT financially compensated to produce this post or video.
Battle Born’s mission is to bring down the cost of lithium batteries to a level that will make them more affordable – and therefore more accessible – for more people. Lower costs will increase wide-spread use as more people transition to lithium power. This reduces the use of fossil fuels, keeps more old batteries out of landfill and is better for the environment. Not just for RVing, but for society and the planet. Any company that has a bigger vision for its customers and the world at large – instead of just pure corporate profit – is one we are interested in knowing more about. And supporting. We’re proud to be part of the Battle Born family. That is how they refer to and treat all of their customers. And we look forward to really enjoying all the freedoms our new system provides us for more off-grid living and travel
Main Components of Our System
All of the items below can be ordered directly from the Battle Born Website.
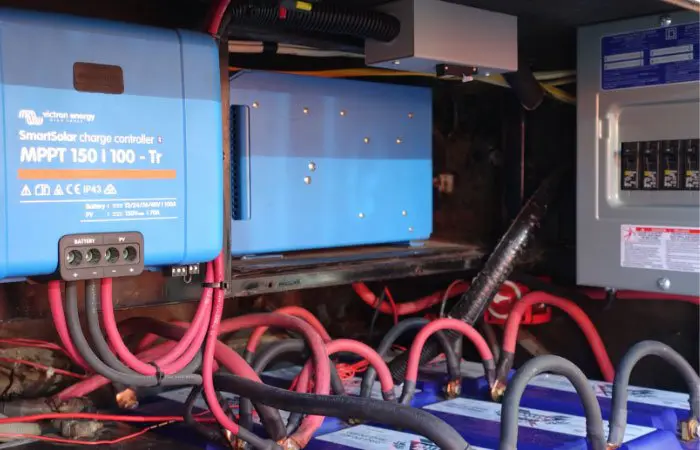
- Victron Multiplus 3000W 12V Inverter Charger
- Battle Born 100AH 12V lithium batteries x 6
- Victron Smart Solar Charge Controller MPPT 150/100
- Precision Circuits LiFePO4 Battery Isolation Manager
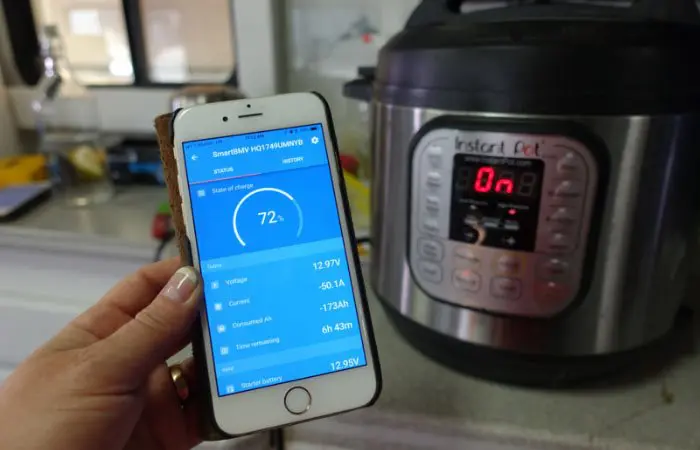
- Victron Battery Monitor with Built in Bluetooth BMV712
- Victron Color Control GX
- Precision Circuits Battery Guard
Click here to visit our Amazon store for many of the other components used in our install
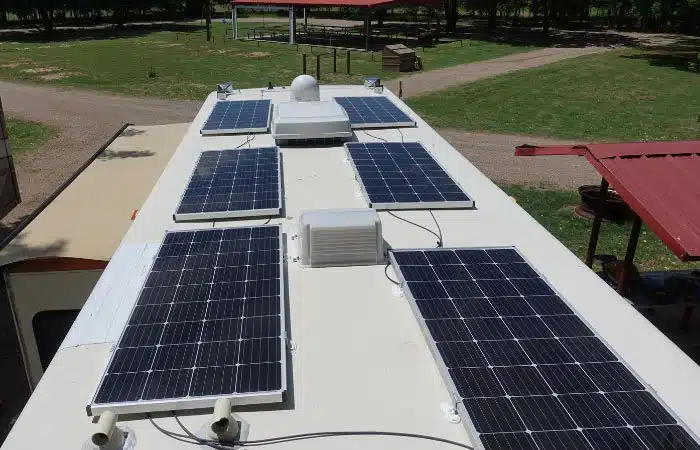
We also added Zamp Solar Panels (6 x 170 Watt panels for a total of 1020 watts) and will be covering that setup in more detail soon, in a separate post.
Stay tuned for more information about the rest of our power system. And keep watching the rest of our RV Makeover Series!
Discount Coupon Code: RVLOVE
Battle Born Batteries offers RVLOVE readers discounts when using coupon code RVLOVE at checkout. The coupon offers $50 off per battery. And also 25% off of merchandise like clothing. Coupons cannot be used in addition to sale pricing or other coupons.
Sign up for our email newsletter with the latest RV park reviews, news and updates.
GOT COMMENTS OR QUESTIONS?
We would love to hear from you. Drop us a note in the comments section below.
More Ultimate RV Makeover Content
Want to check out more on our Ultimate RV Makeover Series? Hover over each image to see the title and episode name.

12 Lessons Learned from Our RV Renovation

Getting Our RV Ready To Travel After our RV Makeover

What Did It Cost? and RV Renovation Questions

Episode 8 The Final Reveal | Ultimate RV Makeover

Episode 7: Finishing Touches | Ultimate RV Makeover

Episode 6: We’re Nearly There! Ultimate RV Makeover
Episode 5: Powering Our Off-Grid RV Renovation | Ultimate RV Makeover

Episode 4: Re-Building Our RV | Ultimate RV Makeover

Episode 3: Tearing Our RV Apart! | Ultimate RV Makeover

Episode 2: What Are We Going To Do? Ultimate RV Makeover

Episode 1: Let’s Do This! Ultimate RV Makeover Series

24 thoughts on “Episode 5: Powering Our Off-Grid RV Renovation | Ultimate RV Makeover”
Any idea what the total cost would be?
The BattleBornBatteries website would have updated pricing on all the components. You might not need a system nearly as robust as the one we installed, and you might already have some components that would not need to be replaced/upgraded like us. And… installation cost will vary dramatically depending on who is doing the install. But, ballpark estimate on a system like this would be around $15,000
Hallo,
just found your site on “nytimes”, we are traveleing Europe with our 4×4 RV since 2 years now and are fully off grid using lithium batteries. Best solution, no question.
see: https://cochecito-on-tour.blogspot.com/2020/04/changing-supply-battery-pack.html
or see: http://www.we-travel.at
Regards, EDDY&CORDY
You have introduced lithium batteries to us and we think they are the answer for us in running my husband’s oxygen concentrator while boondocking. It’s a big power drain on our batteries. We’ve talked to Battle Born and know exactly what we need. Battle Born has even recommended some people/companies that could install the lithium batteries, converter, isolation manager and monitor. EVERY person/company that they have recommended has said they DON’T install lithium batteries! They don’t work with lithium batteries and it sounds like the isolation manager is a problem for them. So, my question is: How did you find people to install your setup? What kind of people were they (ie – mechanics, electricians, etc)?
Hi there, it does sound like lithium will be a good solution for your batteries to reduce that anxiety. Fortunately, we installed our batteries with a team of experienced RVer friends. Have you tried Justin from Opting out of Normal? Also Gary from PauHana Travels? They were both leads on our install team. Sorry you are having so much trouble finding someone to install! Hope that suggestion helps.
This is an awesome story! I came across it on Pinterest and I just had to read.
you two are unbelievable!! constantly amazing me. Now I know what to do!! haha
Haha yes we went all out with CC – why not, right!?
Great article. How do you charge your AGM battery while parked? The charging profile is very different for it and the lithium battery.
Hi Don, great question. Our solar charge controller has the ability to do both AGMs and lithium separately, it’s set up to handle the different profiles.
So the charge controller has two outputs? Or is there a switch somewhere to select house or chassis batteries?
Hi Don, We believe it has two outputs.
Yours is one of the best Lithium overviews I’ve seen! Congrats on an awesome install. Upon discovering BattleBorn 100 Ah Lithiums for $850 each at the Q Big Tent this year I was sorely tempted, even though I’d just finished an old school upgrade the prior year:
.
https://www.wanderlodgeownersgroup.com/forums/showthread.php?t=25074
.
When planning my extensive all-electric coach conversion 5 years ago, lithiums were part of my initial plan due to familiarity with them from an electric scooter conversion years earlier. However, at that time AGM’s were deemed a better option for several reasons: 1) Up front cost, 2) Concerns about operation in very high heat conditions and 3) Fire/safety concerns. Their weight disadvantage compared to Li’s was offset somewhat by elimination of our big LP tank, and their slower 3-stage charge rate compared to Li’s “all in” ability was offset by a larger city panel solar array. Field use of thIs AGM/Solar solution over past couple years doesn’t yield uber cool techie points, but it verifies this solution completely meets all 8 of the “We wanted to” reasons in your overview article. Like you, we can stay indefinitely in off-grid locations without running the geny subject only to tank capacities, and will be doing exactly that from Memorial Day through Labor Day this year. Lithium technology improvement and price reductions over the past few years would likely change my choice if made now. However, your followers should know that Lithiums are not the only solution. Old school still works! That said, I wonder if BattleBorn would offer me a trade on some big L-16 AGM’s? ?
.
PS as part of your upgrade and as often as you stay off-grid, you should consider what I call my QuickHot mod, post #40 here: https://www.wanderlodgeownersgroup.com/forums/showthread.php?t=27175&page=4
(Comment originally posted on YouTube)
Yes agreed, lithium certainly isn’t the only choice/option, but with the advancements and price reductions over the past few years, it’s a great choice now… and even better in the future we expect. But you can certainly find other ways to power your rig while staying off grid. Glad you see you out there doing it!
Awesome job and thanks for sharing.
Thanks Larry!
Mark,
I’m a tech geek. Even so, you’ve given me quite a bit to think about and enough info to get started researching lithium batteries as a possibility for our RV. (We try to use lithium whenever possible for personal use.) I’m looking forward to your video on the solar charging part of the power system.
I appreciate your transparency with respect to sponsorship vs. items you paid for yourselves. It’s good see the level of integrity in your disclosures and, in my opinion, makes the information provided that much more trustworthy. Thanks! VJK
Thanks Valorie. Once we complete the RV Makeover series, we’ll continue to share more about our system and how it’s working for us!
HI guys. Great set-up you built there! I have a question, though, about sealing off your battery compartment. Since you still have an 8d AGM starting battery, how did you seal the compartment enough to keep dust out, but still allow for some out-gassing of the chassis AGM battery?
Thanks!
Hi Steve – great question! First up, it’s a pretty big battery bay but not entirely airtight. It’s dramatically more sealed up than before. The battery door isn’t an airtight seal – but the bottom of the way is sealed up way better than the big opening it was before. We did drill some holes from the rear bedroom down to the battery bay to channel some heating vents from inside to help with temperature maintenance. So that will create some airflow too. We feel it’s sufficient. Cheers!
Does this system charge from the engine while driving or is it strictly solar or shore/gen system.
Solar/Shore Gen
Are there companies around that would do a conversion like this for a fee? If so, is there a listing somewhere?
Sorry can you please be more specific in your question, what you are asking?