This post may contain affiliate links.
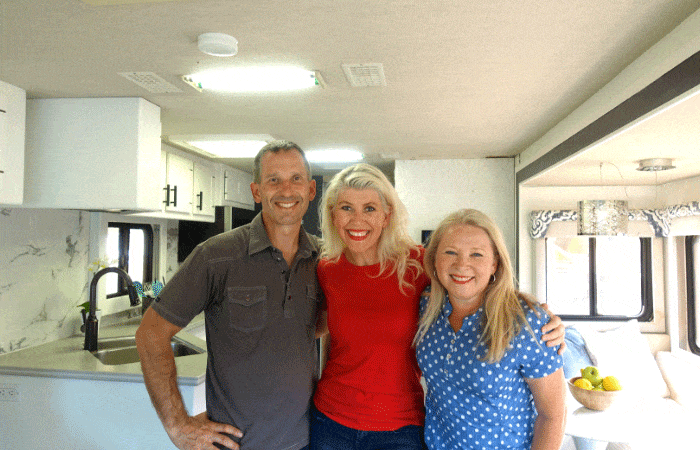
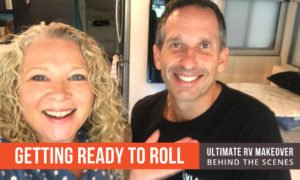
In Episode 6 we walked you through the main living area with progress updates on our mostly complete renovation. There was still quite a bit of work to be done, but you could see it was nearly there. In this episode, we walk you through the back section of the RV. The bathroom and bedroom, to share a progress update, and also share some of the finishing touches being made – to lighting, flooring and plumbing – before our final reveal next week. Watch the video for a visual walk through and read on for more details.
As mentioned in Episode 6, the RV renovation is about 85% complete at this stage. It all looks relatively finished at first glance. But there is a lot of detail work and finishing touches yet to be done. This post will share some of those last projects before final design touches. We will also share a walk through of the design plans for back section of the RV including the bathroom and bedroom.

Last few projects and finishing touches
Even though everything looked close, there were still quite a few projects that needed to be completed. We’ll break them out and list them below for you.
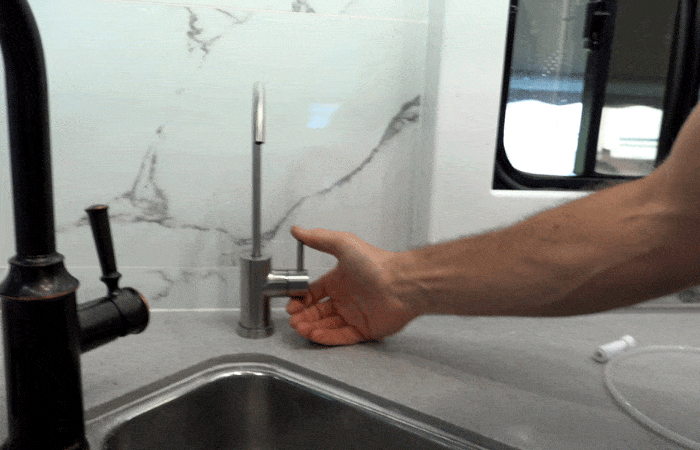
Adding water purification for our drinking water
Traveling all around the country, we are exposed to lots of different water sources. Marc drinks almost exclusively water, and we don’t like buying bottled water for everyday use. Though we are diligent about regularly sanitizing our fresh water tanks, we wanted to install a drinking water purification system to make sure we always have great water.
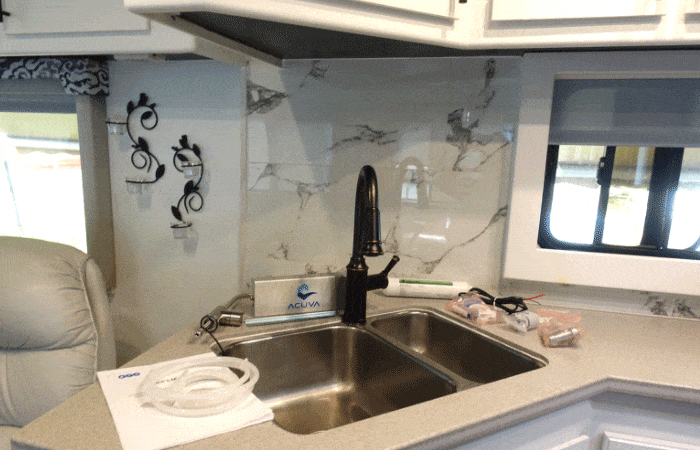
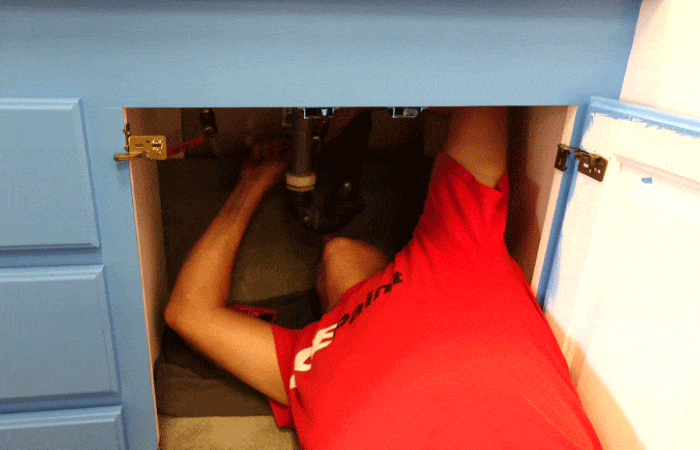
We ordered an ultraviolet light water purification system from ACUVA https://acuvatech.com/ The small additional water faucet mounts to the countertop near our sink and blends in beautifully with the rest of the design. When in use a blue light at the base confirms that it is working properly.
Under the counter, there is an additional water filter, a flow restrictor, and the UV purification unit. It is relatively easy to install, and now we have super safe water available at the tap at any time.
Installing new faucets
Kitchen faucet
Once we had the Acuva installed, we also installed a new residential kitchen faucet and soap dispenser. We chose a Moen with sprayer in bronze to tie in with some of the other darker accents in the kitchen.
We needed to drill more holes into the countertop, but we love how it looks. Residential faucets are so much nicer than most faucets installed in RVs. When you do all your dishes by hand, it is important to have a kitchen faucet and sink that you really like.
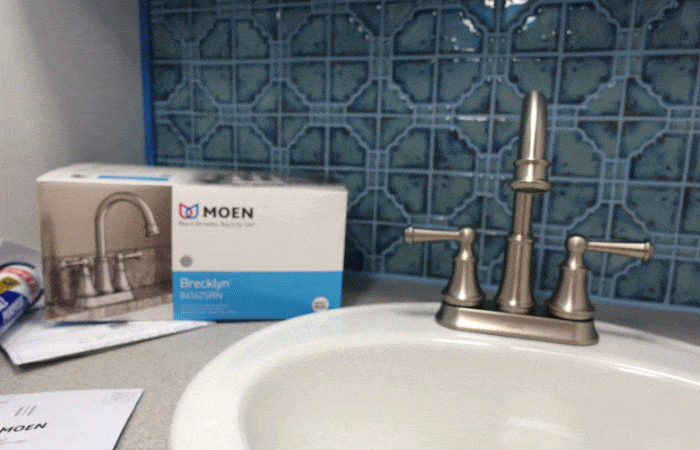
Bathroom faucet
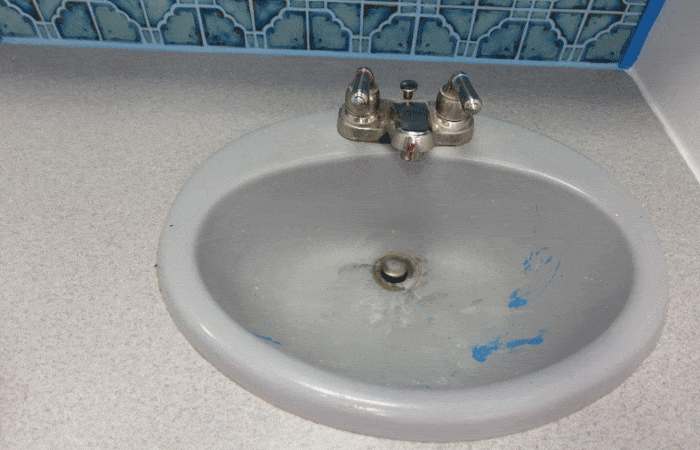
In the bathroom we installed a new faucet and a new sink as well. The original gray sink basin was a little scratched up and felt more dingy. We freshened it up with a new white sink, and a much taller residential stainless steel faucet from Moen. These finishing touches provided a more upscale and elegant look
New Ceiling Lighting
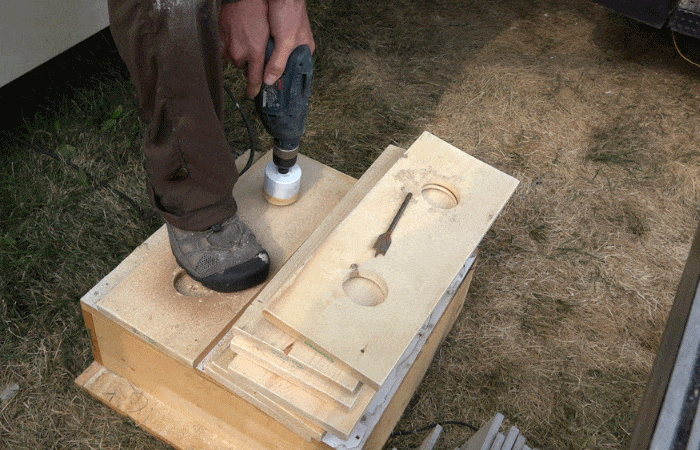
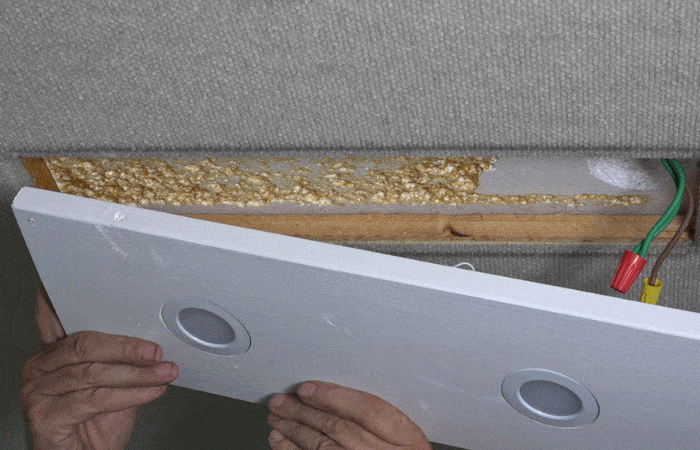
One of the largest projects at this stage, in effort and in visual impact, was installing new ceiling lights throughout the RV. The original ceiling lights were fluorescent fixtures. Most of them still had the covers, but they didn’t stay on well. The lights without the covers looked terrible.
We thought up a creative, simple, and inexpensive solution to replace the nine ceiling fixtures. Cutting 1” x 8” boards to the length to cover the opening, then sanding down the edges and painting them to match the cabinets. We drilled out circular holes in them to mount LED puck lights we bought from our friends lighting studio Splashlight. This is also where we got our dining room chandelier from, and the LED strip lighting with dimmer switches for under the cabinets.
The ceiling lights were easy to wire being 12 volt. We just needed to turn off the light at the switch, connect the positive and negative wires with wire nuts and screw the new boards to the ceiling. The hole left from the original fixtures allowed extra room for the wires and air flow. One of the best things about replacing the fluorescent lights was being able to change the color temperature. The original lights were a very harsh and intense light. The LEDs are a warmer, softer temperature. Finishing touches like this are a big part of what makes it feel so much more homey.
We also installed LED strip lights under the cabinets on dimmer switches for accent lighting. The dimmer switch is mounted discreetly under the cabinet as well, and you just touch the switch to turn them on, off, or change the intensity.
Changing all the lights from fluorescent lights to LED also makes the RV much more power efficient. The old fixtures used 30 watts each (90 watts for the main kitchen light). The new LEDs use a fraction of the power and create a much more beautiful and enjoyable atmosphere.
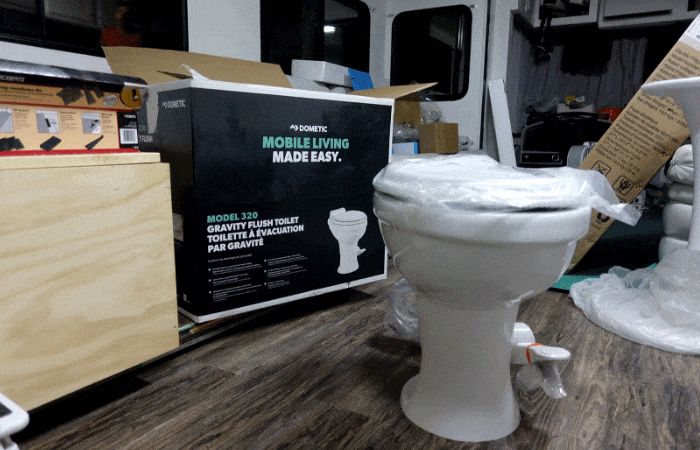
Installing a New Toilet
Having compared a lot of RV toilets in our travels, and even shared in this blog post, we knew we wanted a new one. The toilet we chose was a Dometic 320. Changing this out was a big job that once started, we would need to keep going until finished. This project involved removing the old one, breaking out the remaining tile flooring, prepping and installing the new floor, then the new toilet. The job took the majority of the day, and was not finished until after midnight.
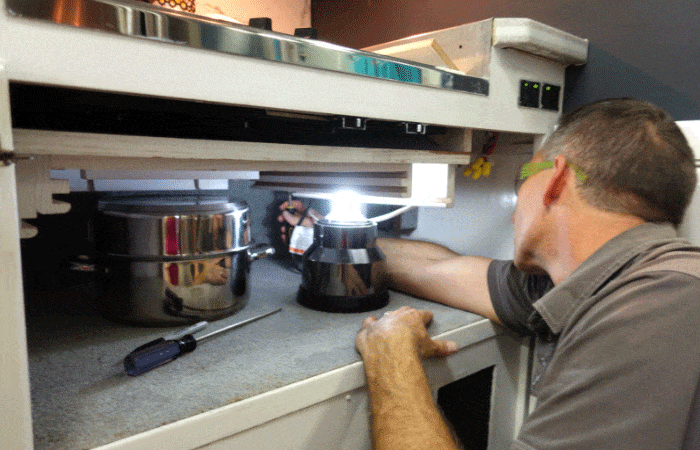
Adding Additional Electrical Outlets
After living with the RV for a few months before the renovation, one of the drawbacks of the kitchen was the location of the only outlet. We decided to add a strip of outlets against the wall on the edge of the counter top. This added extra outlets, and put them in a more discreet and desirable location.
This was a tricky job because we chose to run power from an existing outlet under the stovetop. The access was a little challenging, but the end result is fantastic. We painted the power strip to match the wall it is against. Finishing touches like that help it virtually disappear.
Baseboard Trim for the Flooring
The flooring was all installed, but being a floating floor, it had gaps at the edges. We bought simple quarter round trim and painted it black. It blends in beautifully, and was a fraction of the cost of using the expensive trim that matches the floor from the manufacturer.
We didn’t have a power mitre saw, so we made most of the cuts with a handsaw and mitre box. Very excited about having the Ryobi nail gun. Trying to install small baseboard trim pieces with a regular hammer and nails is not fun, and very time consuming.
Bathroom Design Finishing Touches
We have what is called a split bath in our RV. This basically separates out the bathroom into three separate components, that can be used independently. If you want the whole area, or a portion of it to yourself for privacy, you can close the pocket doors for that area. We love that as a couple, we can both be using areas of the bathroom at the same time.
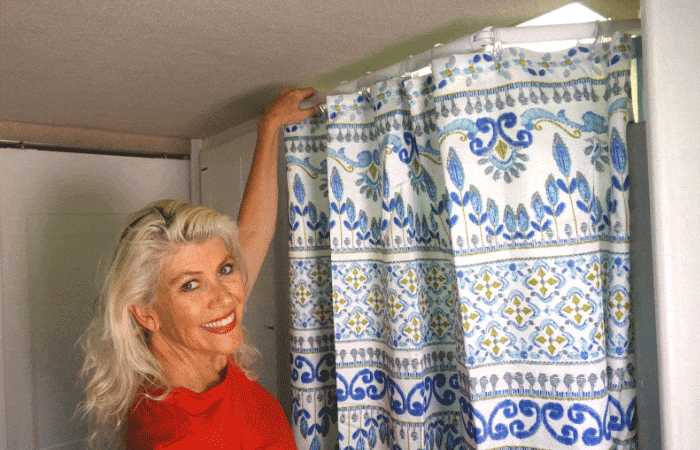
We removed the glass and brass shower door and replaced it with a colorful shower curtain. The curtain ties in with the rest of the design of the RV, and also provides better privacy. A secondary benefit is that it hides our laundry basket when the shower is not in use. We also mounted the shower curtain on an adjustable rod that folds into the shower area or out into the hallway a bit. This provides a very roomy space while in the shower. Folding the rod into the shower when not in use also creates a great place to hang wet swimsuits or towels to dry.
Vanity and Loo
The vanity area received a very bold pop of color. We removed the beveled mirror backsplash, and the mirrors above the sink. The mirrors above the sink were too high for Julie to use, so she mostly used the mirrored doors of the pantry anyway. The bold color adds a lot of personality to the RV and blends beautifully with the new tile backsplash. We even added blue grout in the tile for a very congruent and finished look
Our loo with a view also received a bold visual statement. We mentioned the new toilet above. But the main wall in the loo is one of the largest unobstructed wall spaces in the whole RV. This blank canvas had many different design options suggested. We decided on a dramatic mural. The mural is a simple peel and stick wallpaper that only cost $30. So if we ever get tired of it, we can easily remove it and replace it with something else. The image pulls in all of the other colors of the renovation and is a very fun visual.
Bedroom Concept Finishing Touches
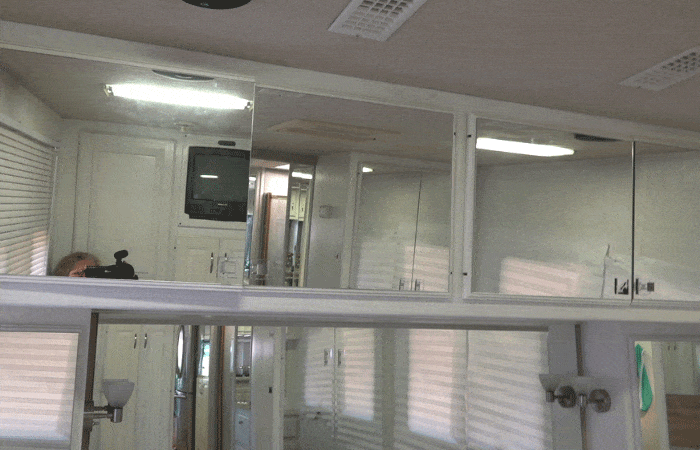
The bedroom is already showing a huge change from where it started. Nine large mirrors dominated the space originally. Virtually the entire rear wall of the room was mirrors, even down to mirrored pulls on the cabinets.
Most all of the mirrors were removed, and the cabinet doors were flipped around to create a much more modern, simple and contemporary look. The large mirror at the head of the bed was replaced with a soft, padded headboard. This drastically increased the soft and welcoming feel of the room.
Bedroom Window Coverings
Possibly the ugliest things in our bedroom were the blinds covering the windows. One had even broken and was replaced with a temporary paper cover. Not only were they ugly and banged against the walls. They also made it difficult to appreciate how nice the large windows are in the bedroom. Large windows in the bedroom are very rare in RVs, so we wanted to showcase them. We will be replacing the blinds with drapes, but will hold off showing the finishing touches until the final reveal.
Many more details and finishing touches to be shared in final reveal because this is actually the only room that Julie and I were not part of the final process. As a designer, Jane is not used to having homeowners so involved in the process. She likes having the opportunity to have a final reveal, and bedrooms are her specialty. The bedroom is the only room that can be closed off from the rest of the RV, so it was the perfect room for a special reveal. We look forward to sharing that with you in episode 8 of the Ultimate Makeover series.
Next Episode is the Final Reveal
Next episode we’ll be sharing the reveal of the finished renovation. We will continue to share additional makeover related content for a few weeks after next weeks reveal.
Here’s how to connect with us so you don’t miss a thing.
Sign up to our email list for updates
Thanks so much for watching and reading! We’d love to hear from you!
Sign up for our email newsletter with the latest RV park reviews, news and updates.
GOT COMMENTS OR QUESTIONS?
We would love to hear from you. Drop us a note in the comments section below.
More Ultimate RV Makeover Content
Want to check out more on our Ultimate RV Makeover Series? Hover over each image to see the title and episode name.
12 Lessons Learned from Our RV Renovation
Getting Our RV Ready To Travel After our RV Makeover

What Did It Cost? and RV Renovation Questions
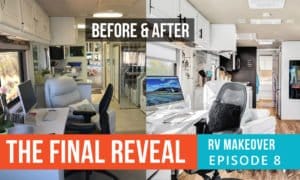
Episode 8 The Final Reveal | Ultimate RV Makeover
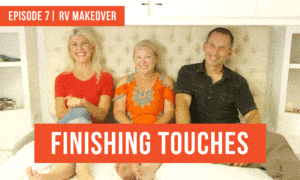
Episode 7: Finishing Touches | Ultimate RV Makeover

Episode 6: We’re Nearly There! Ultimate RV Makeover
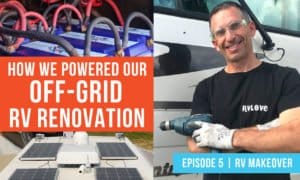
Episode 5: Powering Our Off-Grid RV Renovation | Ultimate RV Makeover
Episode 4: Re-Building Our RV | Ultimate RV Makeover
Episode 3: Tearing Our RV Apart! | Ultimate RV Makeover
Episode 2: What Are We Going To Do? Ultimate RV Makeover

Episode 1: Let’s Do This! Ultimate RV Makeover Series

3 thoughts on “Episode 7: Finishing Touches | Ultimate RV Makeover”
Hi. I was looking for specifics on the LED puck lights you used in your renovation. Sounds like a great idea but there were no details on model number or lumins. The splash light store doesn’t have a category for 12 volt.
Thanks and we really enjoyed the series. At first I didn’t like the week long wait, but in the end I learned to be patient and enjoy as it came. Jim.
Hi Jim, yes we ordered those LED pucks lights from our friends at Splashlight – I have put in a call to them to get the details and we have been playing phone tag. Stand by and will find for you asap. I believe they were 2700 kelvin. Glad you came to enjoy the series…. it’s about 40-60 hours to produce each episode… hence I need a week in between just to put them together! The editing job ended up being as big as the actual renovation, but not as physical 🙂 Hope you enjoy the final reveal tonight!