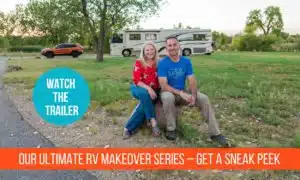
This post may contain affiliate links.
Following up from our first episode of our RV Makeover Series where we introduced you to the team, and set the foundation. In Episode 2 we will be diving into our first walk through with our expert interior designer friend, Jane Brown. During the walk through we share many ideas and tips for you to consider or try out in your RV or home too! Watch the video for a visual walkthrough, and read on for more information, photos and our action plan!
Jane Meets CC. First Walk Through, Ideas and Tips
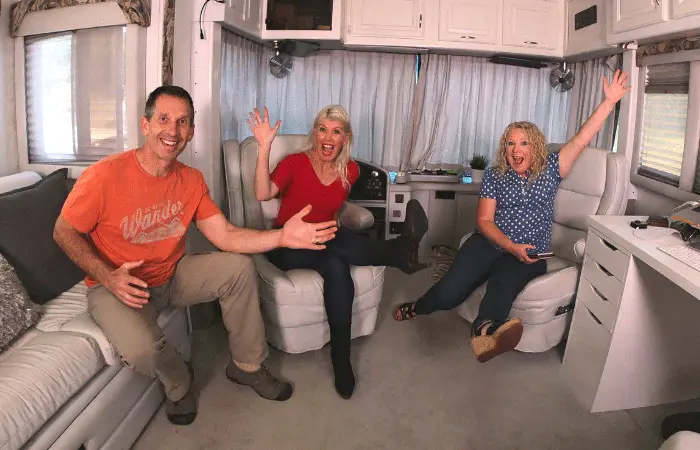
It may be our RV, and Marc may be the man behind CC’s wheel, but when it comes to our RV makeover, Jane is in the driver’s seat! Shortly after getting off a 20 hour plane ride from Sydney, Australia, it was time for Jane to visit CC.
When Jane first stepped inside, she was hit by how different it is to see the motorhome in person compared to the photos Julie had shared with her in the months leading up to the renovation. Jane asked for a bit of time on her own to walk through CC, so we stepped out and gave her time to soak it all in and get a feel for the changes we would like to make.
We were excited to hear Jane’s thoughts and ideas, as she had been an integral part of designing three of Julie’s previous homes, plus the last home Julie and I owned in Colorado, before hitting the road. Interestingly, each home was quite different. So we were confident that our RV renovation would be unique to us, too.
Let's Talk About It
Once Jane had an opportunity to walk through the RV on her own, we came back in and sat down at the booth dinette with a cup of tea to talk through and firm up our plans for the RV renovation. We were all on the same page for most of Jane’s ideas. But there were definitely a few unexpected suggestions that required a bit more thought and convincing.
In the end, we decided to be brave and bold. After all, that is why Jane is here. To share her expert advice, and she had always created beautiful environments for Julie/us before. Somehow it felt different, being an RV. But It was up to us to let go and trust.
We divided the RV up into “zones” and honed in on the key changes we wanted to make to each of them.
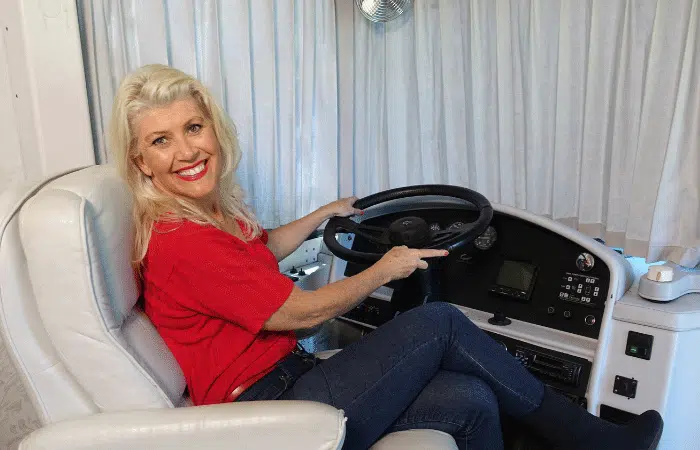
Front Cockpit / Driving Area
When we bought CC, there was a huge TV mounted on a swinging arm directly above the driver’s seat. It would swing around precariously while driving. Aside from the fact we don’t watch TV (we only occasionally stream on our laptops) it was clearly a safety hazard, so we removed it right away. In this area, we decided to create a workspace in the driver seat area, popping a desk top on the steering wheel, to make the most of the space when we are not driving.
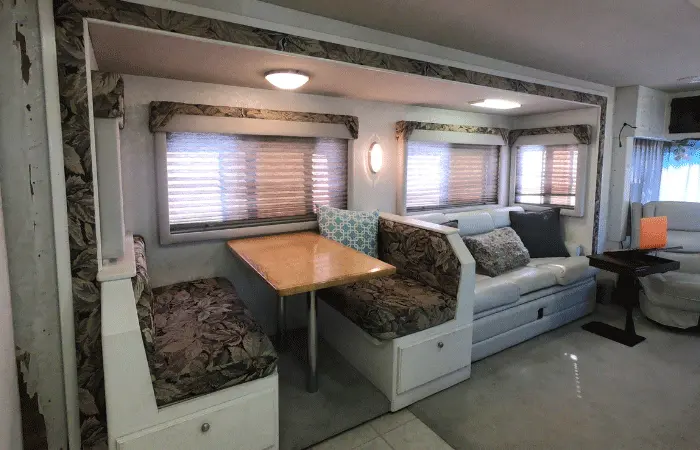
Dining Area
After living with the original booth dinette for a few months, Julie and I were clear we wanted to significantly change it. It’s chunky, dated, unattractive and just doesn’t work for our needs.
The plan is to completely remove the original dinette and build a new L-Shaped dining area with separate table. We don’t need big seating or sleeping capacity in the dining room, as it is usually just Julie and I. As the old RV saying goes – drinks for six, dinner for four, and sleeping for two.
There is also a large wall on the side of the fridge that feels part of the dining and living area. This is one of the largest wall spaces in the RV, so we want to make the most of this wall. The makeover of this cabinet and wall will be a significant feature of the RV after the renovation. We will also be making an update to the original window boxes and installing new window shades.
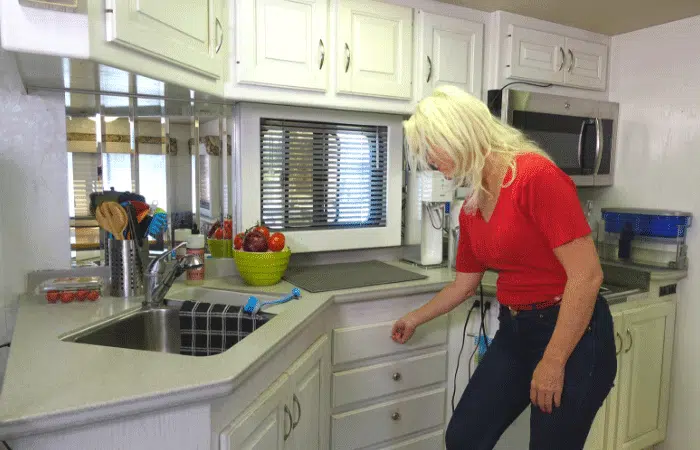
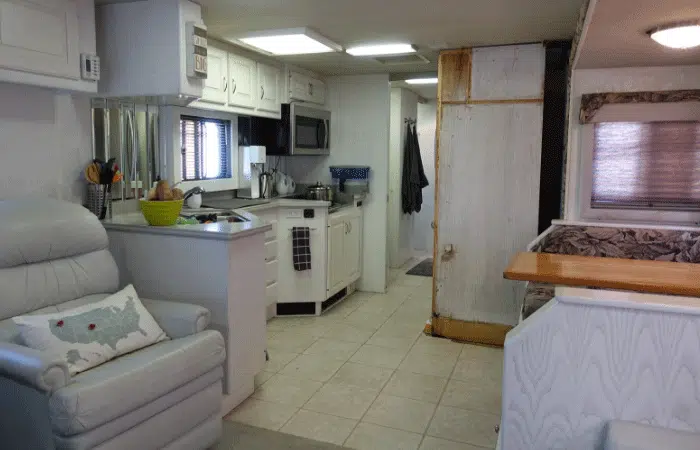
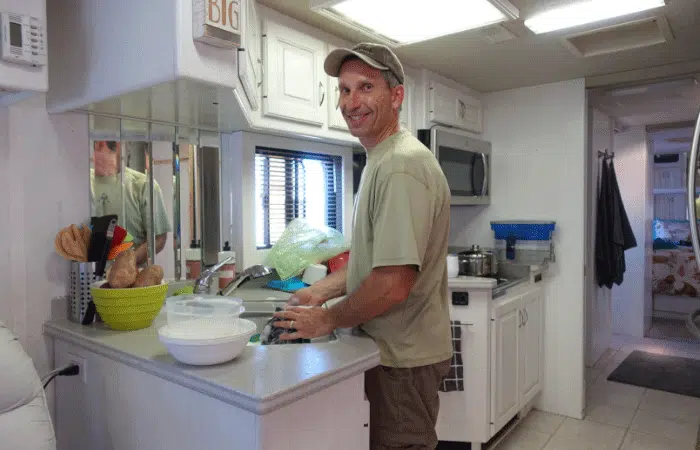
Kitchen
The kitchen in CC is large by RV standards and has a great neutral light grey Corian countertop “in great nick” (condition) as Jane would call it. The consensus was that we would easily update the kitchen (as with the rest of the coach) with fresh paint, new hardware, and new faucet. It was a unanimous decision to remove the beveled mirrored backsplash and replace it with new tile. CC has plenty of weight capacity which meant we had the luxury of using real tile, instead of wallpaper or peel and stick tiles.

Before the core of our official RV Makeover started, we replaced the original RV fridge, with a residential fridge. That was a really big job. It involved a lot of pre-planning and carefully choosing a fridge that would fit. We made this switch while in Texas, a few months prior. The job also required the best part of a day and some heavy lifting by a crew of guys, all RVing friends. It was a tight fit, but we managed to take the old fridge out of the driver side window, and bring in the new fridge the same way.
As you might imagine, the old fridge and new fridge were different sizes and shapes. This also means all of the cabinetry around the fridge will need to be rebuilt as part of the renovation. Before removing the original fridge cabinet, we removed the floor to ceiling bevel mirrors.
We then put a temporary wall in place to keep the fridge secured while driving the coach. That’s why the wall you see in the photos and video is so ugly. It was the back of the original cabinet and was purely functional, not for looks. It worked, safely keeping the fridge in place while driving the RV from Texas to Oregon.
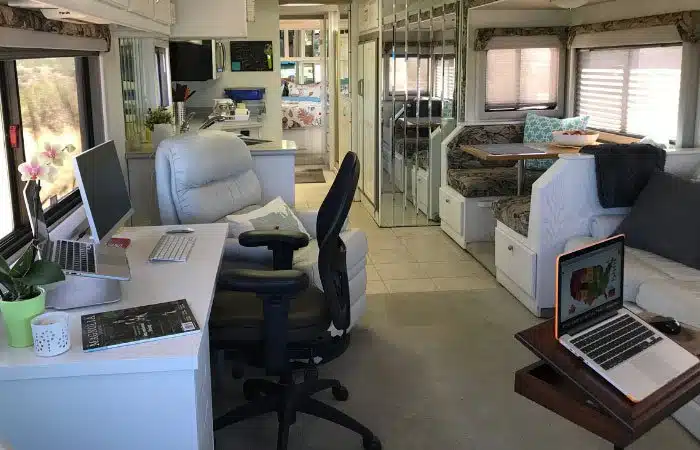
Main Living Room Area
Our primary workspace was under the window on the passenger side wall. We all agreed it worked very well there because it isn’t the primary thing you see when walking into the RV. This space also offers a great view out of the window while working.
We also agreed that even though the original sofa and recliner were dated, they are neutral and still in excellent shape. The couch and chair work great in the space and we could easily freshen them up look by adding some cushions and throws.
One of the largest visual impacts of the RV Makeover will be when we rip up all the carpet and tile and replace it with dramatically different flooring. The new flooring will flow through the entire RV.
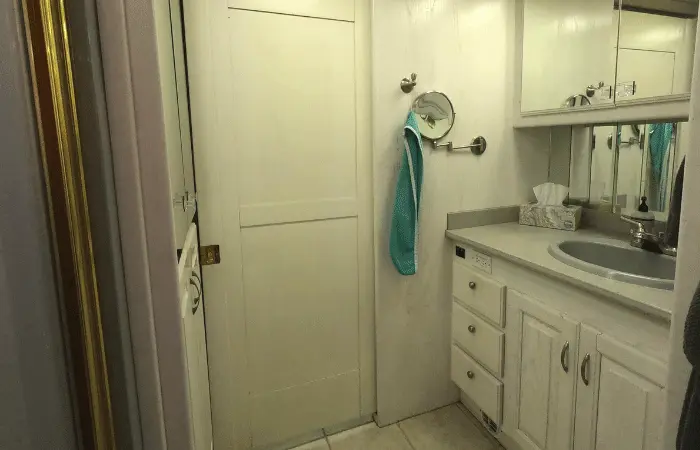
Bathroom
Our coach has what is called a split-bath. This floor plan layout allows for three separate areas in the bathroom. The vanity, the shower, and the toilet area. We planned to replace the mirrored backsplash, sink, and faucet in the bathroom. Maybe even add a bright, bold color to the area.
The brass-trimmed glass door for the shower was a unanimous vote to remove. None of us liked the brass, and we also like to keep our dirty laundry hamper in the shower. By replacing the door with a shower curtain we solve both challenges very easily. It also solved Julie’s concerns about seeing a streaky or dirty glass shower door.
The wall in the separate toilet area is one of the largest wall spaces in the RV. So there are big opportunities to do something creative with that space. Jane has some ideas brewing for that.
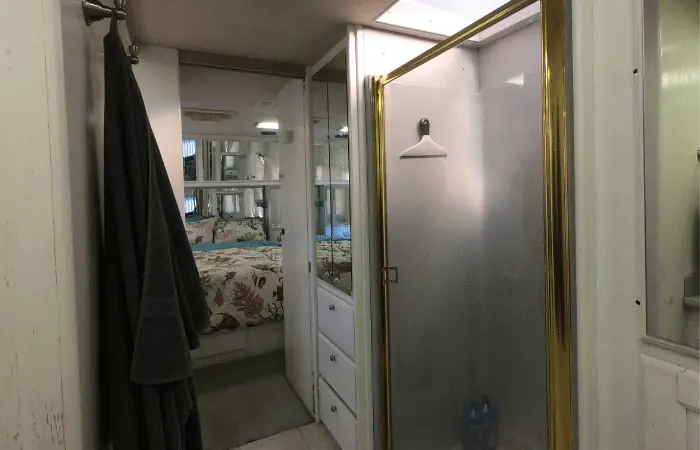
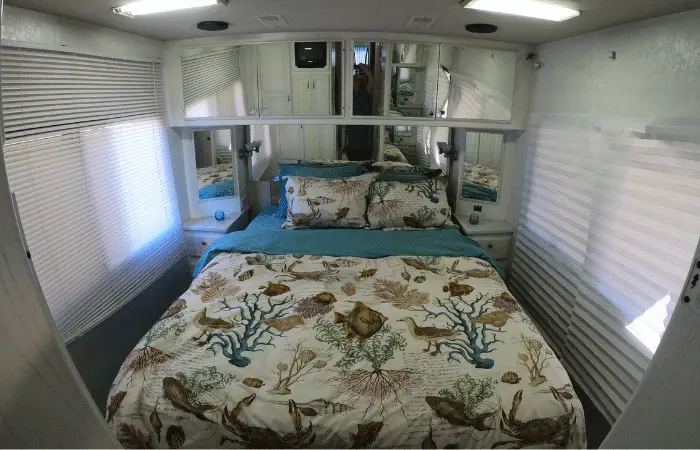
Bedroom
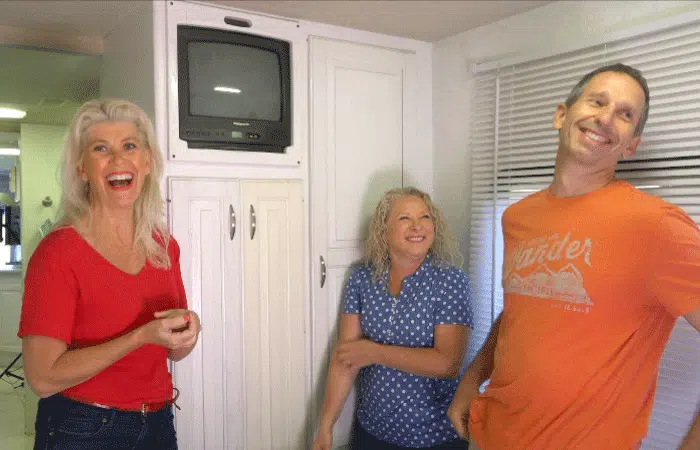
The bedroom has huge windows that we all love, but we all could not wait to remove the terrible window blinds. Walking into the room was overwhelming because it had so many large mirrors. We counted nine mirrors in total, in the bedroom alone. They felt very chaotic and hard, not the soothing and relaxing environment we wanted.
We definitely needed a serious bedroom makeover. We’re RVLove after all! So most of the mirrors were going to find their way out of the RV. And as mentioned above, we are not TV watchers, so that antique portable TV will definitely be coming out too.
A Few Surprises That Stretched Us
As you might expect, we weren’t all on the same page about everything! There were a few areas where Jane made suggestions that we just weren’t quite so sure about. If you’ve ever done any kind of remodel or renovation, you’ll know it can be overwhelming. We needed time to process and digest, and some work-shopping by Jane, before eventually agreeing to them.
Probably the biggest surprise to us was Jane’s suggestion to try flipping the cabinet doors around and using the inside of the door as the new outside. The exterior doors were traditional raised panel, while the interior had more of a craftsman look, with straight lines and a more modern look.
This was a really bold suggestion that would take a lot of work to complete. It was also really risky because if we made a mistake or it didn’t work out, we may need to get new cabinet doors. Remember, we are doing this project on a very tight timeline and on a budget. So this was a bold suggestion, especially since the plan was to flip every cabinet in the RV!
The next biggest surprise was Jane’s suggestion to introduce dark (possibly even black) flooring and accent colors on our light and bright interior. We had originally anticipated keeping things more neutral with CC’s existing white/light grey palette, but decided to go for it with Jane’s bold paint choices, including bright colors in some areas to add personality.
We will be sharing much more detail and many design tips and tricks throughout the Ultimate RV Makeover series as we dive deeper into the individual episodes.
Challenges and Considerations of Renovating an RV
Renovating an RV involves a number of unique considerations not encountered when renovating a traditional home. The first one being slide-out rooms. When you have walls that move in and out of your RV to create extra space, it impacts the flooring, and of course any wall or surface near the area that moves. So you need to be mindful of all that.
RVs also generally tend to have a narrower door opening than most homes, which may impact your ability to bring large pieces in or out of the RV. An example of this is when we replaced our refrigerator. We had to remove the driver side window to make that happen. RVs are usually much smaller inside than most homes, with more restrictions on what you can place where, so your furniture choices are more limited.
In addition, RVs are generally poorly insulated when it comes to sound and temperature, so we wanted to find ways to help with that. And as RVers, we always need to maximize storage to keep things put away, organized and secured. So we had to keep storage space top of mind. That said, CC is pretty plentiful with the storage capacities, inside and out.

We’re On a Roll… Literally
Our home has wheels which means we regularly drive the road – highways, scenic byways, sometimes even dirt roads. That means everything needs to be secured for travel. You don’t want to have a lot of things that require lengthy setup or pack down as part of your design.
Weighing Up Our Options
Some RVs also have very limited weight carrying capacity, which is important to stay within to be safe. So you need to keep the weight down as much as possible when considering your design choices. It is a good idea to consider things like wallpaper or peel and stick tile instead of actual tile for a counter backsplash.
Weight matters. Not just in total weight, but in weight distribution. All that said, CC has really good cargo carrying capacity (CCC) and we had about 2,000 pounds to spare, so that wasn’t going to be an issue for us. This opened up our options, especially considering we’d be removing a lot of weight too, from the mirrors and glass shower door.
RVs are Depreciating Assets
Many people justify the often large expense of doing a home renovation because it can increase the property value long term. This is especially true of renovating/updating kitchens and bathrooms in traditional homes. However, RVs are different in that they almost always go down in value over time, not up. Just like most things with wheels.
So most RV modifications need to be approached with the goal of enhancing your living environment to make it more enjoyable to live in. Not necessarily with the objective of getting a bigger return on your investment. It’s possible of course, but it’s the exception rather than the rule.
Renovating on a Budget
Remember, we are doing this renovation on a budget. We got an amazing price on this RV when we bought it. It had pretty much hit the bottom of its depreciation curve. We only paid $25,000 knowing that we were going to be doing a renovation. (We’ve seen similar RVs of the same era sell recently for more than double what we paid.)
We did our homework and went into this purchase and project with eyes wide open. And keep in mind, we’ve been experienced full-time RVers since 2014, so mostly knew what to expect. But there’s always more to learn.
We knew that some of our system upgrades (like our lithium battery, inverter and solar upgrades) would be significant investments. But we didn’t want to over-invest in design elements. With this in mind, we did our best to use as much of what we had as possible. We wanted to keep or repurpose things, and mostly enhance what we already had.
We also did most of the work ourselves which offered significant savings compared to paying others to do it. It’s a good thing we had a pretty handy team of friends who lent a helping hand. If you haven’t already seen Episode 1, you can watch the video, read the back story and learn more about our team here. We are so grateful to them all for making this RV Makeover possible.
Our Game Plan - RV Makeover Action List
Here’s a quick snapshot of the main changes we plan to make during our RV makeover:
- New flooring
- Fresh coat of white paint throughout
- Add accent paint colors
- Build new fridge cabinet
- Build a new L-shaped dining area
- Remove and flip cabinets and hinges
- Create a second workspace
- Remove brass shower door
- Remove most mirrors
- Re-upholster window box tops
- Replace window shades
- Update backsplashes
- Update faucets, bathroom, and sink taps
- Create two feature walls
- Style with decor, cushions and more
What's Next?
We’ll keep you updated with the RV renovation, in our videos and blog posts. By the end of it, you’ll witness an incredible transformation! We hope you enjoy the series, and take away some inspiration, tips and ideas for your own RV or home makeover.
Sign up for our email newsletter with the latest RV park reviews, news and updates.
GOT COMMENTS OR QUESTIONS?
We’d love to hear your thoughts, questions and comments! Have you done an RV makeover (or any kind of remodel)? Are you considering doing an RV renovation? Are you picking up some good ideas and tips in the series? We’d love to know. Let us know in the comments below.
More Ultimate RV Makeover Content
Want to check out more on our Ultimate RV Makeover Series? Hover over each image to see the title and episode name.

12 Lessons Learned from Our RV Renovation

Getting Our RV Ready To Travel After our RV Makeover

What Did It Cost? and RV Renovation Questions
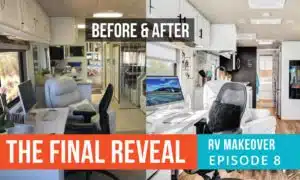
Episode 8 The Final Reveal | Ultimate RV Makeover

Episode 7: Finishing Touches | Ultimate RV Makeover
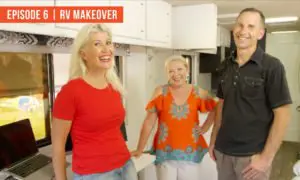
Episode 6: We’re Nearly There! Ultimate RV Makeover
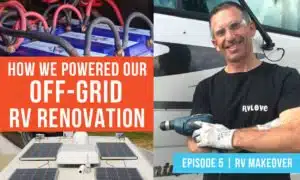
Episode 5: Powering Our Off-Grid RV Renovation | Ultimate RV Makeover
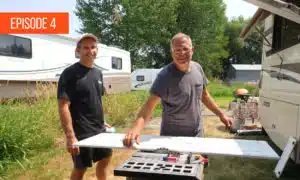
Episode 4: Re-Building Our RV | Ultimate RV Makeover
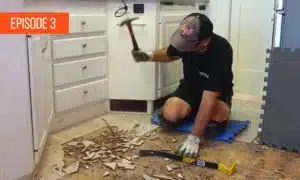
Episode 3: Tearing Our RV Apart! | Ultimate RV Makeover
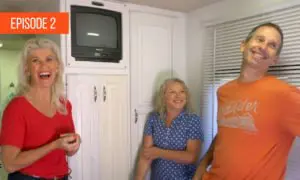
Episode 2: What Are We Going To Do? Ultimate RV Makeover

Episode 1: Let’s Do This! Ultimate RV Makeover Series
12 thoughts on “Episode 2: What Are We Going To Do? Ultimate RV Makeover”
It’s AMAZING! I can’t wait for the next video.
Awesome! Episode 3 is up!
I am so excited to see all the before and after. This is going to be an awesome adventure. I would think HGTV would love to get their hands on this after it’s done. Good luck and keep us posted. Please add bloopers!
Hi Audrey, so glad you are enjoying the series! Haha wouldn’t that be fun if HGTV wanted it But being on YouTube now, may not qualify. Anyway we have definitely been collecting bloopers for a dedicated blooper reel once all this is done. Cheers!
While I would agree that, generally, RV’s are depreciating assets, they really don’t have to be. Here are 3 examples:
1) Our first RV – a (small) fifth-wheel Scamp. After looking for a few months, we found her only 3 hours away for sale by someone who really didn’t know what he had. It seems Scamps have a cult-like following in the fiberglass world! Bottom line — after four seasons of use, we sold it for almost 50% more than we bought it for.
2) Your CC. I think it’s a pretty safe bet that after you figure your purchase price and what you put into her for upgrades, you will likely sell it for more than the $25,000 you bought it for. I’d be so bold as to say that you’ll likely also be able to sell it (whenever that day comes) for pretty close, if not more, than the combined purchase price and upgrade costs.
3) Our newest fifth wheel is a 2010 34 footer which was manufactured by a top quality company before they went out of business. It’s truly a well built rig in great shape and came in significantly under $20, 000. We were looking for months and it fell into our laps out of the blue only 30 miles from us. We will be taking off full time in it this September.
The common thread here is that with the requisite research and (most of all) patience, fantastic buys are out there to be found — for a myriad of reasons. As the RV industry continues to explode with more and more younger full-timers AND more and more boomers hitting the road, I think it will quickly become more likely that RV’s will not have to be depreciating assets.
Been following along with you guys for quite some time and I am particularly interested in your remodel. I already think I’ll be re-doing my cabinet doors by flipping them. Ours are probably exactly the same as yours. What a great idea!! Never would have thought of that. Kudos to Jane for that simple idea!
Hi Peter! Loved your comment and insights and totally agree! In fact, Marc’s brother bought a new Scamp and sold it less than a year later for basically what we he paid for it. And we agree – we bought CC so well, and with the upgrades we are making – we strongly believe we will get our money back from purchase price and what we have spent. Guess time will tell! Sounds like you got a great deal on your fifth wheel! The key is – as you say – doing your research! Also, with so many of the older RVs being better built, and the popularity of RVing, used RVs are actually holding their values pretty well right now… Glad you are enjoying the remodel series! Jane does have some pretty great ideas – we would never have thought to do that ourselves! Thanks for your comment and insights!
Good morning you three, my name is Rik, i remember when you had your last coach wieghed they did a per axel and total wieght inspection. Are going to do that with CC? Also Marc when you transitioned to a 40 ft has that limited any of your location choises, i currently have a 30 ft gasser and was thinking of going to a 38ft pusher, however after seeing you two in now a 40ft im just wondering about the “hassel” in finding a new location. Im really excited in following your facelift on CC having done home changes i never thought the same about RVs. Thank you an have fun
Hi Rik, Yes we actually did the weigh in on CC soon after buying it but that content hasn’t made it to our website/channel yet (we have a huge back log). In a nutshell, we have about 2,000 pounds to spare on CC and had to move some cargo around to lighten up the rear back left corner (engine, radiator water tanks etc). We have experienced no issues in going from a 36 to 40′ coach. Going up to 40 is pretty safe, going over 40 starts to become more limiting. But it all depends where you do your camping. Eg. National parks which can more more limited in terms of options for bugger sites/access. but it really hasn’t been an issue for us. Hope that helps! And hope you enjoy the RV Makeover series!