This post may contain affiliate links.
Have you ever worried about running out of power during your RV trips? If so, it may be time to upgrade to a lithium battery, with benefits including a longer lifespan, increased efficiency, and lighter weight. Switching to lithium can be a game changer for your RV life. And the best part? For most RVs, it’s an easy and affordable upgrade you can do yourself.
In this article, we’ll guide you through the steps to upgrade your RV lead acid battery to lithium so you can start enjoying the freedom of more reliable power on your travels. This can be a super simple upgrade that makes a huge difference in available power without breaking the bank.

Over the years, we have done lithium battery upgrades on three of our four RVs. While installing lithium batteries (and solar) in our Class A motorhome was a much bigger, more complex job that required assistance from others. Upgrading from lead acid to lithium batteries on our Class C motorhome and Casita camper were both straightforward DIY drop-in replacements.
Let’s start with an overview of the benefits of lithium batteries in RVs. Then, we’ll cover each battery upgrade, including power data, battery specs, gear used, the cost, and the time it took. We cover the Casita camper install first, then the Class C motorhome install.
RV Lithium Battery Upgrade Benefits
If you are not already familiar with RV lithium batteries and why RVers are swapping their original lead acid batteries for lithium, here is a quick list of why they are superior.
- Dramatically lighter weight than similarly sized lead acid batteries
- Significantly more available power from the same size
- Much longer battery life or charging cycles (better value over time)
- Able to use ALL of the power, not just 50% as in lead acid
- Not damaged by discharging too far, and built-in protections
- There is no poisonous off-gassing, so they don’t need to be ventilated
- Far better power availability in cold temperatures
- Can be stored in insulated and secure areas
- More resistant to heavy loads of power
- Much faster charging/recharging
With lithium having so many benefits over lead acid, it is easy to see why you might want to make the swap. Those who would not see as much benefit likely spend their RV trips hooked up to power in a campground. But some of the above benefits can benefit every RVer, regardless of how you use your RV.
Note: Coupon Code RVLOVE offers discounts with Battle Born Batteries. See details at the end of the post.
Our previous huge RV lithium battery upgrade
If you have been following us for a while, you probably know we did a massive lithium battery upgrade in our previous Class A full-time RV. This was a massive upgrade that completely transformed our RV into an amazing off-grid home on wheels. We could even do our Ultimate RV Makeover powered entirely by our solar and lithium batteries.
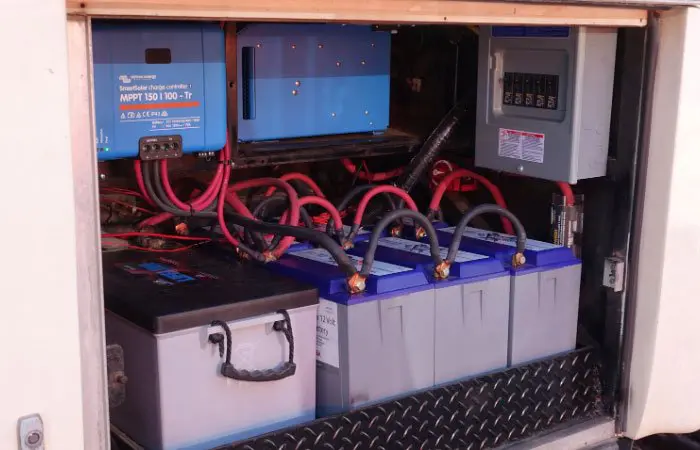
That system included adding 600 amp hours of Battle Born Batteries (6 x 100 ah batteries), plus 1020 watts of solar panels, a new inverter, a converter, a charge controller, and massive changes to the wiring and electrical system in the RV. That was a significant investment in time and money, resulting in a powerful and life-changing upgrade. If you want more information about that power system, you can check out our article and video in Episode 5 of our RV Makeover Series. There’s a great explanation in there.
That setup enabled us to boondock for extended periods in our full-time RV life. Several weeks at a time. And use all kinds of household appliances and tools in our daily life. But that’s a lot more power than you may really need.

What if you don’t need a big battery upgrade?
The simple fact is most people don’t need an extensive system like that. Most people want to reduce their battery anxiety while traveling in their RV. They are interested in upgrading to lithium batteries for some or all of the reasons and benefits we mentioned above.
Also, many may not feel confident making significant changes to their RV electrical systems. Nor do they want to need to spend too much money. They want a simple, affordable drop-in battery replacement to reap the benefits. So that is the focus of this article—simple drop-in replacement upgrades to lithium batteries in RVs and campers.
Two Simple Drop-in Replacement Upgrades To Lithium Batteries
OK, we shared some of the many benefits of upgrading RV batteries to lithium. Plus, a quick overview of our big previous power upgrade. Now, let’s dive into the details of the two simple and relatively inexpensive drop-in replacement battery upgrades we did on our two most recent RVs.
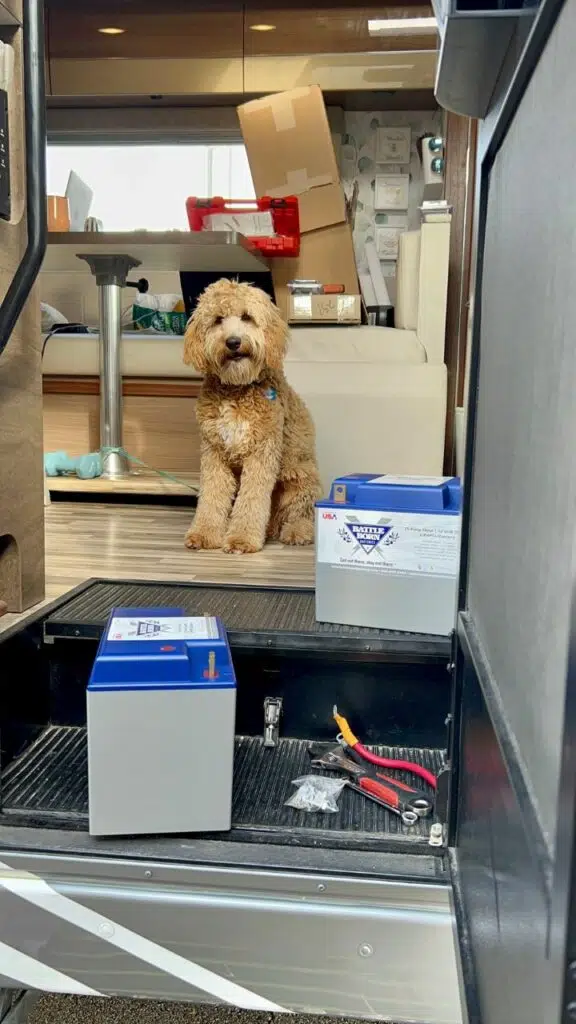
RV Lithium Battery Upgrade #1: Casita Camper
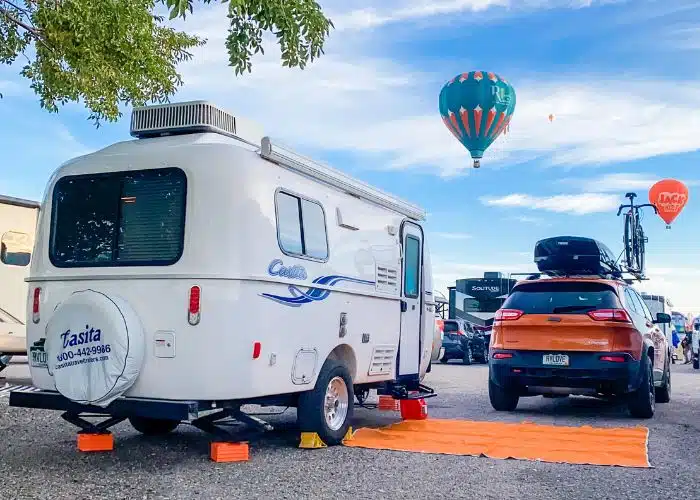
We bought our Casita camper trailer primarily to use for short getaways. Many of our trips with this camper were boondocking. But with just one small lead acid battery from the factory, we felt a lot of limitations and battery anxiety. This was amplified because we were used to the comforts of the much larger battery system in our Class A motorhome.
The original battery that came with the Casita was rated at 88 amp hours. When you factor in that only 50% of a lead acid battery’s rated power is available to use, that meant only 44 amp hours. When you consider water pumps use four amps per hour, furnaces use eight amps per hour, and all of the other draws, those 44 amps can go quickly.
We usually carried a small portable solar panel, which helped capture energy on sunny days. And sometimes, we brought a portable generator for more extended stays, like at the Albuquerque International Balloon Fiesta. But when out camping, we prefer to use batteries and solar when possible.
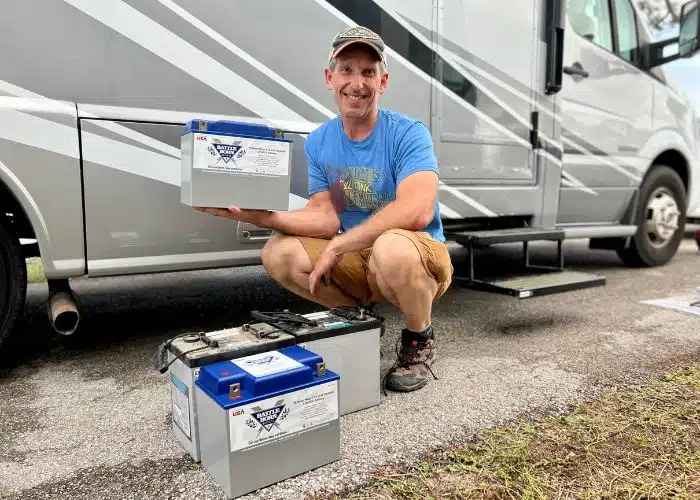
By upgrading the lead acid battery in our Casita to a 100 Amp hour Battle Born lithium battery, we more than doubled the available power (2.3 times). This is especially so when you consider that lithium recharges faster. It offers more true available power, and the battery power does not significantly diminish if drawn low. We also saved on weight with the lighter lithium battery. And no longer had to worry about poisonous off-gassing from a lead acid battery right under our bed.
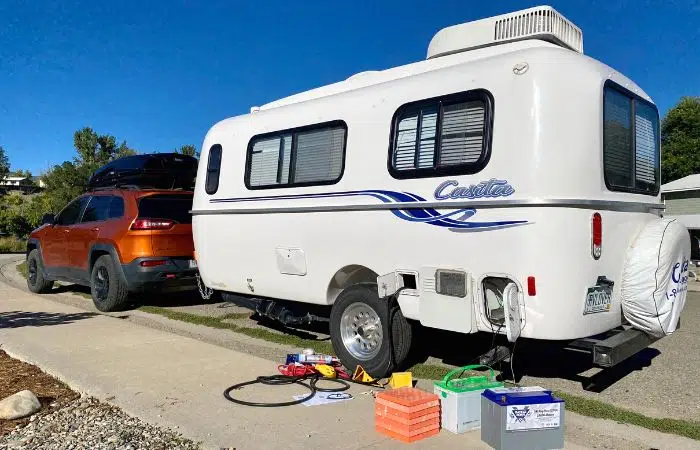
Drop-in Install: Upgrading Casita RV battery to lithium
The installation of our new 100-ah lithium battery was super easy. All I needed to do was unlock the bay, remove two bolts, and slide the old battery out. Then, I detached the battery cables from the old battery, connected them to the new battery, and put the battery back into the bay.
While I was at it, I chose to add a battery monitor and cable inside the camper, which added a bit more extra complexity. But that task only added another 30 minutes to the job. Having the battery monitor really improved our camping experience since it provided an accurate picture of available power.
The stock battery charger, though not explicitly rated for lithium, had a charging profile that still accounted for most of the battery charging needs. The battery would also charge from our solar panel and when towed behind our Jeep. It worked beautifully while we owned it. While we no longer own the Casita, we are still in touch with the new owners, who advised it is still working great for them.
How much did it all cost? How long did it take?
Installation of this drop-in battery replacement – and battery monitor – for the Casita camper took less than an hour to do by myself. The 100-ah Battle Born lithium battery we chose costs just over $900 and more than doubles the available power.
Remember, because lead acid batteries often need to be replaced every few years, the lithium battery you replace it with may be the only battery the RV will ever need. Depending on how long you keep it, of course! We paid about $60 for the battery monitor and cable. So all up, this RV lithium battery upgrade (and monitor) comes to less than $1,000 (ex-tax).
Gear we used:
RV Lithium Battery Upgrade #2: Class C RV
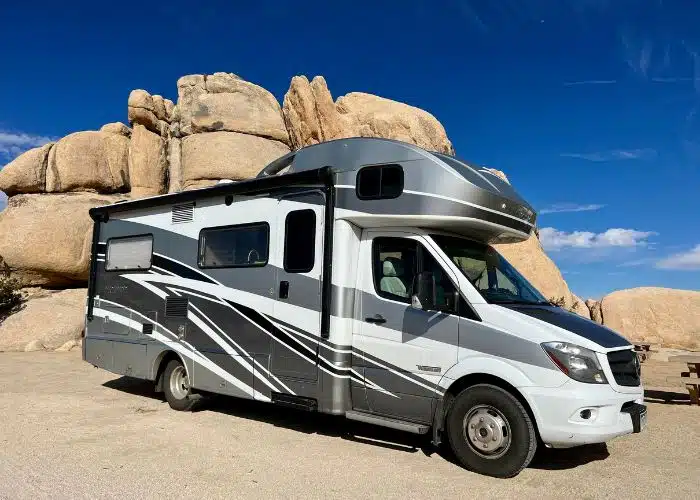
When we began traveling in our 2017 Winnebago Navion Class C motorhome, we were renting it from a friend. We were driving it from Colorado to Florida for the winter. The first night, we were not connected to utilities, and we realized something was wrong with the house batteries. They were so dead that they couldn’t even run the water pump to flush the toilet!
Remember, this was already the second set of batteries in a five-year-old RV. The original batteries that came with the RV from the factory were two NAPA 8240 12-volt batteries. These weighed 42 pounds each and were rated at 75 amp hours. Being lead acid, the total usable power of the pair would be 75 amp hours. As you might expect of factory RV equipment, they are inexpensive $150-ish batteries.
About a year after taking delivery of the RV, the original owner upgraded the NAPA batteries to two much larger AGM batteries. At the same time, he also added 300 watts of solar power to enhance his off-grid capabilities.
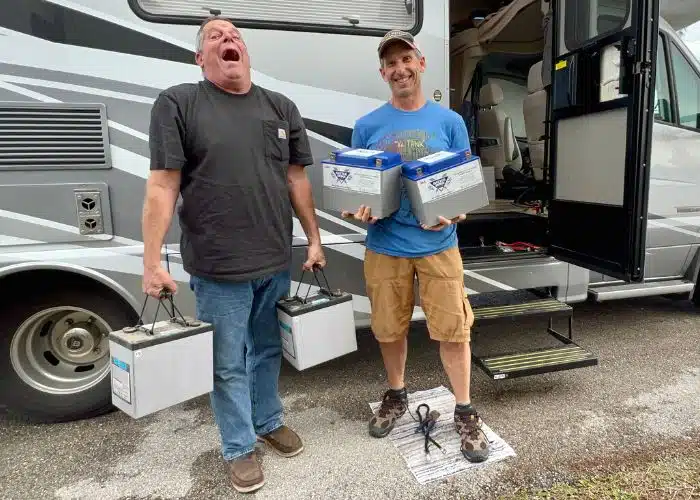
Switching from AGM batteries to lithiums saved 78 pounds and increased power
Upgrading from dead AGMs to new lithium batteries
This second set of batteries, which were completely dead, were two Lifeline GPL-4CT 6-volt batteries, each rated for 220amp hours. But remember, that is 220amp hours at 6 volts. RVs operate on 12 volts. So, this meant changing how the batteries were originally wired and how you calculate available power.
Let’s look at the data.
Here’s the math. A total of 440 amps at 6v = 220 12v. Then, being lead acid, the 50% usable power means 110 actual amp hours available. It was a significant improvement from the original batteries. Dimensions were 10.28 inches in length x 7.06 inches in width x 9.92 inches high. They each weighed a whopping 66 pounds for a total of 132 pounds.
Replacing the batteries became an immediate necessity. Because they were SO dead, we HAD to stay at places with electrical hookups. So, we began searching for replacement batteries. The same AGMs weren’t easy to find (we assume due to supply chain delays). Eventually, we found them advertised at around $400 each. But because we could not find them locally, the cost of shipping made them more expensive. The total cost for replacing the two dead AGM batteries with the same type was around $1,350, including shipping!
Which RV lithium batteries did we upgrade to?
Because of the supply chain issues and the relatively high cost of two new AGMs, we recommended our friend upgrade his RV batteries to lithium. They only cost slightly more, which was worth it for the extra benefits. And we told him we’d do the installation.
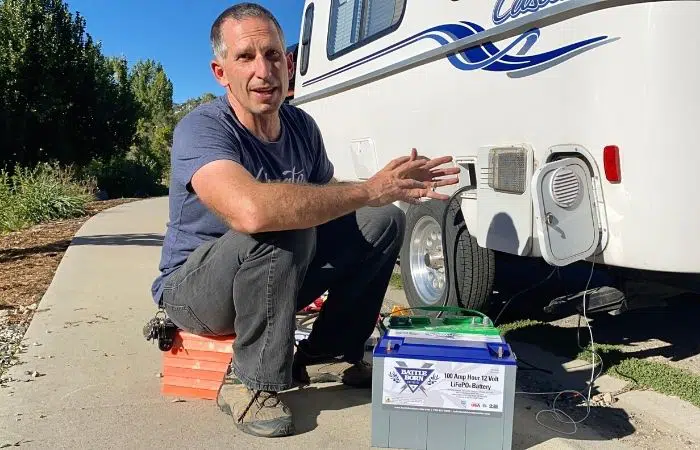
We were able to replace the dead AGM lead acids with two 75Ah Battle Born lithium batteries for a total of 150 amp hours of usable power. The reason for selecting 75ah lithium batteries (instead of 100ah) is the 75ah size batteries are slightly smaller than the 100ah and virtually identical size to the AGMs we replaced. This was important as the RV stairwell space was snug. Overall, this was a pretty easy drop-in replacement. Dimensions in inches of these 75-ah lithium batteries are 10.49 in length x 7.11 wide x 8.95 inches in height.
But these easily have 50% more usable power because of lithium’s advantages of discharge and recharge. If you compare the lithium battery upgrade to the original factory batteries (which most RV owners would have), the available power is more than double.
The weight savings were a huge advantage, too. Because this RV has limited cargo-carrying capacity for its size. The new lithium batteries for this RV weighed only 27 pounds compared to the 66-pound batteries they replaced. That is a massive 78-pound difference in weight savings for the same size and more power. Even compared to the smaller original lead acid batteries, the two new lithiums would have saved 30 pounds of weight.
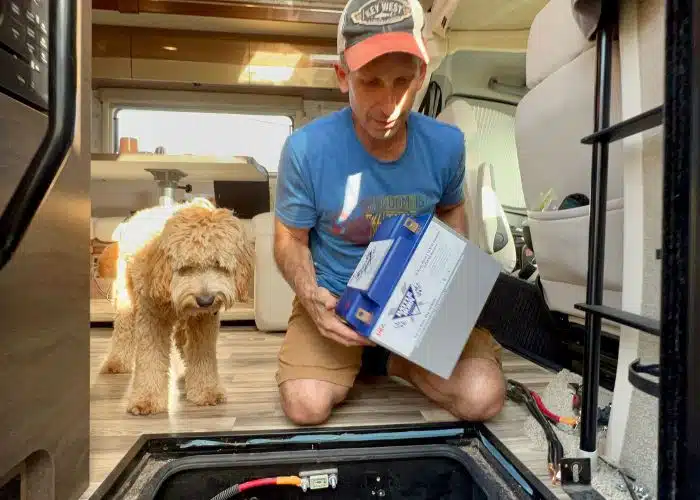
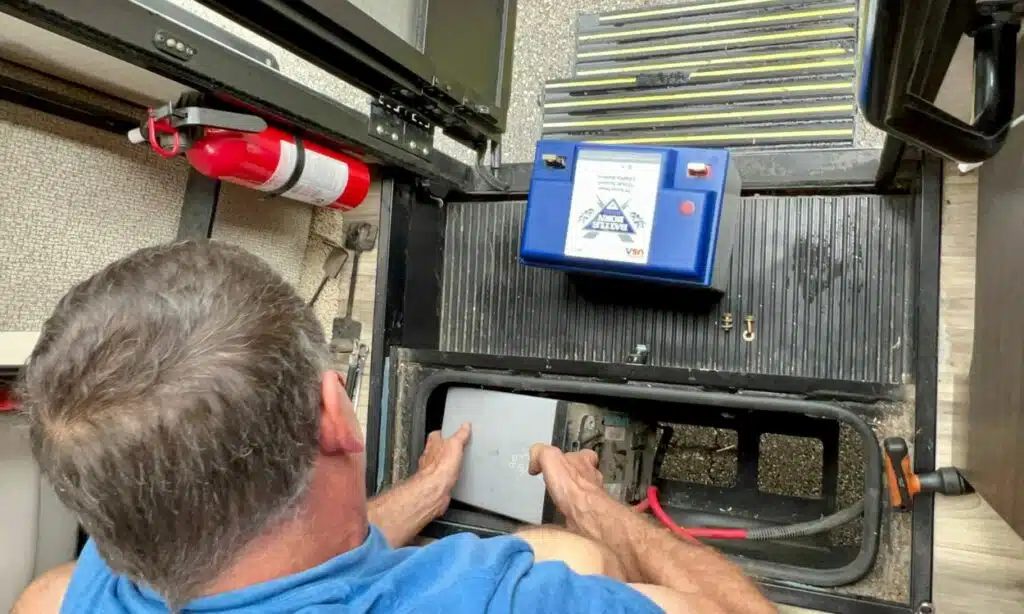
The Install: Upgrading the Class C RV house batteries
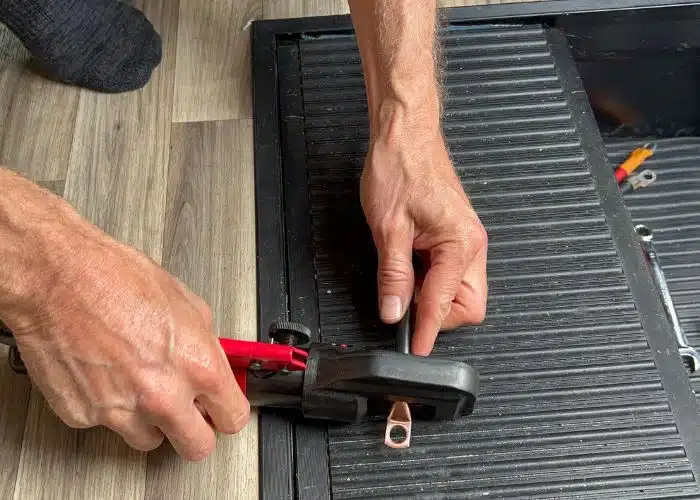
Swapping out the dead lead acids for lithium would have been a super simple 15-minute job if the dead batteries were still the original 12-volt batteries. However, since we were replacing 6-volt AGM batteries, I needed to switch the battery wiring back to how it was initially wired from the factory.
That added some extra time and required special wire crimping tools. Shoutout to our friend Brett Hays for his help! Brett, who was staying at the same campground, helped me with the job and brought the needed tools. The extra wires and parts cost about $36. But remember, you likely won’t need to worry about this, assuming you’re upgrading from 12-volt batteries.
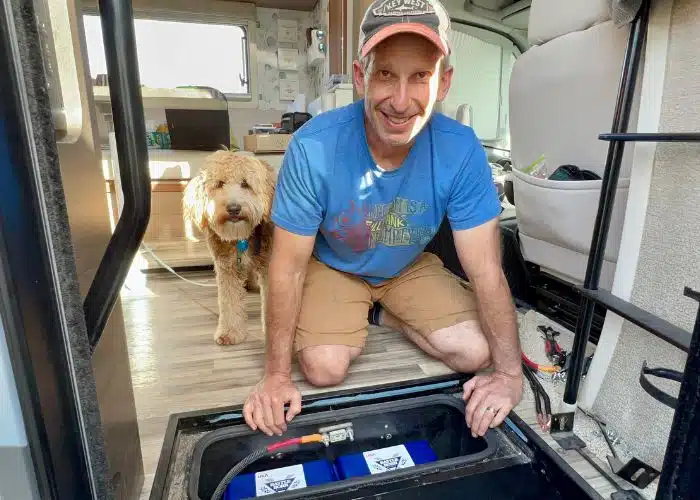
Since the new lithium batteries no longer needed to ventilate, I was also able to improve the insulation in the battery bay. Even though lithium outperforms lead acid in cold weather, this better protects the battery from extreme temperatures and also keeps the area cleaner. I added some foil insulation around the batteries, as there wasn’t a lot of space to work with due to the step mechanism.

How much did it all cost? And how long did it take?
The two new lithium Battle Born 75Ah batteries came in at a total cost of only $1,438, including shipping. That is only $90 more than what it would have cost to replace them with the same AGMs that died. Remember, this $90 difference buys more than 50% more power, dramatically reduces weight, and offers all the other lithium battery advantages. Also, remember these new batteries were the third set of batteries for a five-year-old RV. And these should last at least ten years.
All up, the battery swap probably took about an hour. Most of that time was because I needed to switch from two 6v wired in ‘series’ to two 12v wired in parallel. That required changing the battery wiring connections, including crimping some new wires. If I were swapping out the original 12-volt batteries, the job would have likely been only 15 minutes. That upgrade would involve disconnecting the old batteries from the wires and removing them. They are easily accessible in the RV step well. Then, drop in the new lithium and connect the wires.
Gear we used:
The wires and crimping tool we used were only needed because we had to switch from 6-volt back to 12-volt. So you probably won’t need those. We got those from a local auto parts store.
Discount Coupon Code: RVLOVE
As mentioned above, Battle Born Batteries offers RVLOVE readers discounts when using coupon code RVLOVE at checkout. The coupon offers $50 off per battery. And also 25% off of merchandise like clothing. Coupons cannot be used in addition to sale pricing or other coupons.
There are other Lithium battery manufacturers, but Battle Born Batteries are our favorite. We have installed them in every RV since they came out. After many years of communicating with their leadership and staff and touring their manufacturing plants, we strongly believe they are the safest, best-built, and highest-quality batteries on the market. They also have the best service.
Don’t you need to change the RV battery converter?
This is a question we commonly get. And while the original battery converter/charger in this RV is not technically rated for lithium, it can still do much of the charging for our upgraded batteries. The charging profile for the stock battery charger has a bulk charging phase at 14.4 volts, which is great for charging lithium. However, the float stage is not high enough to maintain lithium for extended periods.
But, since this RV is also a motorhome, the house batteries charge at 14.4 volts whenever the motorhome engine is running. And, since this RV has a solar charge controller rated for lithium batteries, it also keeps the batteries topped up nicely. So, since this RV has three ways of charging, it has never been a problem keeping the batteries at their full potential.
Summary
As you can see, a simple drop-in replacement from lead acid batteries to lithium is not only possible. It can actually be easy! The higher costs are more than outweighed by the long list of lithium advantages, especially when considering how much longer they last. The important thing to keep in mind is you don’t need to make a huge investment or drastically change your RV wiring systems, to do a lithium battery upgrade and reap the benefits.
And yes, that first major power system upgrade to the Class A motorhome we full-timed in was amazing! But now that we’re part-time RVers, we have still appreciated the significant improvements and reduced battery anxiety from our simple and easy drop-in replacement battery upgrades. We can now relax more, knowing we have power for our shorter overnight boondocking stays.
Considering making the switch to lithium batteries in your RV? We’re sure you’ll love it. Especially if you like spending time unplugged from power, out in nature, and making the most of your RV experience.
Discount Coupon Code: RVLOVE
As mentioned above, Battle Born Batteries offers RVLOVE readers discounts when using coupon code RVLOVE at checkout. The coupon offers $50 off per battery. And also 25% off of merchandise like clothing. Coupons cannot be used in addition to sale pricing or other coupons.

Author Bio: Marc Bennett
A Colorado native, Marc is an avid cyclist and hiker who has lived, worked, and traveled by RV to all 50 USA states, while working full-time. He is co-author, with his wife Julie, of two bestselling books: "RV Hacks: 400+ Ways to Make Life on the Road Easier, Safer, and More Fun!" and "Living the RV Life: Your Ultimate Guide to Life on the Road". In RV life, Marc takes care of all the dirty jobs – fixing things, washing dishes, and dumping the black tank.
Sign up for our email newsletter with the latest RV park reviews, news and updates.
GOT COMMENTS OR QUESTIONS?
We would love to hear from you. Drop us a note in the comments section below.
More Do-It-Yourself Content
Want to check out more do-it-yourself content? Here are some we think you will like. Hover over each image to see the title and article name.

RV Lithium Battery Upgrade? Easy Drop-in Replacement

10 Easy DIY RV Bathroom Renovation Ideas

How to DIY Replace a Thetford RV Toilet Waste Ball Seal

The State of RV Repairs: Problems, Solutions and On-Demand RV Techs

RV HACKS. Our New Book is a Bestseller!

12 RV Hacks for Staying Cool this Summer

New RV Awning Replacement Fabric and Slide Topper

12 Lessons Learned from Our RV Renovation

Getting Our RV Ready To Travel After our RV Makeover

What Did It Cost? and RV Renovation Questions

Episode 8 The Final Reveal | Ultimate RV Makeover

18 thoughts on “RV Lithium Battery Upgrade? Easy Drop-in Replacement”
How did your two 75ah lithium batteries do with starting your onboard onan? I found a mfg spec that said its 100ah battery could deliver 200a for 3 seconds. With 2x 100ah, I could get 400a cranking power, FOR 3 SECONDS. My onan requires 330 to 450cca to start and sometimes takes 3 or more 15 second starting cycles (10sec start, 5sec rest).
Hi Phil. Thanks for the question. Our two lithiums actually had no issue starting the generator. And our Navion had the diesel generator option, which I imagine requires more juice than the propane generator. -M
Marc, Enjoy your blogs and all the information. We have a 2016 View with a 1000 watt inverter with a 9200 charge wizard. Following your change in batteries on the View you purchased, we also would like to change over to Lithium. From reading your blog it looks like it was just a drop in and we are wondering is there anything we would need to add /change to switch over? Thanks in advance for your help
Hello Bucks,
Yes, for us it was an easy drop in replacement because we had an additional/alternate charging source for our battieries (both the alternator AND solar panels with a charge controller programmed for Lithium). The answer would depend a bit on how you use your View. If you drive frequently, the higher voltage of the alternator from the engine might be enough to get your Lithiums up to optimal charge regularly enough. From what I understand, the 9100L and 9100AL charge wizards are appropriate for Lithium, but the 9200 in your RV is meant for lead acid. When the 9200 is in boost mode it hits appropriate lithium charging rates, but it would need to be supplemented by an alternate source at least some of the time to reach full charge. Best to check with the battery manufacturer for more specifics, but again, it partially depends on your travel style. -M
I just purchased 2 100ah lithium from battleborn. Installing the batteries and the smartshunt was easy, but they said I need a dc-dc charger to protect the alternator and engine battery.
This IS NOT a drop in job. I have an appointment with a professional installer for next week.
Buyer beware….
Thanks for sharing. We added in those extra components when doing our big installation because of how it was wired. But believe it was not needed on these two installations. Every install has its variables. Always good to double-check.
-M
Marc you say that the lithium battery works fine in the cold I l ive where cold is a nice day in the winter (-40 or so is the temp occasionally). Do these batteries work then and/or do they need some adaptation (heater wrap).
Also at what point do you have to replace the house charger unit? My rig is a 1997 Leisure Travel Van well before lithium (was told it was good for AGM batteries).
Hello Richard. Lithium outperforms lead acid batteries in cold weather as far as delivering power. But they will not be able to recharge if they are too cold. Fortunately, since lithium does not release poisonous gasses and is stable, you can keep them inside insulated areas protecting them from extreme cold, or use a heat wrap of some kind. Some of the newest Battle Born Batteries actually have heating elements built inside. Check out this detailed article about cold weather performance here.
https://rvlove.com/gear/lithium-vs-lead-acid-batteries-in-cold-temps/
And check the charging profiles of your current house charger to see how it aligns with the required charging profiles of the batteries. But also know that when you are running the engine of your LTV, you are probably creating enough volts to charge the batteries. Thank you -Marc
Howdy again,
I went through the post more thoroughly and found this under the Class C project: “The charging profile for the stock battery charger has a bulk charging phase at 14.4 volts which is great for charging lithium. However, the float stage is not high enough to maintain lithium for extended periods. ”
I will get the manuals out to see if I can find the ‘profile’ of our charger/converter.
Since we have a travel trailer (2017,CRV, Shadow Cruiser 225rbs), we don’t have 14.4v. I don’t know what we have voltage wise when hitched/connected via the seven pin. I’ll have to look. But if I’m not mistaken our charger is sending 13.6v charging and 13.2 in float. That doesn’t seem to be a significant difference to me but maybe that’s the design. Sorry, we’ve had the TT for two years and I tend to question whether anything is working correctly. I’m sure you know what I mean…
Would I need to find a battery tender/charger to supplement the current system? I will look for the profile on our current system. Your thoughts would be appreciated!
Hello again Jeff,
Great that you were able to find the other information in the post that answered the rest of your original questions. If your current charger only provides 13.6 volts and doesn’t offer a short-term bulk charging phase that hits 14.4, it might not be adequate for topping up lithium. So you might need a supplemental system. But, when you are towing the trailer connected to your 7-pin, your alternator is likely putting out over 14 volts which would top your battery up. But again, if your normal charger doesn’t have a mode to go over 14 volts, and you don’t tow significant distances, you may need a supplemental charging system. Especially if you have a large battery bank. Thank you -M
Thanks! Really appreciate you helping us
Happy to help. Thank you.
Howdy,
Really enjoy your weekly blog posts. Learn something every time!
This Lithium upgrade is something I’d really like to do. I’m Battery Anxious.
When you say, “The stock battery charger, though not specifically rated for lithium, had a charging profile that still accounted for most of the battery charging needs.” I understand that lithium requires a higher voltage to charge them to something like 14 v. I’m not sure how the charger senses the battery is fully charged and then goes into float mode when charging lead acid batteries. But would it go into float mode charging lithium?
I also have installed the AiLi Voltmeter Ammeter but I don’t think it’s working 100%. It shows the battery level at 100% all the time. I am confident that it is showing the correct voltage so I use that with a post it note for determining the level. AiLi support didn’t seem to get it. The hard work is done, buying a new one and replacing the monitor may be the solution. No big deal for me, it would be nice if it worked 100% though.
Thanks for all you do,
Jeff Mattingly
Hello Jeff. Yes, Lithium requires a higher charging voltage than lead acid, and a higher float voltage. I am not familiar with your voltmeter, ammeter, so I con’t provide much insight on that. But I would be surprised to think your battery would be 100% all the time. As you mentioned, you might want to replace the monitor, unless there are some settings off. I know I needed to set up parameters on my battery monitors based on the size of battery. I see you have another question. I will go answer that one too. Thank you. -M
My question is about swapping our lead acid batteries from our ’22 Winnebago TT. We have two batteries installed on the tongue , in plastic protective cases. Will this location work for Lithium batteries as well? Thanks, Norm.
Hello Norm,
Yes, you should be able to use the same location without issue.
All excellent points about the benefits of lithium over lead-acid. We have never regretted the conversion in our Class A. A good rule of thumb is that you have enough battery capacity if you can get through the night with a comfortable reserve and enough charging capacity if you can both power your day and replace what you used overnight. Highly recommend the battery monitor to learn this! Only by watching ours did we learn that our alternator charges our house batteries twice as fast as our generator or our solar charger. Now, when we need a battery top off, idling the coach is our preferred method.
Thank you Marv for the extra insights and learnings on your system. Agreed that having an accurate battery monitor can really help you learn your system from all sides. Thanks again. -M