This post may contain affiliate links.
If you’ve been following our RV Makeover series, you may be wondering how it’s all going to hold up on travel days. In particular, those 3 chandeliers! Last week we shared how much the renovation cost, this week we walk you through our process for packing down the inside of the RV on travel days.
Keep watching until the end of the video to see some footage of items while the RV is in motion, to see for yourself how they travel. In real time, our RV Makeover was actually finished several months ago, and we have traveled thousands of miles since leaving Oregon. Watch the video and/or read on below for more details.
Keep In Mind
With our motorhome being a diesel coach with air suspension, we have a pretty smooth ride. This allows us to leave quite a few items on countertops, as long as they have rubber or other sticky bases. We would not recommend leaving anything on counters for RVs that have a rougher ride. For example – any towable RV – especially travel trailers. Even gas coaches can have a bumpier ride than diesels.
So in general, if you aren’t sure about whether or not it’s safe to leave something out on travel days, it’s probably safe to put it away. In a cupboard, in the sink etc. Especially if you are not in a motorhome with a passenger, who can quickly jump up and take care of anything that has moved! There are times we forget to lock a pocket door, or we hit a bump, or brake hard… and things move. It doesn’t happen often, but it happens!
One advantage of traveling in a motorhome is that you can hear or see anything that might have been forgotten. Towable RVs don’t have this luxury, and some of our friends have arrived to huge messes from things that were not secured before travel. So if you have a towable RV, we recommend being extra careful and safely stowing away as much as you can.
To learn more tips about RV Packdown for travel days – inside and outside your RV – jump over and visit our other Pack Down Blog Post and Free Checklist here.
What We Will Cover In This Post
We will walk you through each area of the inside of our RV as we prepare for travel days. Some of our practices might surprise you. Similar to other walkthroughs of our RV, we will break it down into sections.
If you are looking for any of the items that we’ve shown here in the video/blog post – freezer lock, velcro etc – you can find many of them in our RV Makeover Amazon store.
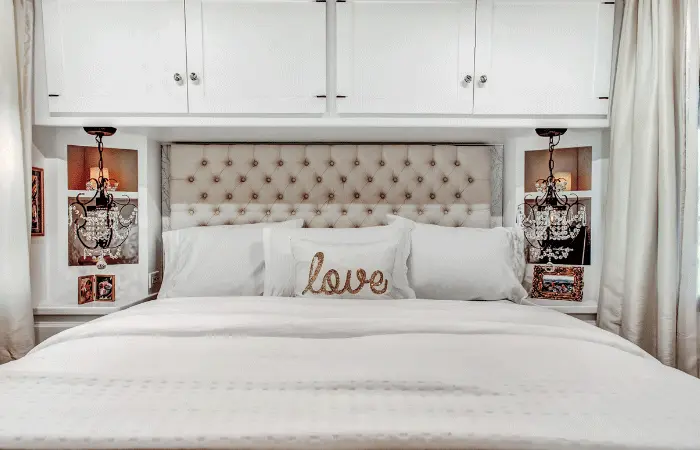
1. Bedroom
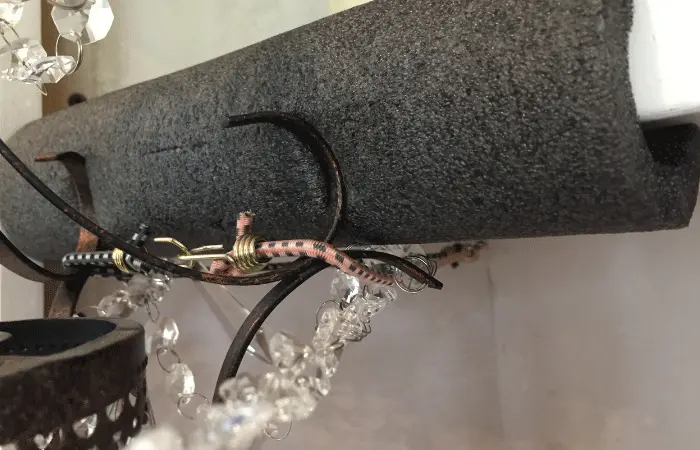
One of the more controversial changes in our RV Makeover was installing two chandeliers in our bedroom. Many thought they would be too delicate to travel with. Our simple solution involves a hidden hook inside the nearby shelves, and two small bungee cords. The bungee cords hold the chandeliers in place.
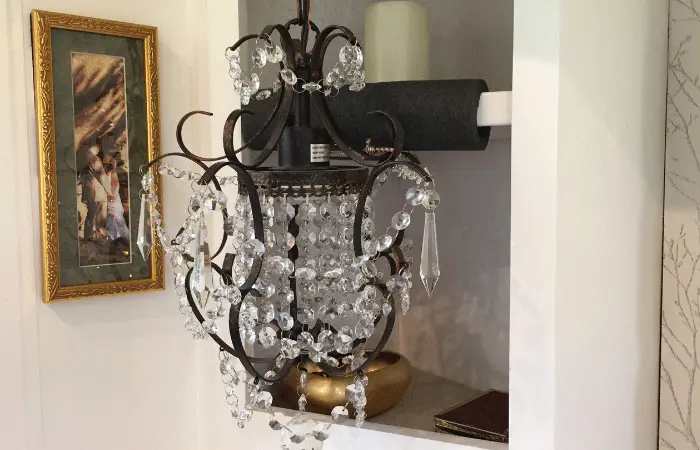
We slide a piece of pipe insulation over the shelf on the little cabinet beside the bed first, to protect the wood and paint on the shelves. Then we attach the bungee cords. We make sure all cabinet doors, and side windows are full closed too. And we put the photo frames (with glass on front) inside the little side cabinets to keep them safe.
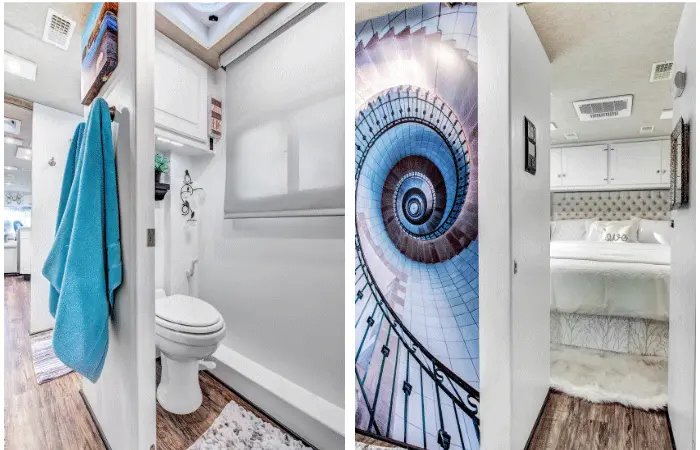
2. Bathroom
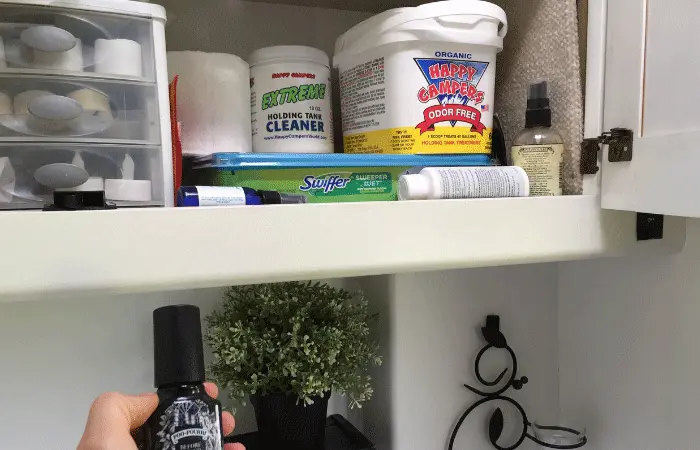
The bathroom is super simple. Walking from the bedroom to the bathroom, we make sure the water heater is turned off. Once inside the toilet room, we close the window and ceiling vent. Then we put out “Pou-Pourri” inside the cabinet above the toilet. This prevents it potentially falling into the toilet if we should happen to leave the lid up while driving on travel days.
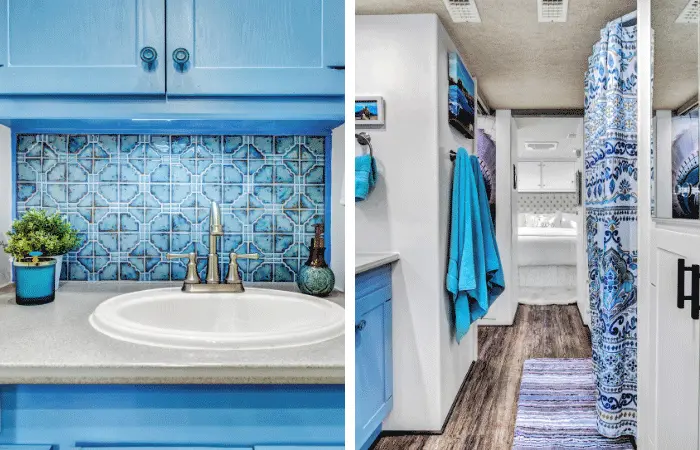
In the bathroom vanity area, we leave most items (soap dispenser, candle, potted plant, toothbrush holder) on the bathroom vanity. So far, they have not moved.
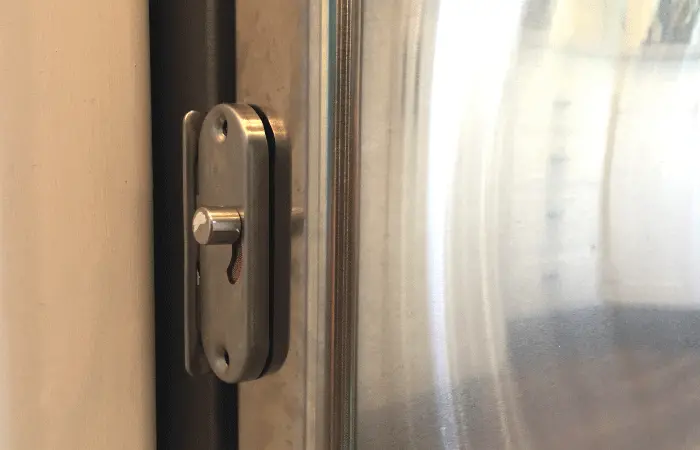
The main pack down for in the bathroom is closing and locking the three pocket doors. If we don’t lock them, the doors will slide back and forth while driving, banging in the process.

3. Kitchen
Our kitchen area takes a little more effort than the bathroom on travel days. First up is the residential fridge. We installed a lock a lock on the freezer drawer – you can find it here. We could have added one of these to the fridge doors as well, but it would have been more visible and unsightly. So instead, we came up with a simple, creative solution for the two main fridge doors.
We stuck some commercial grade velcro (this one has worked a treat – we’ve used a ton of it around the RV!) onto a plastic “shim” and also along the top of the fridge doors. When in place, the velcro/shim holds the doors very securely. When not traveling, we just move the shim to the side so it sticks to the top of one door and stays out of the way. It’s barely visible! And is a really affordable, stealthy way to secure the fridge doors!
We leave a few other items on the kitchen counter top. The paper towel holder is heavy and has a rubbery base. Our utensil holder is also fairly weighty, and we put a round, rubbery shelf liner underneath it. The hand soap dispenser is heavy, but we put it in the sink for good measure, as it has vibrated off the counter once or twice. We also empty the tea kettle and it stays in place (plugged into the wall).
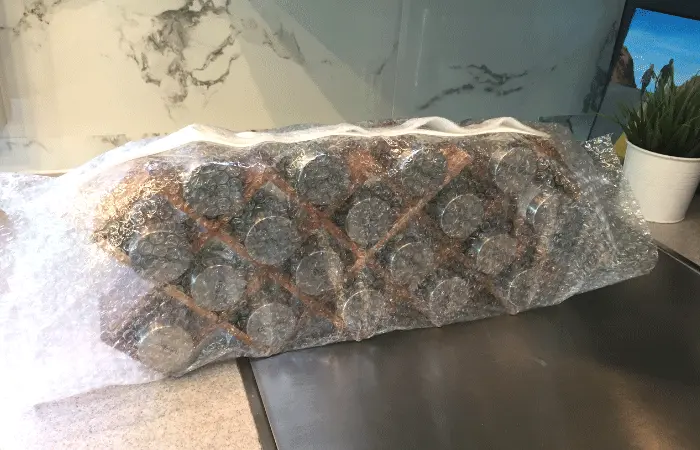
We now have a countertop spice rack (not shown in the post makeover beauty shots) and the spice jars often slide out while driving. So we came up with a creative solution – using bubble wrap and velcro. Julie taped two pieces of bubble wrap together – enough to wrap around the spice rack/bottles. Then she stuck a strip of velcro on their end of the bubble wrap sheet. She carefully moves the spice rack onto the bubble wrap sheet and wraps it around then secures it. That stays in place at the back of the counter top.
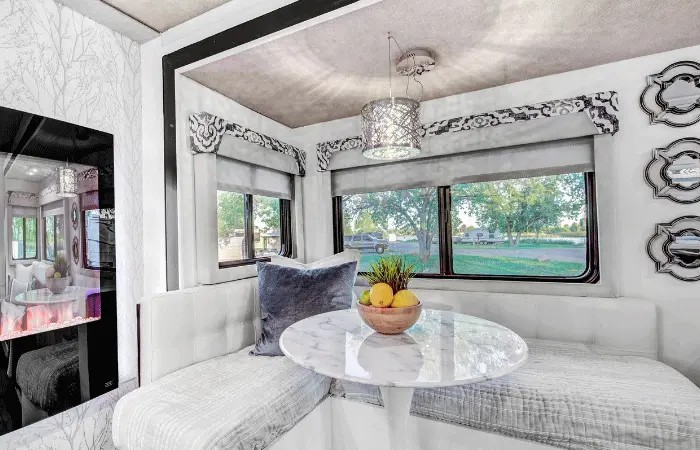
4. Dining Area
Our chandelier in the dining area travels safely by simply unhooking it and resting it on a stack of pillows. When installing the chandelier, we used extra wire so that it could easily be lowered down. We have a took off to the side, that allowed us to position the chandelier in a more optimal position than the original fixture was located. Especially important as we had changed the dining area layout and furniture.
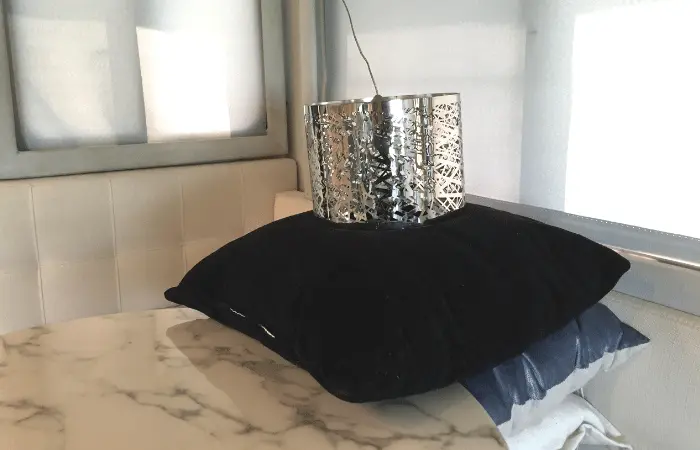
Resting the chandelier on the pillows prevents any swinging or swaying. If we forget to lower it before in motion, it swings and clangs pretty quickly, letting us know right away. And Julie can go back and fix it. It stays back there nice and quietly, until we arrive at our destination… and takes only a few seconds to put back in place (and set down on the pillows).
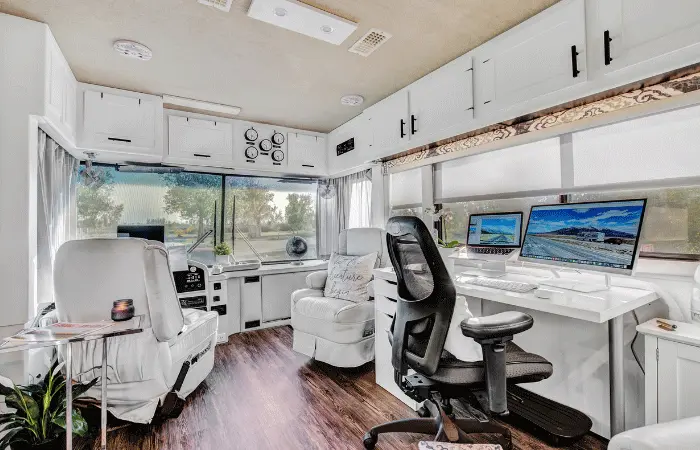
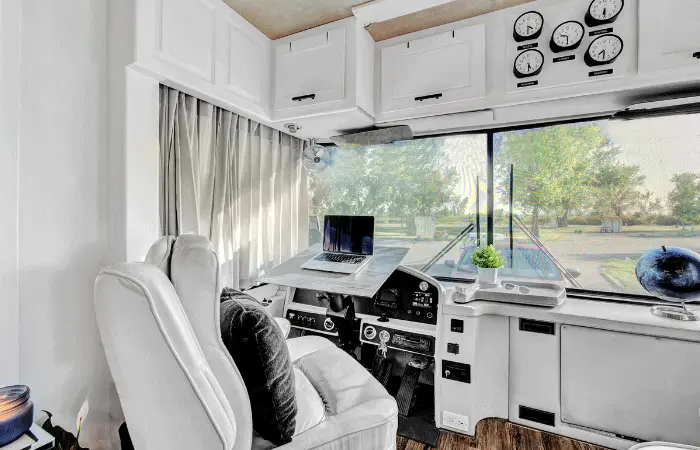
5. Living Area / Workspaces
Our RV only has one slide out (on the driver’s side) and most of our living area is very simple. We slide the recliner out of the main walkway because once the slide comes in, that space is reduced.
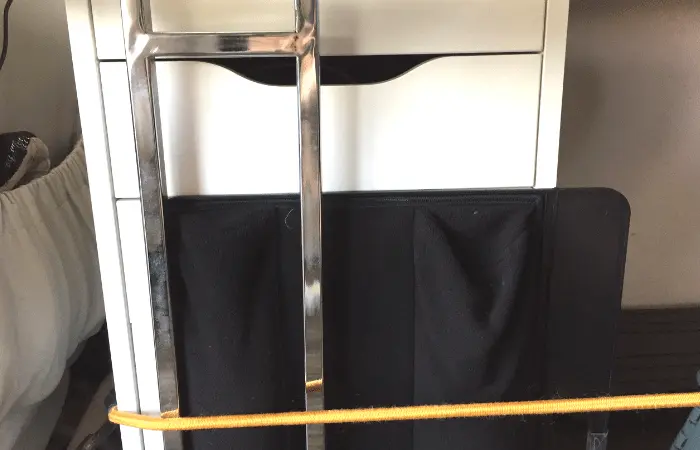
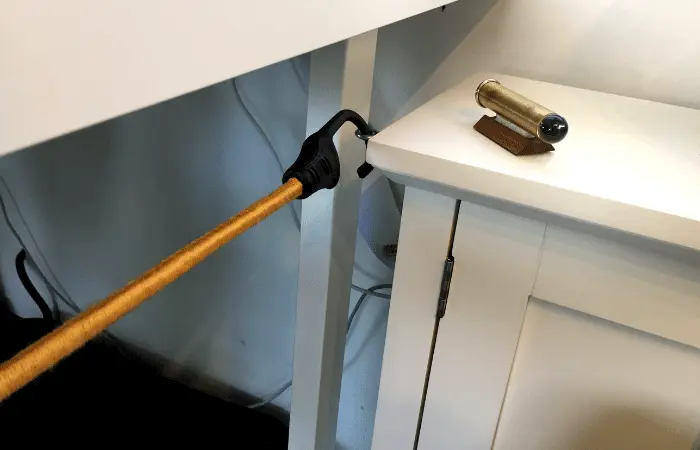
Most everything on our main RV office remains in place on travel days. But, the chair is on rollers, and the desk drawers don’t lock in place. We use the lap desk (that we use with the secondary workspace) plus and a small cocktail table to help secure the drawers. A strap wraps around the drawers and chair, and then attaches to a hook on the little side cabinet we keep beside the main desk.
We also extend the lift of the chair so that the arms of the chair contact the bottom of the desktop. This helps keep everything nice and secure during travel. It is worth noting that the desk and side cabinet are screwed into the floor and wall to make sure they are solidly installed.
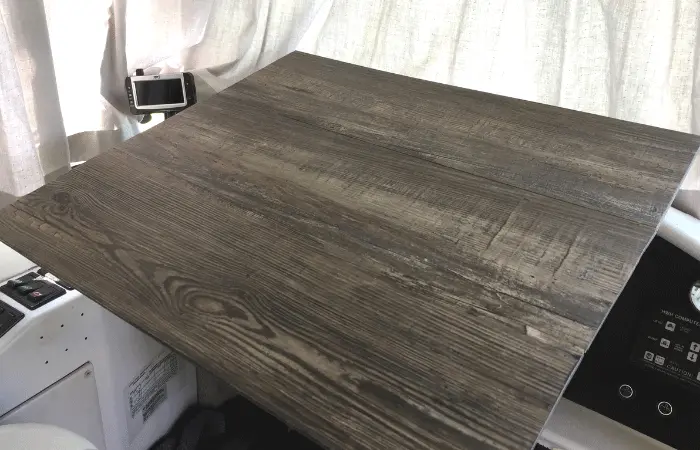
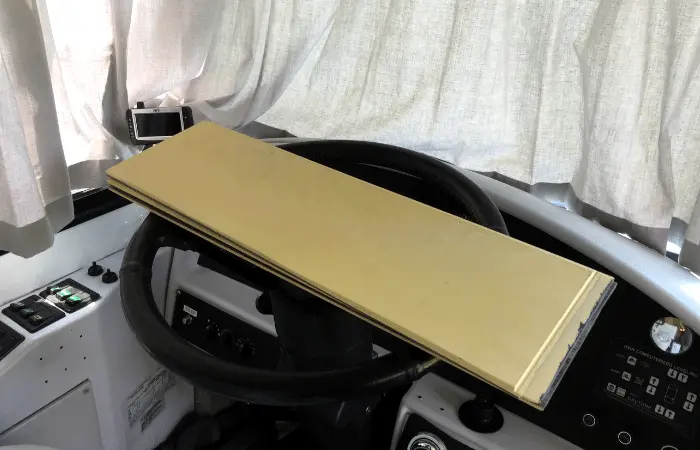
Our secondary workspace in the driver seat area is very easily stored for travel days. The laptop and any notes are placed in a laptop bag that we simple place on the couch. We used a few off-cut flooring pieces as the diver area desktop, and these are folded up and placed in the drawer under the sofa.
When watching the video, you might have also noticed the small gold colored kaleidoscope on the cabinet next to the desk. That is secured to it’s mount with a small strip of velcro, so it doesn’t move. And the stereo and speakers have rubberized bottoms/feet, so they tend to stay in place too.
6. Final Preparations on Travel Days
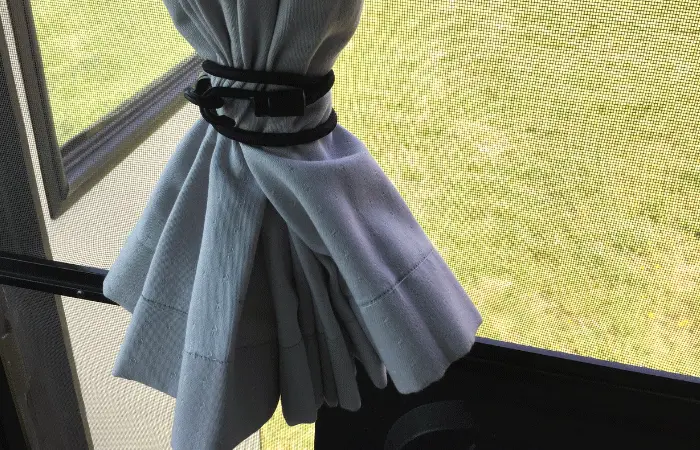
Once we have finished all of the above preparations, we walk through the RV to make sure all windows and ceiling vents are closed. We pull the front cab curtains around and secure with small bungee cords. This is something Julie plans to create a better solution for soon.
Now it is time to fire up the engine and bring in our single slide out room. We always leave at least one window or the door open before operating the slide. This is important, as the air volume and pressure can change a lot when opening or closing slides, especially if you have multiple slide rooms.
We also remove the basket and globe from the front dash area and pop them on the sofa.
How Long Does It All Take?
All of the above pack down preparations can be done in about 5 minutes, especially if both of us are doing it. So our process is very quick and easy.
If you are looking for any of the items that we’ve shown here in the video/blog post, you can find many of them in our RV Makeover Amazon store.
Please note that this post is focused on packing down the interior. There are, of course, steps related to packing down the outside. Packing down the outside can vary depending on how long we are in a location and what items we have out. It will also depend on if we are boondocking, or hooked up in a campground.
If you would like to learn more, jump over and check out our first RV Packdown blog post and video from our first RV. This shows outside pack down and more tips for packing down the inside too.
Sign up for our email newsletter with the latest RV park reviews, news and updates.
GOT COMMENTS OR QUESTIONS?
We would love to hear from you. Drop us a note in the comments section below.
More RV Makeover Content
Want to check out more on our Ultimate RV Makeover Series? Hover over each image to see the title and episode name.
12 Lessons Learned from Our RV Renovation
Getting Our RV Ready To Travel After our RV Makeover

What Did It Cost? and RV Renovation Questions
Episode 8 The Final Reveal | Ultimate RV Makeover

Episode 7: Finishing Touches | Ultimate RV Makeover
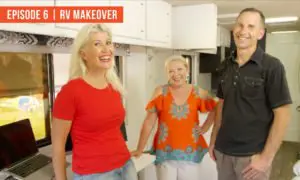
Episode 6: We’re Nearly There! Ultimate RV Makeover
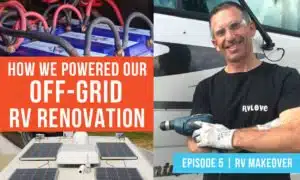
Episode 5: Powering Our Off-Grid RV Renovation | Ultimate RV Makeover
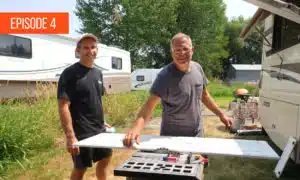
Episode 4: Re-Building Our RV | Ultimate RV Makeover
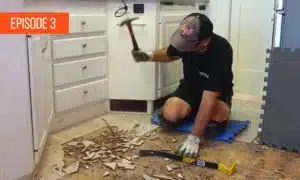
Episode 3: Tearing Our RV Apart! | Ultimate RV Makeover
Episode 2: What Are We Going To Do? Ultimate RV Makeover
Episode 1: Let’s Do This! Ultimate RV Makeover Series

3 thoughts on “Getting Our RV Ready To Travel After our RV Makeover”
An amazing article. It’s nice to read a quality blog post. I think you made some good points in this post. These simple tips are really simple.Thanks for advising these simple tools.
I love the idea of the second workspace. My husband and I both teach college courses online, so when we travel, we are both working. We have a workspace in the passenger seat, but it would be nice to free up the dining table for eating and playing games only. Did you velcro the flooring pieces to the stirring wheel to keep them in place?
No, they actually just sit there! I guess the non stick back of the flooring pieces and rubber steering wheel is enough. We definitely value having two separate work spaces and keeping the dining table for eating. We rarely work from there, and besides ergonomics not as good. But we just prefer the separation of our work/eating environments.