This post may contain affiliate links.
Love your RV, but not happy with your RV bathroom? Have you wanted to make your rig’s bathroom look and function better while updating an older look? Not sure what to do or where to start? Here are some easy and low-cost ideas for DIY RV bathroom renovation and upgrades you can do!
My wife Jeanne and I have absolutely loved our mid-size (30’) Class A RV since we took delivery five years ago. But, after a few years of living, working, and traveling full-time in it, we wanted to make some changes to our RV bathroom. It was time to personalize it to our tastes, make it brighter, and add more functionality.
Out With The Old, In With The New!
You don’t have to be stuck with the “same old-same old” bathroom fixtures and decor that are mass-produced out of those Indiana RV factories. It doesn’t matter if your rig is fairly new, or more than 10 years old. There is absolutely nothing wrong with making changes to your RV that make you happy!
So, let’s get started on some great RV bathroom renovation ideas and upgrades that you may want to consider.
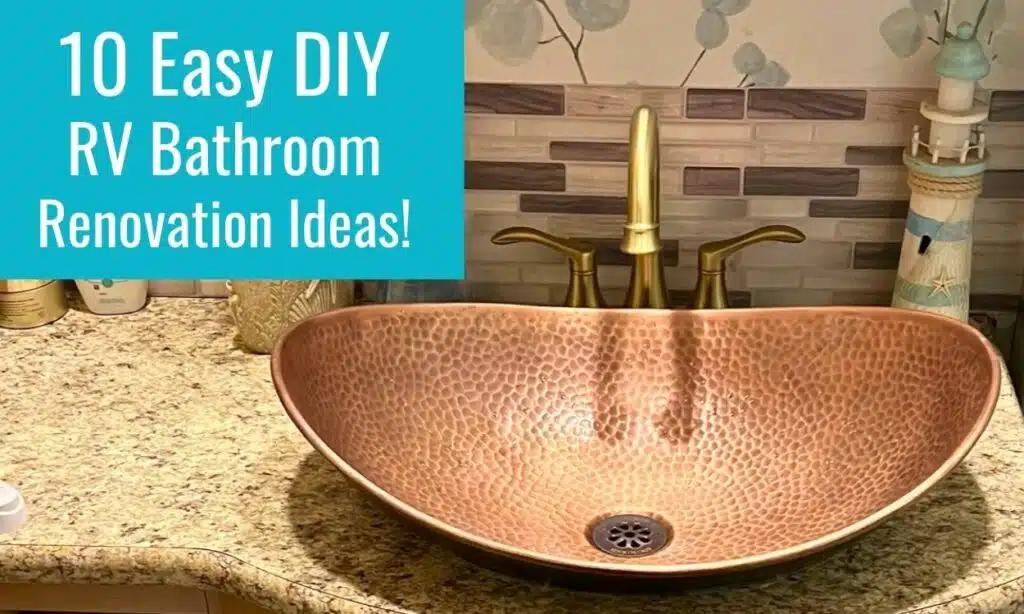
RV Bathroom Renovation #1: Sink and Faucet
Easy change, huge impact!
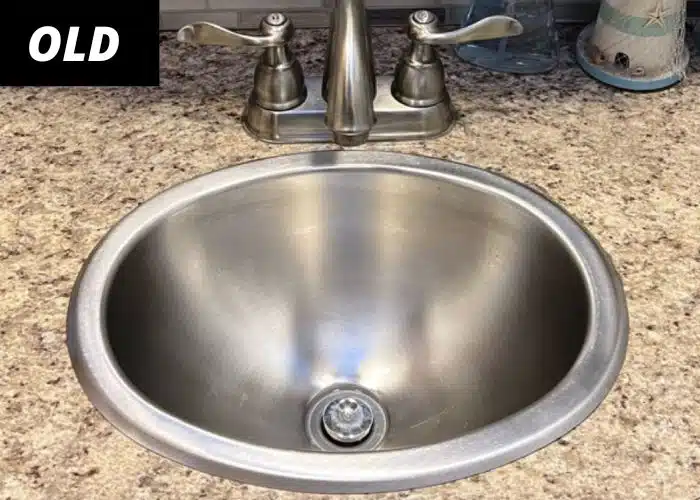
If your RV bathroom sink and faucet are like ours were, you know they aren’t ideal. The typical sink for an RV bathroom is small and it’s difficult to wash up without splashing water all over the place. And, the factory stock faucets are usually very short, impractical, and low quality. They’re not the best setup at all.

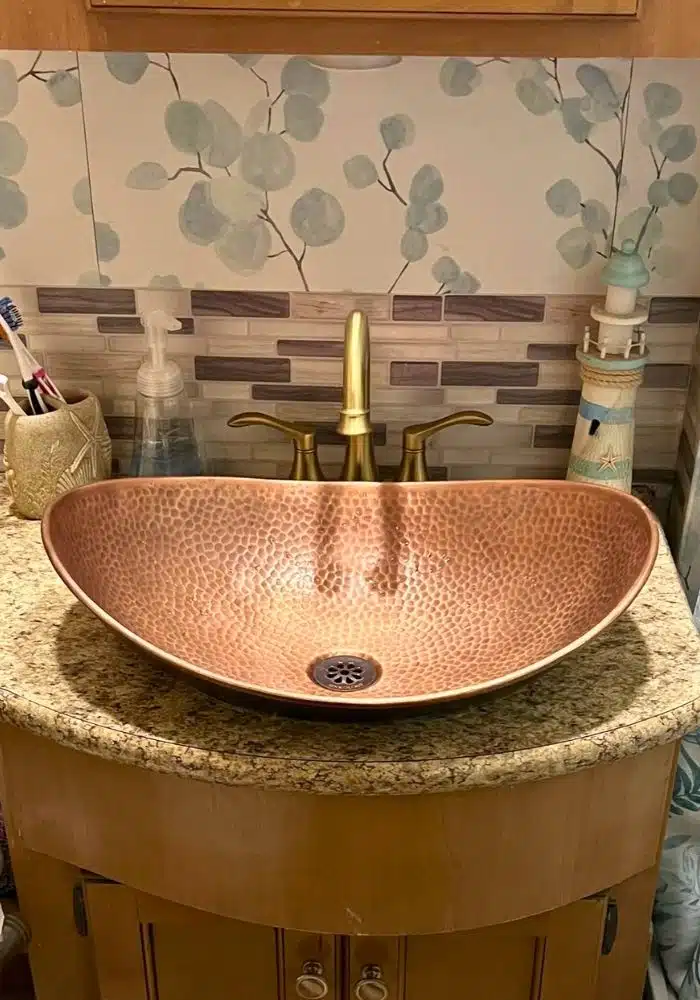
We had seen a fellow RVer’s post about a hammered copper “vessel”-style sink by Sinkology. It looked great and he said the installation was straightforward, so we ordered the sink and matching drain pipe kit through Amazon. We also ordered a new “high arc” faucet from Home Depot.
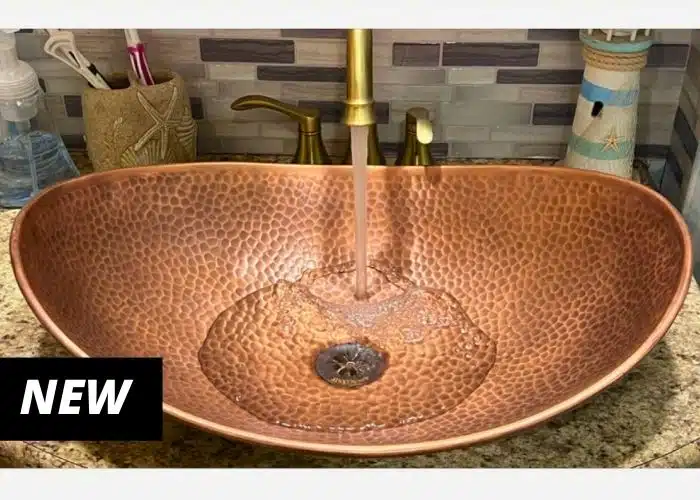
Out with the old, in with the new! Installation was indeed a breeze. We removed the original tiny sink, and mounted the new vessel-style sink in the same vanity cut-out. Since the new sink was wider front-to-back, I needed to drill two new holes for the faucet about an inch farther back from the original location. I sealed the original holes to prevent water intrusion into the vanity substrate.
The hot and cold lines that were provided attached easily, as did the new sink’s drain tube. I added some bathroom-rated silicone caulking around the base of the sink, both above and below the vanity countertop.
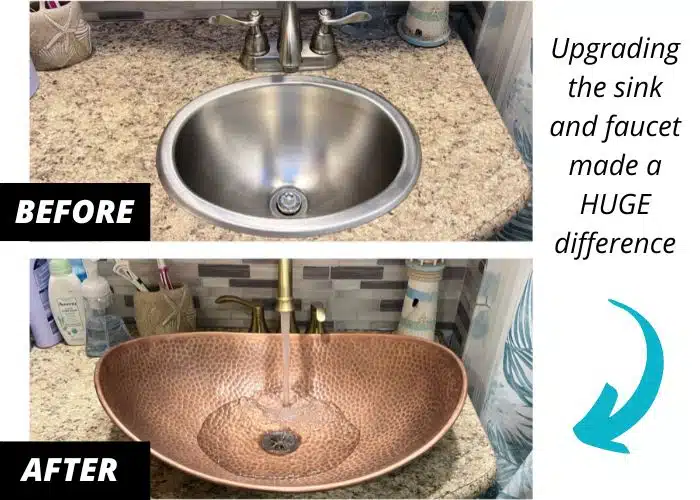
Wow, what a difference the new RV bathroom sink and faucet combo made! It looks much more aesthetically pleasing than the stock RV sink. And now, the sink and new high arc faucet make washing up easier and splash-free!
RV Bathroom Renovation #2: Walls
Let’s brighten up those drab RV walls!
Our RV bathroom walls were covered with a common grayish-brown multi-tone factory wallpaper that was rather dark and drab. While we painted the walls in our bedroom and living areas to brighten those spaces, I decided to give the bathroom walls a new wallpaper treatment. However, there was no way I wanted to deal with removing the original wallpaper. Been there, done that too many times with our old “sticks ‘n’ bricks” houses!
Instead, I found several nice, bright designs of self-adhesive wallpaper at Lowes Home Improvement. They were the HGTV Property Brothers’ Scott Living brand of peel and stick wallpaper and would work well for our RV bathroom makeover.
Was it easy to install?
Installation over the original factory wall covering was simple. The hard part was dealing with the nooks and crannies, multiple corners, and out-of-plumb walls and cabinets so typical of RV construction.
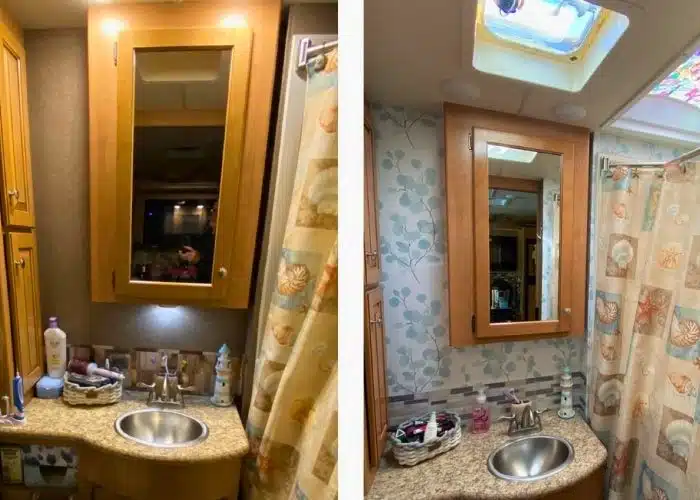
Before and after photos (side by side wallpaper improvement)
Once it was done, however, it really brightened up the bathroom and we’ve been very happy with the new look. I was initially worried about how long the self-adhesive product would last in an RV. But, after two years, 32,000 miles, and cold to hot, humid environments, it still looks as good as the day I installed it.
RV Bathroom Renovation #3: Backsplash
Adding a self-stick “faux tile” backsplash is cheap and easy
Since we added the new, brighter wallpaper, we decided to replace the factory “backsplash decal” with something to better match the new wallpaper. We found a faux tile type of self-adhesive backsplash, again at Lowes.
Peel and stick, a little trimming, and it was done! This self-stick “faux- tile” is inexpensive, and has also lasted perfectly over the past two years of full-time RV travel.
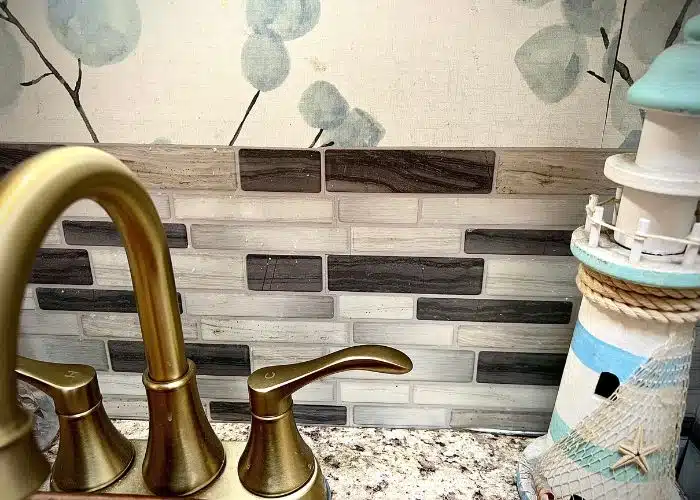
Peel-and-stick backsplash does the trick!
RV Bathroom Renovation #4: Storage
Add wall storage pockets
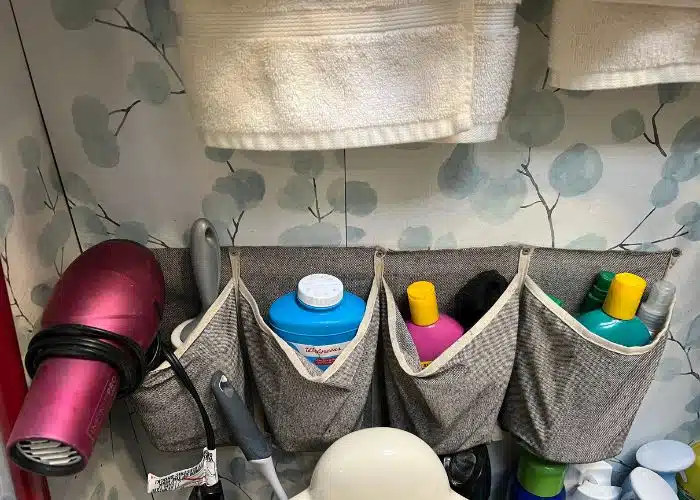
Storage for miscellaneous items in any RV is a challenge. The RV bathroom is no exception. We had a strip of four shoe storage pockets left over from a bedroom storage hack that we repurposed in the bathroom.
In the bedroom, we had taken a standard vertical over-the-door shoe pocket organizer, cut off each row of pockets, and hung them horizontally (end to end) on the base of our RV bed for out-of-the-way shoe storage. We had one strip of pockets left over, so I attached it with screws to a wall in the bathroom to hold bottles of sunscreen and powder, as well as Jeanne’s hair dryer. A simple addition that has proven handy!
Now Onto Our RV Shower Renovations!
Our next five RV bathroom renovation ideas are all for the shower area. What a huge difference they make!
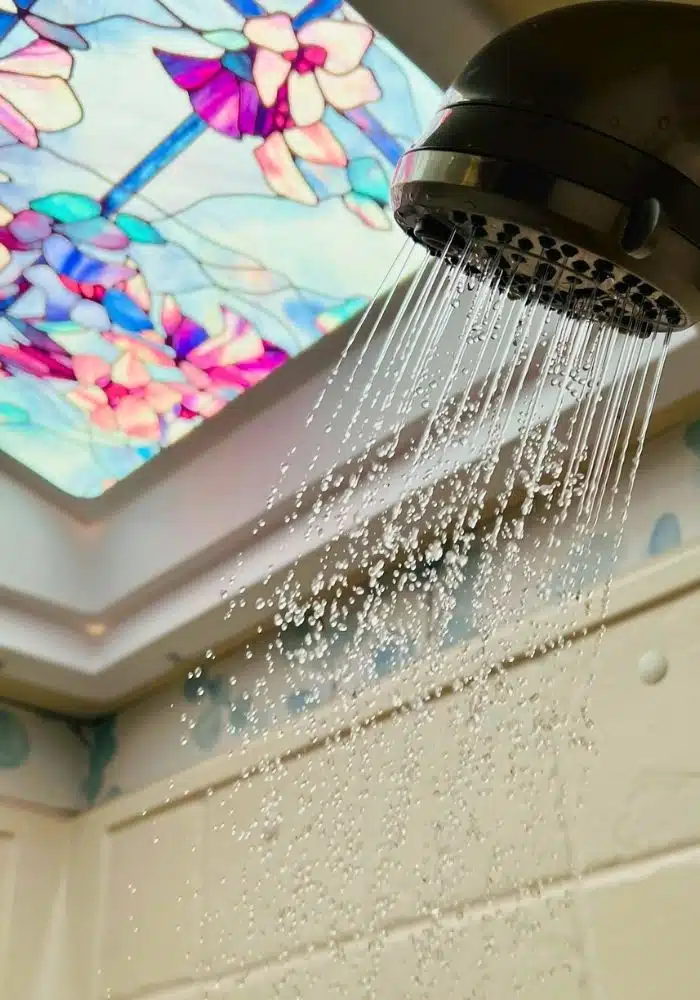
RV Bathroom Renovation #5: Skylight
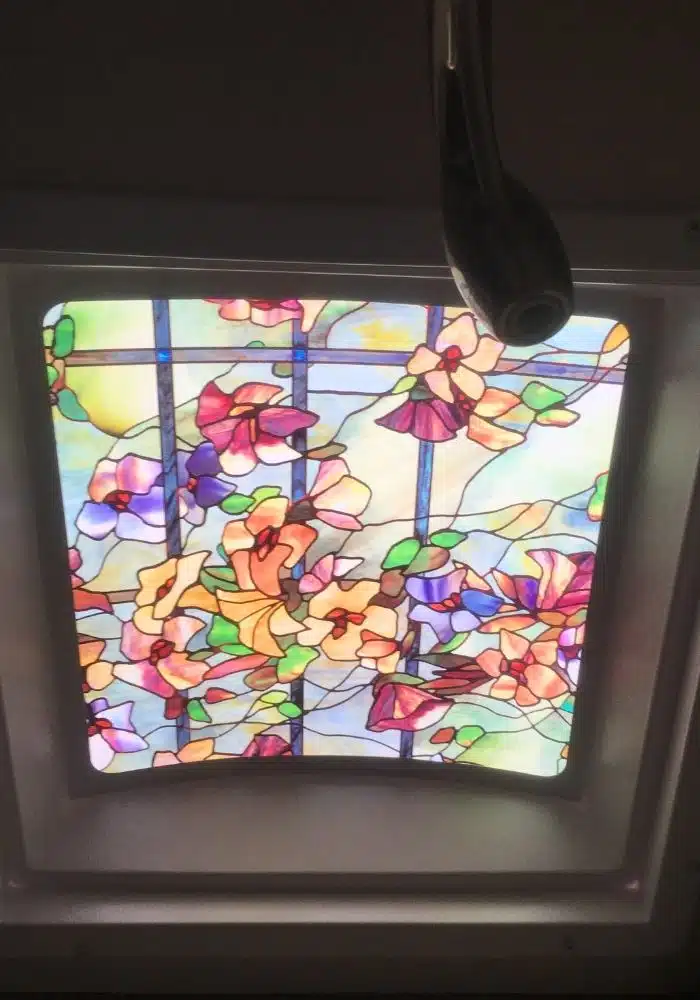
Look up! The skylight for the RV shower has a new look
I’m not sure where I got this idea, but we love it! I used decorative art window cling film between the inner and outer layers of our RV shower skylight. We found the Artscape decorative window cling film online, but some designs are also available locally in Lowes Home Improvement and Home Depot stores. Here’s a selection of designs you can get from Amazon.
The installation took all of about 20 minutes. In our rig, the shower skylight has two parts. There is the main outside dome mounted and sealed on the roof, and an inner piece that inserts up into the ceiling recess above the shower. There is an air gap between the inner and outer sections. The window cling film is applied on top of the inner skylight. It cost only $21 for this decorative touch and it has been up there looking like new for over four years. It’s such a pleasant addition to our RV bathroom and shower.
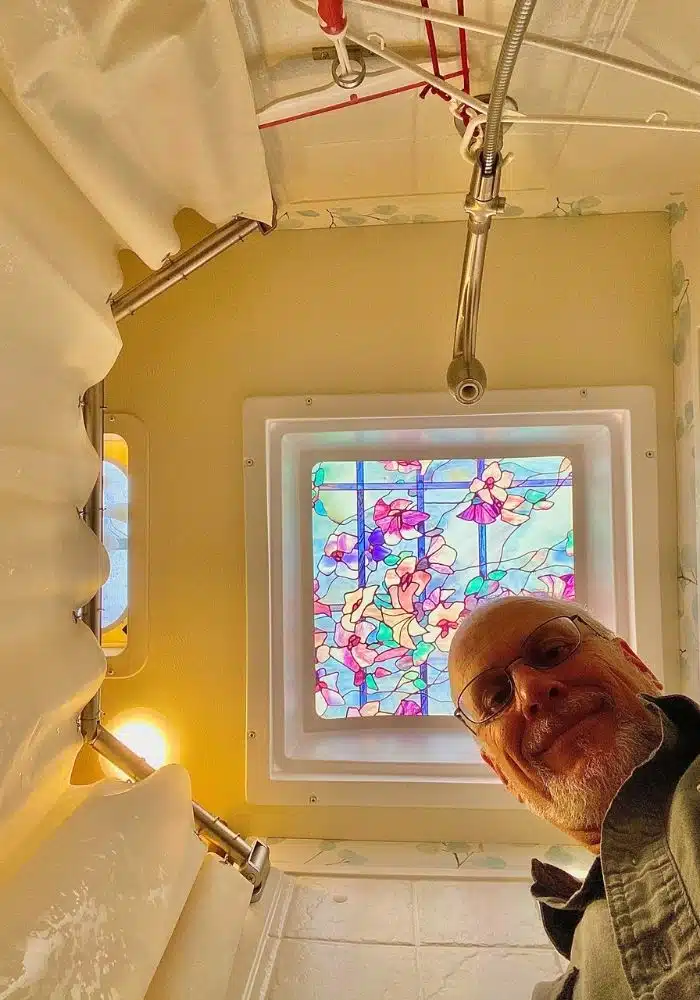
Pretty pleased with my RV bathroom renovation handy work!
RV Bathroom Renovation #6: Shower Rod and Curtain
More space AND a fresh new look in the shower
Wait! Why would we get rid of a perfectly nice, classy-looking glass RV shower door enclosure? Well, we had two good reasons.
First, since we live, work, and travel full-time in our home-on-wheels, removing 43 lbs of glass and metal was like finding gold! Watching your RV weight is essential for every RVer to stay safe on the road. And that precious 43 lbs could be used toward our cargo-carrying capacity.
Second, our old shower door configuration limited our shoulder and elbow room. We liked our RV shower but wanted more room to move around in there. The glass shower door also made getting in and out of the shower enclosure awkward, with its narrow opening.
So what was the solution?
The Stomberg-Carlson extendable shower curtain rod is awesome! The rod extends the curtain out an additional eight or so inches, which makes showering and drying much easier. There is also more room to get in and out of the shower easily. When not in use, the rod easily folds back into the shower and functions as a great drying rack for damp clothes and towels.
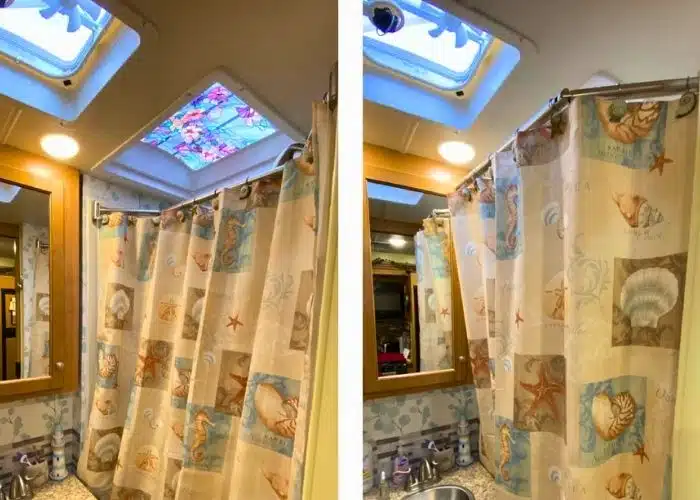
Here you can see the shower rod pushed in, and extended out
We were also able to add a seashore-themed shower curtain that compliments the bathroom’s brighter, updated look. This simple, inexpensive change added triple functionality to our RV bathroom renovation: more room, easier access, and a built-in drying rack.
If you watched Marc and Julie’s ultimate RV makeover series, you may recall they also added an extendable shower rod. And replaced the heavy glass shower door with a colorful shower curtain. You can see how their RV bathroom renovation (and their entire RV) turned out in episode 8 – the final reveal.
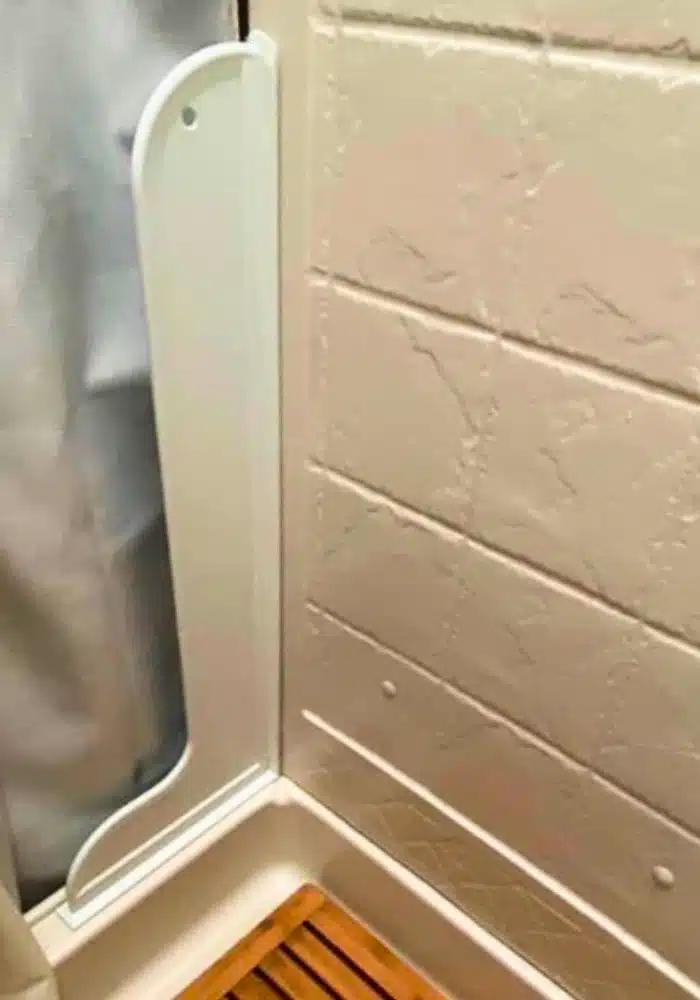
RV Bathroom Renovation #7: Splash Guard
Containing excess water
Since we jettisoned the glass RV shower door enclosure, we wanted to make sure no water would escape past our new shower curtain. Water escaping the shower could create major problems in an RV, which we wanted to avoid.
A large 28.55” tall corner wall splash guard did the trick. This has self-adhesive strips along the side and bottom, making installation simple and quick. We found this corner splash guard at Home Depot and it has performed well. Here are some other kinds also available on Amazon.
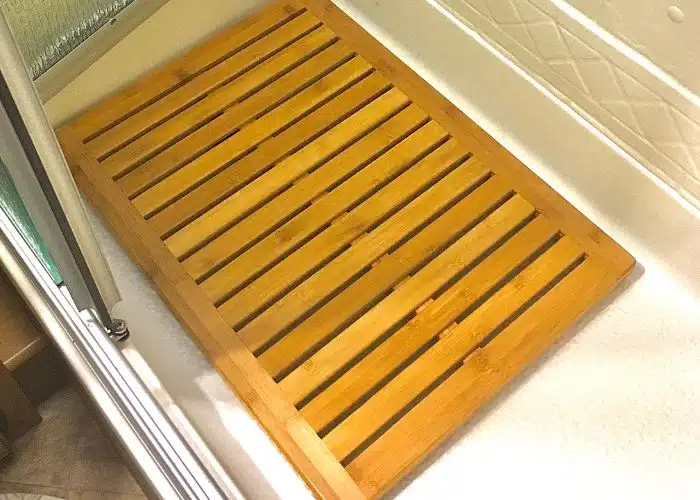
RV Bathroom Renovation #8: Shower Mat
Better weight distribution and a nicer look
Does your RV shower base have some flex to it? Maybe too much? Many RV bathroom showers have this issue, which is related to not enough support structure underneath the shower pan.
Too much flex, especially around the drain area, can lead to broken drain pipe connections, resulting in damage-causing water leaks. You can attempt to add more support under the shower pan, but access to that space is often limited or nonexistent.
As an alternative, we added a nice-looking bamboo shower mat to distribute our weight better and provide a more solid base on which to stand. We like the look and have stopped worrying about possible damage to the shower drain.
RV Bathroom Renovation #9: Showermiser
Conserve tank water... plus an unexpected benefit
Do you dry-camp or boondock and want to conserve fresh water while not filling your gray tank so quickly? Waiting for hot water to reach the showerhead is typically a waste of water. It just ends up in the gray holding tank, using up the capacity.
Yes, many savvy RVers will catch that initial cold water in a bucket or cooking pot, then use it for toilet flushing or dishwashing. That’s a good boondocking tip. But there’s another solution that offers more functionality, plus a great side-benefit.
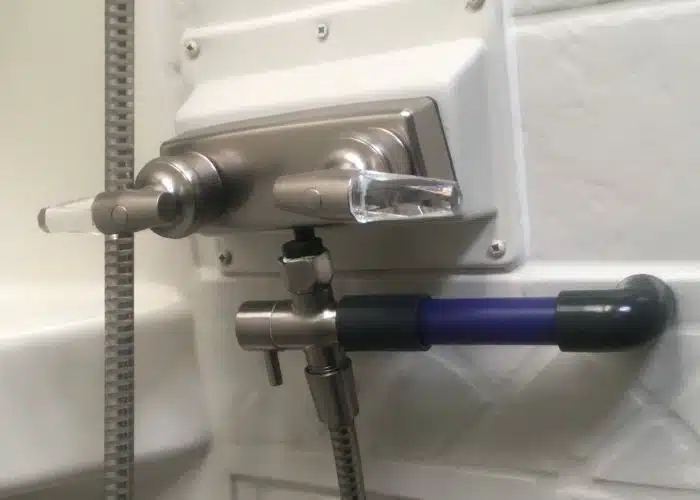
With the flip of a lever, a ShowerMiser RV shower water flow diverter will redirect that initial cold shower water into your fresh water tank. This saves valuable water and prevents unnecessary filling of the gray tank.
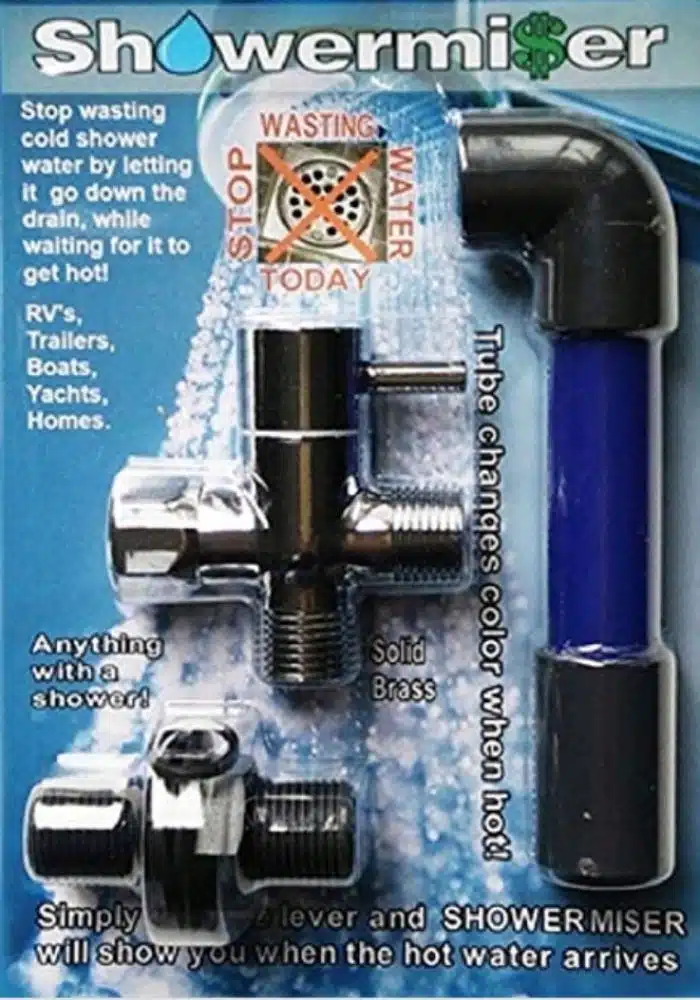
The ShowerMiser system uses temperature-activated tubing that will change from its normal blue to a whitish color, letting you know that hot water is now reaching the shower faucet. Another flip of the lever and the hot water is immediately directed to the shower head.
So what's the unexpected benefit of installing a Showermiser?
Some RVs have an internal fresh tank fill function built into their water management systems, but many RVs do not. If yours doesn’t, the shower flow diverter allows you to fill your fresh water tank directly from the RV’s city water fill inlet, rather than running an outside hose to your fresh tank gravity fill.
Using the Showermiser diverter, you can fill your fresh water tank without ever leaving the RV. This feature of the Showermiser diverter has come in handy for us time and again.
Is it easy to install a Showermiser?
Okay, I know I titled this article 10 “Easy” RV Bathroom Renovation Ideas, but I’ll admit that installing the Showermiser modification wasn’t entirely easy. It really depends on where your RV’s fresh water tank is located relative to your shower. As well as the access from the shower faucet to the fresh tank.
In our case, I had to cut an access hole to get at the back of our shower faucet. This enabled me to run the PEX water line down through the wall and make a tight turn under the shower pan. From there, I had to snake the PEX line through tight inaccessible spaces along the outside wall until it reached the fresh water tank.
Running the PEX line was most time-consuming and troublesome part, resulting in some colorful language that poor Jeanne had to hear. But we both agree it was worth the effort, and are glad to have this diverter in our rig.
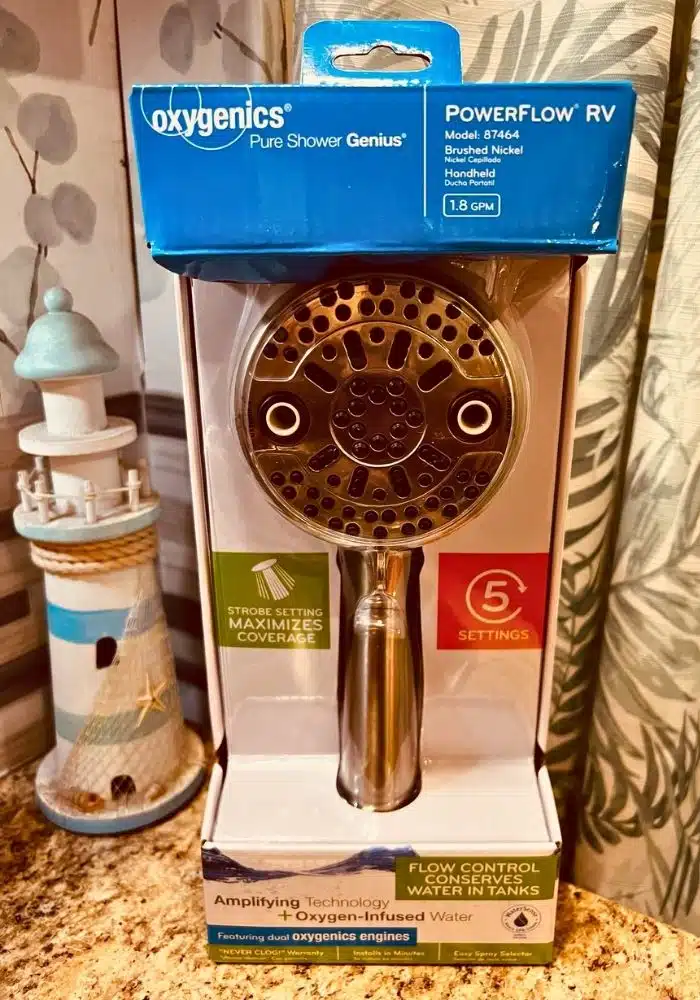
RV Bathroom Renovation #10: Oxygenics Shower Head
Improve your shower water flow
Does your RV shower head do little more than dribble on you? Factory-installed RV shower heads are notorious for weak flows. Replacing them is one of the most common DIY RV upgrade items for new RV owners.
While several brands and models are available, the Oxygenics RV shower heads are very popular among RVers. They are readily available from Amazon, or even in the RV supply sections of most Walmart stores.
We replaced our RV shower head with the Oxygenics PowerFlow-RV model #87464. It has five flow settings, uses only 1.8 gpm, and provides a superior flow. Installation is as easy as detaching the stock shower head hose at the faucet and screwing on the new one. You might also need to change the shower head holder attached to the wall, which is a simple task.
Between this new shower head, and the extra space provided by our extendable shower curtain rod, we love our upgraded RV shower!
If You Don't Love Your RV Bathroom, Make Some Changes!
These are just ten fairly easy DIY RV bathroom renovation ideas that you can do. You’ll find there are many more out there. Just use your imagination to create your own inexpensive improvements. With just a little time, effort, and money, you’ll be pleased with the big impacts these will have on the functionality, comfort, and look of your RV bathroom!

Author Bio: Erik Anderson
Erik and his wife Jeanne have been traveling full-time around the U.S. in their Class A motorhome since July 2020. They love hiking, biking and kayaking, and adventuring with their beloved Cavalier King Charles spaniel "Hershey pup". Erik also moderates the Living the RV Life Facebook group community.
GOT QUESTIONS OR COMMENTS?
Have you done bathroom renovations and redecorating in your RV? Share your ideas with other readers in the comments below.
Sign up for our email newsletter with the latest RV park reviews, news and updates.
More RV Renovation Content
Marc and Julie did a massive RV renovation series on their Class A motorhome. Check out RVLove’s Ultimate RV Makeover Series – on the blog and YouTube – for more RV renovating ideas and inspiration. Hover over each image to see the title and episode name.

12 Lessons Learned from Our RV Renovation

Getting Our RV Ready To Travel After our RV Makeover

What Did It Cost? and RV Renovation Questions
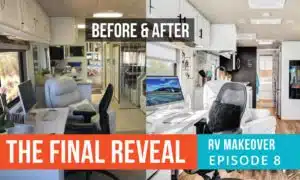
Episode 8 The Final Reveal | Ultimate RV Makeover

Episode 7: Finishing Touches | Ultimate RV Makeover

Episode 6: We’re Nearly There! Ultimate RV Makeover
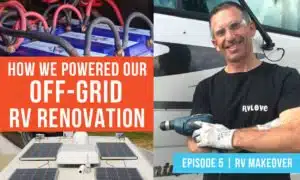
Episode 5: Powering Our Off-Grid RV Renovation | Ultimate RV Makeover
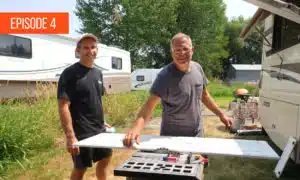
Episode 4: Re-Building Our RV | Ultimate RV Makeover
Episode 3: Tearing Our RV Apart! | Ultimate RV Makeover

Episode 2: What Are We Going To Do? Ultimate RV Makeover

Episode 1: Let’s Do This! Ultimate RV Makeover Series

Get a Sneak Peek | Ultimate RV Makeover Series
GOT COMMENTS OR QUESTIONS?
We would love to hear from you. Drop us a note in the comments section below.
7 thoughts on “10 Easy DIY RV Bathroom Renovation Ideas”
Tony The Tiger G-R-R-R-E-E-E-A-T idea on the shower skylight!!! Never saw that before. Going to give a try. Thanks.
LOL! Thanks! We’ve always loved the look of our skylight. Hope you do it. Thanks for checking out the article.
thank you so much for these ideas!!
Thanks for checking out the article, Betty!
Thanks for taking a look at the article, Betty!
How did you get the window film onto the top of the glass and below the cover of the shower skylight?
Hi, Carol-lee! In our skylight the inner flange and inner “skylight” can be dropped down out of the roof cut-out by removing four screws. Then there’s the bubble outer skylight that is sealed up in the roof. So, I applied the decorative window cling film on top of the inner skylight (just used a damp cloth and smoothed the film on). Then I put the inner unit back up into the cut-out and reattached the screws. The film has stayed perfectly for over four years! I’m sure different skylights are set up differently, but maybe most are similar. W have always loved the look. Thanks for reaching out!