This post may contain affiliate links.
Right after we announced the purchase of our new Jeep, we immediately began getting questions about how we tow it. Obviously, we weren’t going to be towing our Jeep with a tow dolly! In this blog post and accompanying video (Part 1 of a 2 part series) we discuss flat towing, also known as four-down (or 4 down) towing. What tow bar we chose and why.
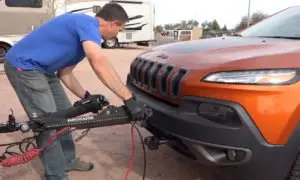
Our new tow bar can be a great fit for almost any vehicle that is able to be towed four down. So we also show step-by-step how we connect the tow bar, and how long it takes to get you familiar with the process.
In part 2 of this 2-part series, we cover the braking system we installed in our Jeep. If you’re new to RVing or currently researching towing solutions, you might like to start by reading our blog post about pros and cons of towing with a dolly versus four down to give you a good general overview of your options.
Let's dive into tow bars... and give you the details of our new tow bar setup
When researching tow bars, you will find that there are many different types and brands to choose from. Some tow bars stay permanently mounted to the towed vehicle. Others stay mounted to the towing vehicle.
We liked the idea of having the tow bar staying mounted to the RV. This avoids having a bulky tow bar mounted on the front of the towed vehicle, allowing it to look stock. If you have multiple vehicles that you tow with, but only one vehicle that gets towed, it might be beneficial to have the other style. For us, towing just one vehicle, mounting the tow bar to our RV made the most sense.
Regular vs Non-binding Tow Bars
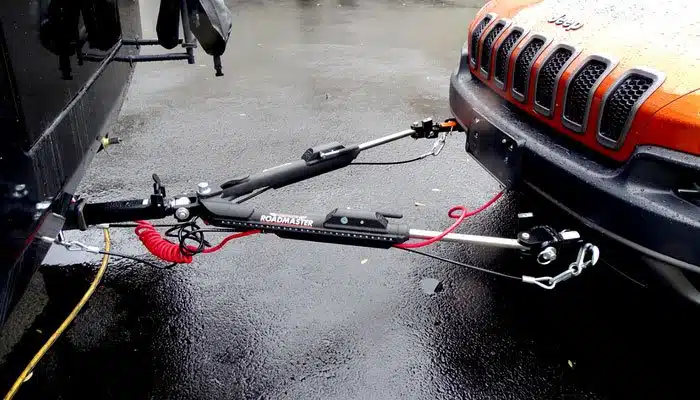
Some tow bars are rigid frame, while others offer more flexibility. One of the features most desirable to us was having a non-binding tow bar. Traditional tow bars require you to be relatively level and straight before connecting or disconnecting your towed vehicle. The equipment can ‘bind’ and be very difficult to remove. Our tow dolly was similar in that we needed to be straight and level to load and unload our MINI.
A non-binding or all-terrain tow bar is far more forgiving. They allow you to easily disconnect your vehicle when facing downhill, on extreme turn angles, and on uneven terrain. There have been many times in our travels that needing to be level and straight had an impact on where we could connect. Having a non-binding tow bar provides a lot more flexibility in where we can connect and disconnect.
Non-binding tow bars have levers that release the pressure to unlock the mechanism. For example, Roadmaster calls it their Freedom Latch. The Freedom Latch provides a 400 to 1 ratio. This means you only need to apply 5 pounds of force to release 2000 lbs of pressure. The only angle that non-binding tow bars will not help as much with, is if you are facing uphill. No tow bar can release the pins that connect the car in that case, because the car is pulling down.
If you need to disconnect while on an uphill, someone will need to get in the towed vehicle and edge forward, creating forward pressure on the tow bar to release it. This can be done with one person, but it’s definitely easier with two.
Most Common Tow Bar Brands
The three most commonly seen tow bar brands are Roadmaster, Blue Ox, and Demco. We had seen products and met with representatives from all brands at RV shows and rallies. Each time, we have been especially impressed by Roadmaster’s educational approach. Then, while traveling in the Pacific Northwest, we had the opportunity to do a tour of the Roadmaster manufacturing facility.
We admired how thorough they are in their product development. We also liked that Roadmaster is a true manufacturer, building most pieces from raw materials in-house. They also thoroughly test anything that comes in from a third party to reduce any risk of failure. This gave us a great deal of confidence. It solidified our decision that when we eventually changed to a vehicle that could be towed four down, we would choose Roadmaster.
We evenutally sold our MINI Cooper Convertible and bought a 2015 Jeep Cherokee Trailhawk. The Jeep is towable, but not without a few modifications. We will cover those more in Part 2 of this series.
Which Tow Bar Did We Choose and Why?
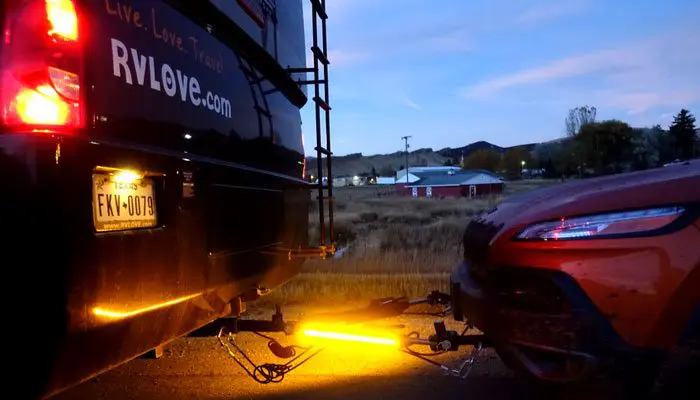
Roadmaster sells several types of tow bars (regular and non-binding) plus tow dollies. We chose an all-terrain, non-binding tow bar called the Roadmaster Nighthawk. The Nighthawk has an 8,000 lb rating which is more than enough for our 4,500 lb Jeep.
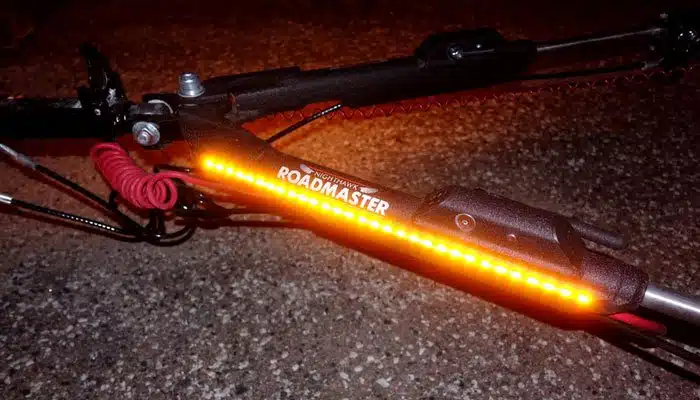
We liked the built-in cable channel to keep the cables looking tidy, not hanging loose. We especially liked that it has integrated LED lights. This might sound like a novelty to some, but they aren’t just for looks. There is additional safety provided through increased visibility to other cars.
Usually, the front of the towed vehicle is dimly lit by the glow of the RV taillights. The Nighthawk brightly lights up this area which even helps your visibility when looking at our tow vehicle in your rearview camera.
The lights are also very beneficial when hooking up, or disconnecting in the dark, as they provide a consistent blanket of light in the whole area. When we had our tow dolly, we didn’t like how dark the area between the RV and car was, or that we often found ourselves disconnecting in the dark. So having a tow bar that lit up was very appealing to us.
List of components we used
Here are the components that make up our specific 4-down towing and braking system. Note that this may vary depending on your tow vehicle and specific brackets, wiring etc related to that. But this will give you a good idea of what to expect:
Invisibrake Braking System (for the Jeep – see Part 2)
Towbar Bracket Kit (these will be individual to your tow vehicle)
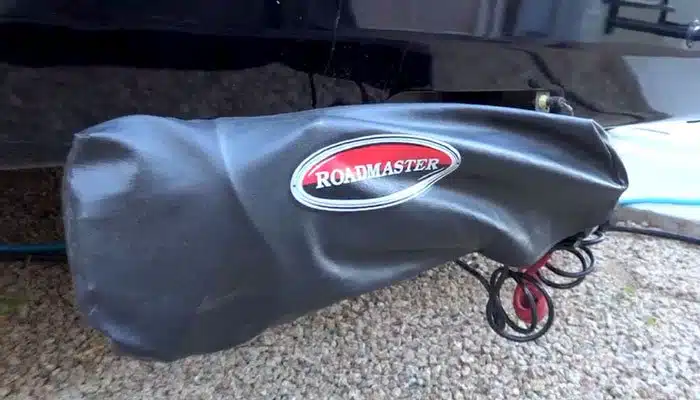
We also got the Roadmaster Towbar Cover Storage Bag to protect the tow bar and wiring, and keep it all together and tidy, plus a Towbar Accessory Storage Bag.
Plus, of course, there are taxes and labor installation costs. So all up, if you’re looking at a four down towing solution, be prepared to spend around $4,000. This will vary depending on where you have it installed, components specific to your vehicle, plus taxes etc.
Yes, going 4-down is a big investment. This is why we wanted to be sure we planned to continue RVing for a long time AND be keeping our tow vehicle for a while, before making the switch.
What's involved with tow bar installation?
The main tow bar remains connected to our RV pretty much all the time in the hitch. But, there was some special installation required on our Jeep. They needed to install the tow brackets onto the Jeep. This required temporarily removing the front bumper. They also needed to cut small holes in the existing bodywork for the brackets to come through from the frame.
The great thing about these modern tow bars is that the bracket locations are often very subtle or stealthy. This allowed our Jeep to appear almost completely stock when the bracket inserts are not installed in preparation for towing. We took our installation up a notch by creating a way to keep our red ‘rescue’ hooks off the Trailhawk when the vehicle isn’t vehicle towed. See part 2 for how we did that.
There are also other elements of installing our towing set up like braking systems and lights. We had the installation done at the Roadmaster factory as we were in the area. The install was done while parked in the Roadmaster lot for two days. Most of the time was spent on the Jeep, installing the brackets, wiring and braking system and getting everything properly set up. We will cover the braking system and Jeep specific items in more detail our next blog post and video – Part 2.
Both the factory and dealers tend to get pretty busy, especially as RVing is becoming more popular. Especially at peak times like spring when people are getting ready to hit the road. So we recommend you book in well in advance. A friend recently had the same tow bar setup installed at a dealer in Mesa, AZ and had to book three weeks out.
How long does it take to connect / disconnect the tow bar?
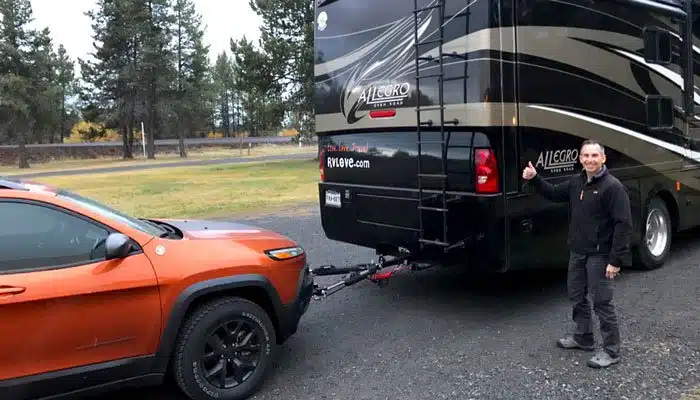
It takes under 2 minutes to hook the tow bar up to the Jeep at a comfortable pace – not rushing. And it also takes less than 2 minutes to disconnect the towbar and stow it away inside the storage bag. So connecting and disconnecting is actually very fast. What takes the most time is the process we have to go through to put our Jeep into neutral, to make it tow-ready. Again, we’re covering that in more detail in Part 2. And this will vary depending on your vehicle.
Our tow bar experience so far
We have now been towing our Jeep with this setup for six years. Our tow dolly served us well for the needs of our MINI Cooper Convertible for our first 3.5 years on the road. But we’ll admit, we have been very excited about our new four down towing system. It is very easy to hook up and disconnect. We have absolute confidence in every aspect of its safety and performance.
The tow bar stows away easily, compactly and also remains securely in position when driving the RV separately, without our Jeep. We always knew towing four-down would be easier than the dolly. That was a price we were willing to pay for our decision at the time we hit the road in 2014. But we have been surprised at how often the increased mobility has been beneficial. Like when taking the RV to fill with propane, as we can now go to a place that we can back up without the dolly.
I (Marc) used to also feel like I needed to change into older clothes to avoid getting dirty when loading and unloading the MINI. Now I don’t feel the need to do that. I stay cleaner during the process of hooking and unhooking the Jeep. So our new four down towing solution gets a big thumbs up from us! We are very happy with our decision and especially our choice in the Roadmaster Nighthawk.
Tow bar Maintenance
When used and maintained properly a tow bar should last around 7 years or 70,000 miles. A tow bar is a big investment, so it literally pays to take care of it. Fortunately, our tow bar is easy to maintain. We just need to lubricate the arms with silicone lubricant every month or so. It’s a good idea to get your tow bar inspected every year as well. Tow bar manufacturers, including Roadmaster, will often inspect your tow bar for free. Sometimes they will even replace parts for free at RV events. So keep an eye out for them next time you are at a rally.
More in Part 2 on Braking
In Part 2, we have a separate blog post and a video that covers the braking system we chose, and why. The braking system we chose, similar to this tow bar, would work on most vehicles that can be towed four down. We also provide details on specific modifications we had to make to our Jeep to flat tow it safely. For Jeep-specific towing info, including how we managed to keep our red rescue hooks click here to see Part 2 on braking.
Got questions?
Please feel free to email us any questions you have about our towing setup. If you want to learn more about other Roadmaster products you can visit their website roadmasterinc.com which has a ton of useful information, or reach out to them directly at 800.669.9690. To find a Roadmaster dealer near you, click here to visit their dealer locator.
Sign up for our email newsletter with the latest RV park reviews, news and updates.
More Towing Content
Want to check out more towing related content? Hover over each image to see the title and episode name.
After almost a decade of motorhome travel, we’re changing to a truck and trailer. Here’s why.
Electric Trailer Dollies Guide: Easily Move RVs and Boats
Best Cars To Tow Behind RVs
After the worlds longest RV test drive we bought this Class C motorhome
Casita Travel Trailer Tour Freedom Deluxe 17

Jeep Death Wobble Fix Update – How We Fixed It
Something is Wrong! Our Death Wobble “Breakdown”
Our 4 Down Towing Set Up: Part 2 – Braking System
Our 4-Down Vehicle Towing Setup: Part 1 – Tow Bar

How We Chose our Tow Vehicle
Pros and Cons of a Towing on a Dolly vs 4 Down


12 thoughts on “Our 4-Down Vehicle Towing Setup: Part 1 – Tow Bar”
I’ve been flat-towing a car behind an RV for 15 years and have only used Blue Ox equipment. I replaced my first tow bar after about 7 years of use due to age. My second Blue Ox tow bar was stolen off the back of my motorhome, and yes it was locked on there with a locking pin that was cut with some sort of power saw. Hence the purchase of this one as a replacement. Blue Ox is well-made and extremely durable.
Sorry to hear about the stolen tow bar. Glad you have been happy with Blue Ox. They are a well respected brand too, and we have many friends who have also been happy with theirs, which is why I included them in the post. We have loved our Roadmaster.
I’m confused about the death wobble fix. Do I need to have the mopar wiring kit installed to prevent that if I have flat tow system that charges the battery from my motorhome? Isn’t the death wobble problem related to the battery dying and the steering going out? If I am charging the Cherokee battery (I have a 2017 trail hawk) while it is being towed with the wiring from my motor home shouldn’t that be enough. Thanks for your time.
Hello Jeff. You actually need BOTH, the Mopar kit that keeps the steering active while the vehicle is turned off, AND the charging wire to keep the battery charged because that Mopar add on drains the battery very quickly. -M
Did you install the Mopar wire harness part number 68321424AB ? Or did you just use the Roadmaster wire kit?
Do you have a video of you putting it in neutral to tow?
Sorry so many questions
Hi Steve – yes – we covered all that in detail in part 2 https://rvlove.com/2018/04/12/our-towing-set-up-part-2-braking-and-setting-up-jeep-tow/ – that IS the part number. Call around to Jeep dealers to find one that has actually installed them before so they are familiar with the process. Not all are. No video of us putting it in neutral to tow but you will also find the steps here in part 2 https://rvlove.com/2018/04/12/our-towing-set-up-part-2-braking-and-setting-up-jeep-tow/.
Do you guys have an Instagram?
We are new to RVing and like the different inputs
Yes we are http://www.instagram.com/rvlovetravel
How can I keep my tow bar attached since I don’t have room to store it once I park in the RV spot
No
Our Roadmaster Nighthawk tow bar stays attached to the coach. It folds up and out of the way
I love my non-binding Roadmaster tow bar. I went with Blue Ox for the vehicle hookup bracket and bought adapters to link it to the Roadmaster. I like the Blue Ox better on the vehicle side because it’s lower profile and is tucked away very nicely inside the bumper. Anyway I’m sure you love having one less piece of gear to deal with!
Hello Andy,
Thank you for your feedback and additional information. Yes, we love our Roadmaster gear and the simplicity of it. Great point that you added that Roadmaster makes brackets that can adapt Blue Ox equipment.
Thank you,
Marc and Julie