This post may contain affiliate links.
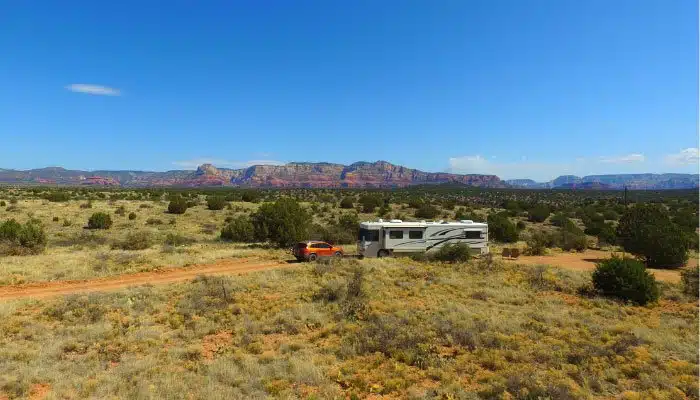
Just a few weeks after purchasing our 40′ 1999 Country Coach motorhome “CC”, we took her out on an RV shakedown boondocking adventure. We wanted to test out the systems and capacities, start getting organized and begin making our first few interior mods and upgrades. Already located in Phoenix Arizona, we decided on a one-week trip to nearby beautiful Sedona, Arizona. So we could get in some Jeeping, hiking and biking too!
Getting Familiar
We spent our first couple of weeks in CC in campgrounds – primarily Mesa Spirit RV Resort in Mesa, Arizona – while writing our book. Because we were so ridiculously busy, we barely had time to put anything away. Upon moving out of Rocky, we pretty much threw everything we owned into CC. We were in a bit of a mess. So we could hardly wait to carve out time to start giving things their proper place in cupboards and drawers.
Before embarking on a full RV Makeover, we also felt it was important to spend a few months living in CC “as is”. We wanted to familiarize ourselves with everything and get a good feel for what was working, and what wasn’t. By living with the existing design and layout for a while, we could start making notes of what we would want to change.
In this blog post and video, we share:
- the first round of changes we made to our RV interior
- our tank and system capacities
- boondocking access in our 40′ diesel motorhome
- some of the plans we have in mind for future upgrades
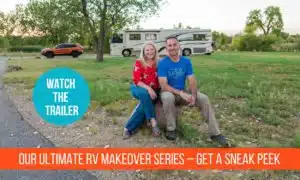
This is the “warm-up” to our Ultimate RV Makeover series, that is kicking off next week, with Episode 1. It will also refresh your memory of what CC looked like “BEFORE”, as it’s been a little while since our “first tour” video.
RV Interior - Initial Mods and Upgrades
You may recall from our 2018 recap video that we spent almost 2 weeks working from a hotel, so we could meet our publisher’s deadline for our book manuscript. Selling our first RV and buying CC happened smack bang in the middle of our month long book writing period, and we literally had NO time to get CC organized until April. Not only would working productively in the RV have literally been impossible during that time, I am fairly confident we would have both gone insane.
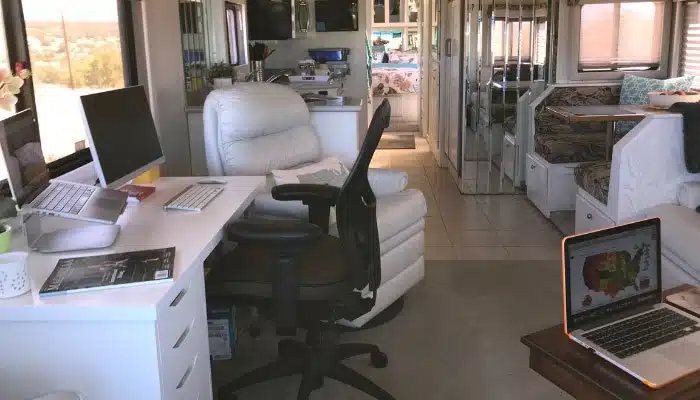
We spent the first few weeks living in our RV, just getting settled in, catching our breath, and deciding on where to put our stuff. Because of our crazy work schedule, our top priority was establishing two productive workspaces.
Creating two productive workspaces
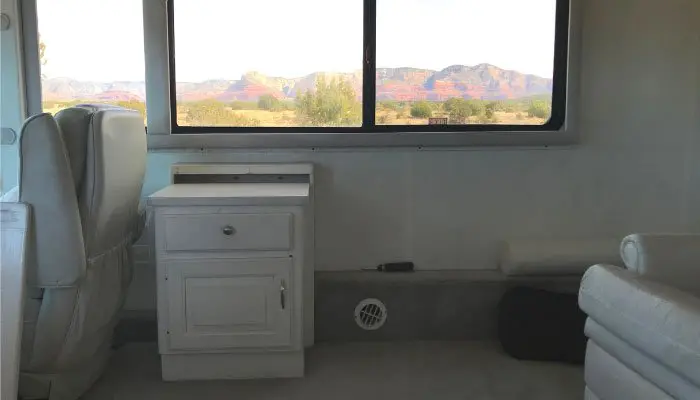
Our motorhome CC came with the original solid wood cabinet with a flip-out desktop. It was probably designed for writing checks and paying bills… back in the late 1990s when she was manufactured! It was situated behind the passenger seat under one of the large living room windows, and completely impractical for us to work from. The desk had to go, but the location seemed ideal for our primary workspace.
Main Workspace #1
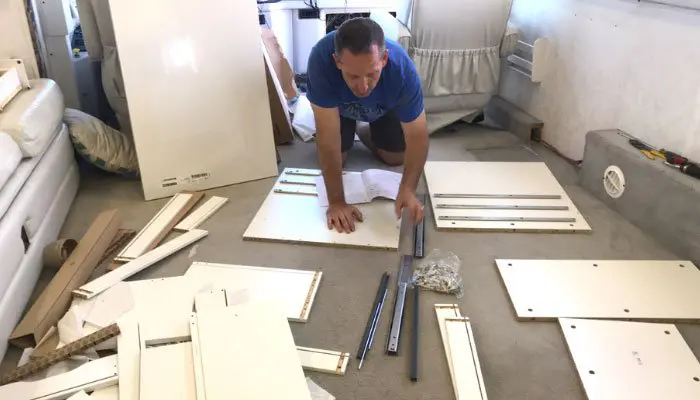
Marc removed the cabinet and snipped the old “phone line” wire that was still connected. We definitely wouldn’t have a need for that!
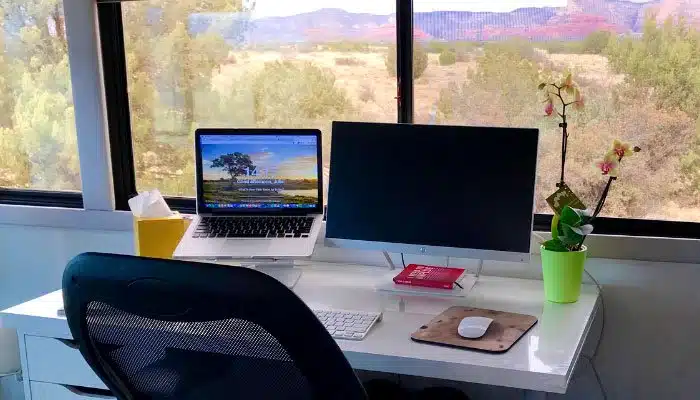
We decided to replace it with a simple, inexpensive IKEA desk with drawer storage, creating and a much larger workspace. This allowed us to set up a laptop stand and external monitor for a dual monitor workspace – ideal for photo and video editing. We had brought Marc’s special fancy ergonomic chair from his previous bunkhouse workspace in our Tiffin motorhome. And the placement of the desk – while in our living area – is made good use of that space and also looks out of the huge living room windows to take in our ever-changing views. This week, it was multi-million dollar views of the red rocks of Sedona… for free. This made us VERY happy.
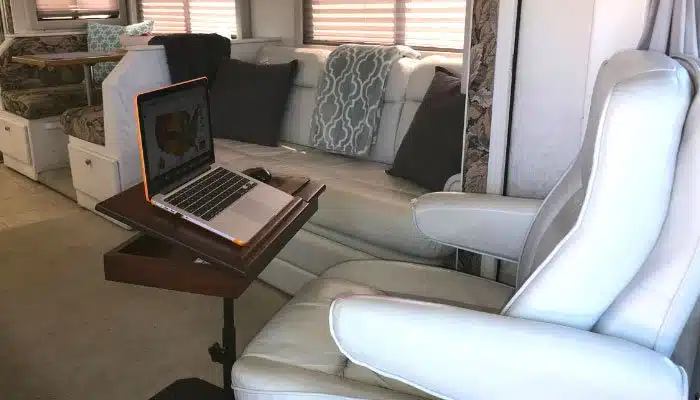
Mobile Workspace #2
The secondary workspace was created by using a portable, adjustable computer caddy desk, that we could easily move around the RV and use – either from main driver or passenger chairs.
We bought the computer caddy on clearance from furniture maker Bradd and Hall in Elkhart Indiana. This made a brief cameo appearance in our review video of the Easy Folding Coffee Table. Unfortunately, Bradd and Hall has discontinued making the computer caddy.
So far we are liking how the main “white office” is working for us. Rather than each have our own dedicated workspace, we tend to share them both and switch around to mix things up.
Thoughts on our new workspaces
So far we are liking how the main “white office” is working out for us. We love that it’s a good size, dedicated workspace and love having views all day out of the window. The mobile computer caddy desk is pretty good, but it doesn’t feel like this will be a permanent solution. While handy (being portable and with storage under the desktops), the brown wood color doesn’t match anything in the RV and it can sometimes be annoying moving it around the RV. We’ll continue to look for more optimal solutions for workspace #2.
We’ll see how all this goes and potentially review and change up our workspaces again, during our Ultimate RV Makeover.
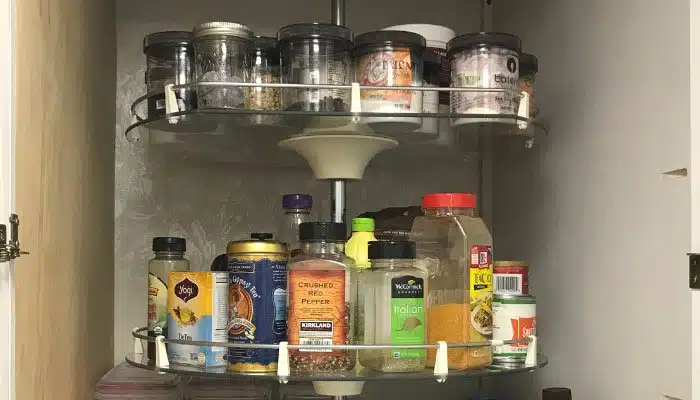
Maximizing storage space in the pantry
There’s a large cabinet left of the refrigerator and opposite the bathroom vanity that could easily be optioned to plumb in a clothes washer and dryer. We didn’t have laundry machines in our previous RV, and honestly, it’s never been an issue for us. We’re quite happy doing multiple loads of laundry all at once at the campground laundromat in a couple of hours.
So we didn’t want to install a washer/dryer in CC. We felt we would rather use the cupboard space as a nice, big kitchen pantry. But the space was huge – tall and deep – which made it difficult to reach things at the top and back of the cupboard, especially for Julie.
To make better use of the space, we installed a large 2-tier lazy-susan-style corner cabinet carousel from IKEA that nearly tripled the available storage and makes access MUCH easier. We may explore other options down the road, but so far, this has proven to be a significant and well-loved upgrade so far.
Click to learn more about the IKEA Utrusta Wall corner cabinet carousel $75.00
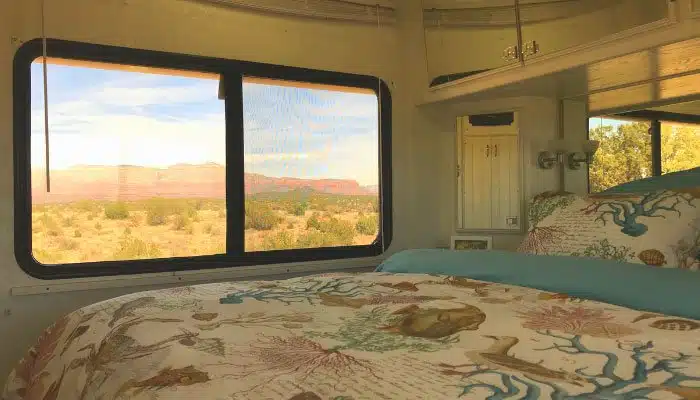
Getting a new RV Mattress
The first interior upgrade we made to our motorhome was ordering and installing a new custom mattress from MattressInsider.com. The RV didn’t come with a mattress at all, so that was actually our very first upgrade! We LOVE our mattress. It’s the same as the one we ordered for our last RV the previous year. Price will vary depending on the size and layers you choose, but as a guide, one like ours costs around $500. Worth every cent. We sleep like babies. 🙂
Click here to watch the video installing our RV mattress for CC
Click here for our tips on buying an RV mattress
Special RVLove Discount: Use coupon code RVLOVE to save 10% on purchases at Mattressinsider.com
Other Changes We Would Like To Make
Having made our critical changes right away, we continued to make notes around the livability of all other areas and features of the motorhome. This would allow us to start establishing our plan for the much bigger renovation in the summer.
We were also making notes of how the various systems were working, including the batteries, appliances, plumbing fixtures, outlets, and off-grid capabilities. The day we arrived in Sedona, we experienced an issue with the entry steps not working. Well, they are temperamental. Sometimes they come in, sometimes they don’t. And sometimes they go out, other times they don’t.
Here’s what else we know we already want to do in our RV Makeover.
1. Replace carpet with hard flooring throughout
While the light gray carpet was in pretty good condition (especially considering CC is 20 years old) and actually quite cosy on cool days, it’s still carpet. We plan to do more boondocking, and hard floors are just easier to keep clean. Boondocking in Sedona reminded us how much dirt gets tracked inside when camping off-grid. In the first couple of days, we were already starting to see the light grey carpet take in a reddish hue!
2. Remove most of the mirrors
Aside from the fact these are circa 1990s, as you can see from the video, it’s pretty much impossible to do any filming inside the RV without the camera equipment reflecting. Believe it or not, the mirrors were an UPGRADE package, that the original owner paid extra for 20 years ago. Go figure!? LOL
The mirrors making it very difficult for video recording inside (a significant consideration for YouTuber like us), the beveled mirrors in particular make the space look visually busy. With about 40 mirrors inside our CC, we just hope we don’t break any! Wish us luck!
3. Update systems and appliances
Aside from the cosmetic changes we wanted to make inside, there are also some inside systems that need updating. And some outside (previously highlighted in our RV Inspection video). Here’s a quick overview.
– Change Microwave
While the microwave was in almost-new condition, we prefer a convection-microwave combo, so that will be changing.
– Upgrade Refrigerator
We like the extra space of the 12 cubic foot RV fridge and the fact that it runs on propane (and electric) which is handy for boondocking, we would prefer to change that out to a residential refrigerator. Our next step is to find one that will fit the space – and work out how to get it into the RV! And, of course, get the old one out!
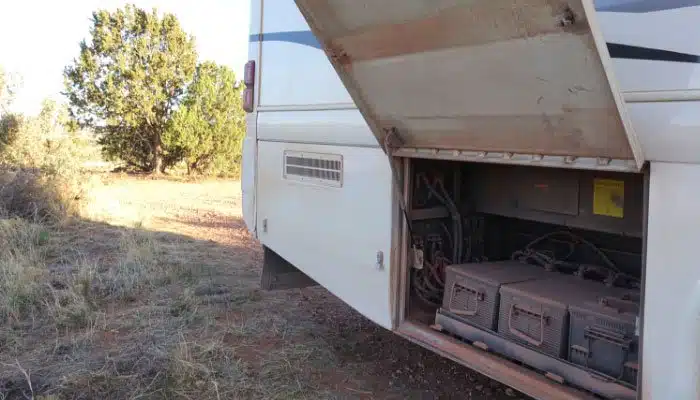
– Replace Batteries & Inverter
The batteries and inverter were pretty much toast and would need replacing.
– Install Solar Panels
As we plan on keeping this RV for a while, we also want to add a full solar array to the roof, to enable us to do more off-grid camping.
– Fix Entry Steps
Of course, this is more of an RV repair than an upgrade or RV Makeover. On the day we left towards Sedona, the entry steps became jammed and would not open. We ended up having to enter and exit the RV using a small, folding step stool as a short term measure.
Marc tried hitting the steps with a hammer (thinking it may dislodge something keeping them stuck). But that didn’t work. He took apart the gears and step mechanism, to manually extend them. Disassembling then reassembling the steps seems to reset them or something, which usually works for a while – at least a month.
This has happened a few more times since. But we’re pleased to report that as of the date of publishing this post, the steps been working fine for several months! Sometimes RVs just get temperamental – new or old. This is one of CC’s quirks that we’ve come to embrace. You don’t spend $25K on a high-end motorhome (back in it’s day, at least) and come away with no troubles whatsoever. RV repairs are part of RV Life!
Boondocking with our 40' Diesel Motorhome
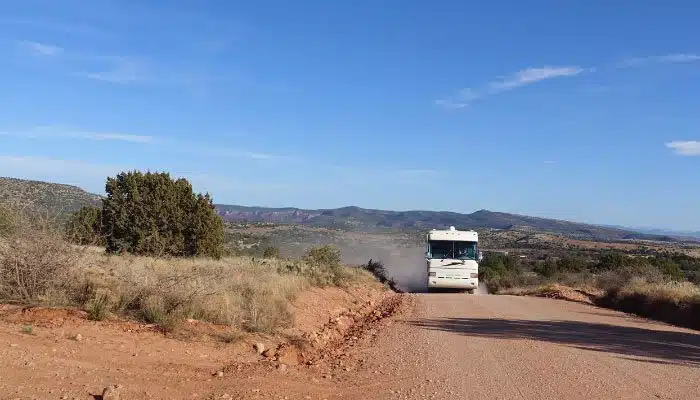
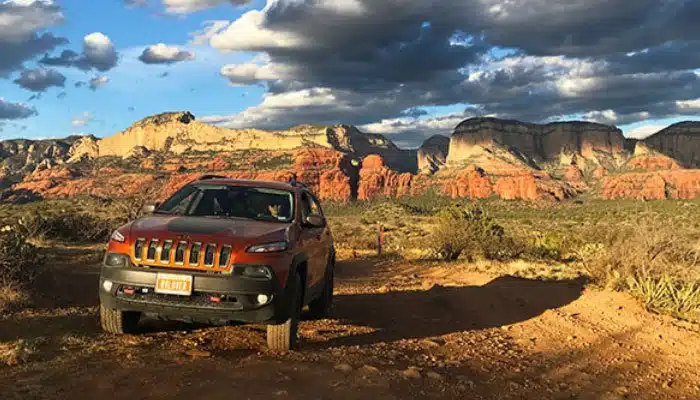
Most people assume we can’t boondock with an RV as big as ours. As a 40′ diesel pusher motorhome, our 1999 Country Coach Intrigue “CC” is certainly a Highway Princess. But it’s not impossible to camp off-grid. Sure, getting off pavement with a coach like ours does present some challenges.
Being forty feet long and with relatively low ground clearance, we definitely need to scout out the roads first with our toad vehicle – our Jeep Cherokee Trailhawk. But, when we do find a suitable location, the capacities and capabilities of an RV like ours means we can comfortably enjoy the peace, serenity and views of open land for a couple of weeks.
System and Tank capacities
Of course, having a large fresh water holding tank and good sized waste tanks makes camping off-grid much easier. Quite simply, it means we can stay out there longer, without having to break camp to dump our tanks. Of course, we still have to conserve water and power, but not as drastically as you might think.
One of the things that impressed us about our RV was our tank capacities, with:
- 100-gallon Fresh Water Tank
- 130-gallons of Waste water capacity (gray and black combined)
- 42-gallon Propane Tank
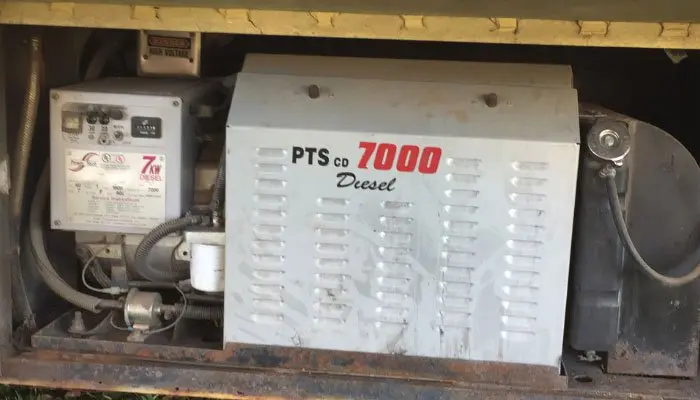
- 7000 Watt PowerTech Generator
We have been unable to find the size of each holding tank. Being a 1999, there’s not a lot of information like this to be found online. We just know it’s about 130 gallons combined – from the original coach owner’s manual.
Even though we stay in campgrounds often, we’ve also done quite a bit of boondocking since our first time camping ‘off the grid’ back in 2014.
With that experience, comes good practices in knowing how to conserve water and energy to maximize our stay. Want to know how you can do it too? Read our article 29 Tips for Successful Boondocking here and also watch our video with dry camping tips from Quartzsite, Arizona.
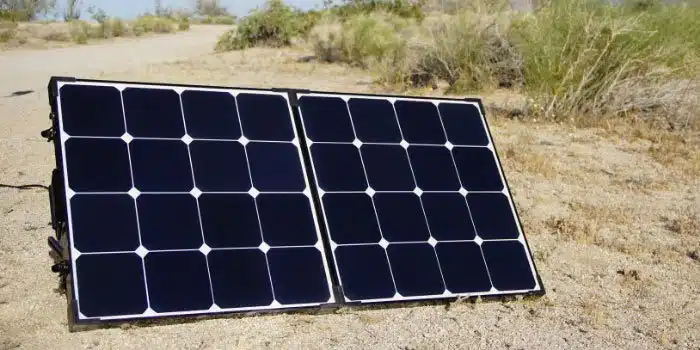
We also used our portable 100 Watt Portable Solar Panel to help keep our batteries charged. You can watch our Video Review and learn more about our Portable Solar Panel here. As mentioned earlier, we have plans for installing a full solar setup.
Update: Check out our massive off-grid power upgrade in this post
How did we do after a week of boondocking?
With 100 gallons of fresh water on board, we have plenty of water for a couple weeks of conservative use, and we only stayed 8-9 days. So we still had water to spare by the time we left. We hardly used any propane, just enough to run the fridge and stove burners.
Our lighter colored paint, improved insulation, mirrored windows, and window covers for the non-mirrored windows (windshield and side windows) significantly reduce how hot our RV gets in full sun. This helped keep the coach cooler inside, and meant we didn’t need to run the air conditioning. We just opened windows for ventilation and breeze as needed.
We were also excited to confirm our expectations of significantly reduced fuel consumption of our diesel generator compared to our previous gasoline powered generator. Our 7000-watt diesel generator uses less than one third of the fuel that our 7000-watt gasoline generator used to consume on our Tiffin gas motorhome. Generator noise did not cause a significant problem as there were no other RVers in sight or nearby at all. So we knew we would not be offending anyone with the noise or fumes.
We did need to run our generator a bit on our inaugural boondocking adventure with CC as we only had our 100-watt portable solar panel, and the crappy old batteries were not holding a charge well.
Even before arriving in Sedona, we knew we were planning on upgrading our batteries, inverter and adding solar, so we just got by with what we had, knowing it was short term. More to share on our power upgrades in Episode 5 of the Ultimate RV Makeover Series.
Overall, we were pleased with CC’s boondocking capabilities, knowing that some of the shortcomings will be addressed soon. Some concerns like how much dust is kicked up into our air filter won’t be as easy to change. We will likely still predominantly stay in campgrounds, such as those in our Thousand Trails membership. But we can definitely see ourselves increasing our off-grid RVing once the upgrades are made.
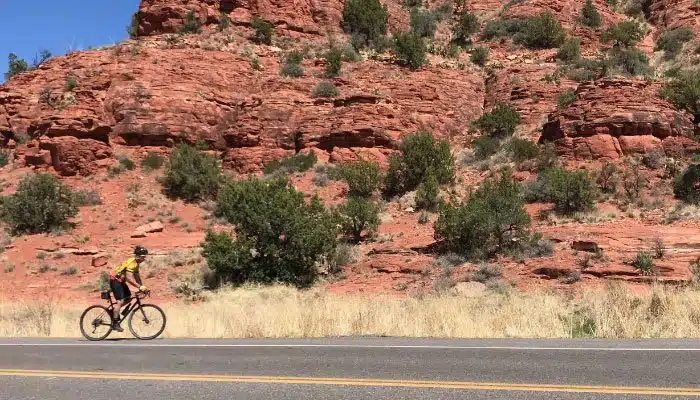
Time for Play - Jeeping, Hiking and Biking
All up, we spent a little over a week in Sedona. Although we had a lot of work to do – sourcing and organizing over 200 photos for our book, as well as continued organization of CC, we still managed to do some of our favorite things in one of our favorite places. Jeeping, hiking and biking in beautiful Sedona, Arizona. We can’t wait to get back there again, with a much lighter schedule next time, so we can treat it as more of a mini vacation.
Coming Up Next - Our Ultimate RV Makeover
Since our RV shakedown, we continued to make notes about other changes we would like to make in all areas of the RV. And if you watched our 2018 recap video, you would have seen that our RV makeover has already been completed (in the summer of 2018)! We know you’ve been patiently waiting, as we have been working behind the scenes to put together episodes in our Ultimate RV Makeover series that take you through each area of the RV, show you what we did and why, complete with handy tips. You will be amazed to see what we have done to the interior of this motorhome!
Hopefully this blog post and video have brought you up to speed with these early modifications to CC as well as initial ideas for our RV renovation. We have our plans for the renovation in place, a location lined up, plus the help needed for us to pull off this project! We’re excited to share it with you… and may even inspire you to make some changes of your own.
If you haven’t already, sign up for blog and email updates, the latest YouTube videos and social media posts below, so you don’t miss a thing!
Sign up for our email newsletter with the latest RV park reviews, news and updates.
GOT COMMENTS OR QUESTIONS?
We would love to hear from you. Drop us a note in the comments section below.
Ultimate RV Makeover Series Content
Want to check out more on our Ultimate RV Makeover Series? Hover over each image to see the title and episode name.
12 Lessons Learned from Our RV Renovation

Getting Our RV Ready To Travel After our RV Makeover

What Did It Cost? and RV Renovation Questions
Episode 8 The Final Reveal | Ultimate RV Makeover

Episode 7: Finishing Touches | Ultimate RV Makeover
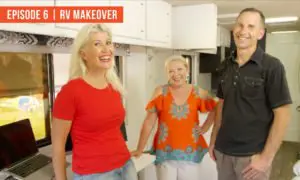
Episode 6: We’re Nearly There! Ultimate RV Makeover
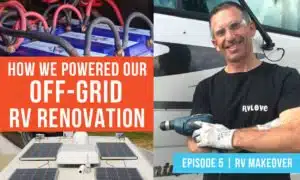
Episode 5: Powering Our Off-Grid RV Renovation | Ultimate RV Makeover
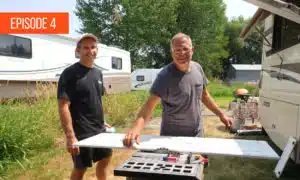
Episode 4: Re-Building Our RV | Ultimate RV Makeover
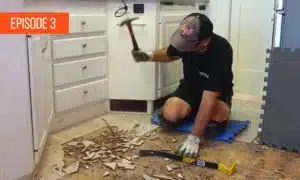
Episode 3: Tearing Our RV Apart! | Ultimate RV Makeover
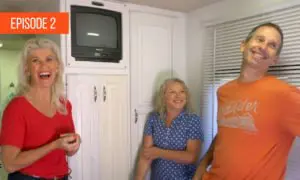
Episode 2: What Are We Going To Do? Ultimate RV Makeover
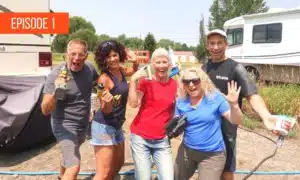
Episode 1: Let’s Do This! Ultimate RV Makeover Series
17 thoughts on “RV Shakedown: First Boondocking trip and Upgrades”
Hi Folks,
The amount of dust CC was throwing around I would say your radiator fan control valve is broke and stuck in the high fan speed position, which is common given the year of the coach. If the control valve is working proper, unless your engine temp is really high, the fan should be running at a low speed which isn’t going to kick up that much dust, even on a dusty road. Been through this on my 2002 Intrigue. Look for a WaxValve replacement controller. Cheers Willie
Willie – you’re the bomb! Thank you so much! Marc has already looked into it and it’s on the list. Cheers and keep the tips coming! 🙂 PS. You might enjoy our Ultimate RV Makeover Series which is starting on YouTube – watch us remodel our 1999 Country Coach! 🙂
Those “large” windows in your new coach are a big plus. Our new RV trailer also had larger than average windows to view the outside. Sedona AZ looks like a boon-dockers meca. Which part of 525? there is A, B and C. Are all parts of the winter OK to boon-dock there as far as temps. The 70/50 temps are ideal. April?
Yes, we love our big windows! We love boondocking in Sedona! This was off 525C. We have not boondocked there in the winter so cannot speak from personal experience. You would need to be mindful of weather eg. snow… and rain as it can get muddy (we have had friends get stuck there). Always be careful and check the weather ahead of time! April the temps were ideal. We previously stayed in summer at 90-100 during day which was too hot but we still love it.
Awesome article! I absolutely can NOT wait for the CC upgrade series. I just had to laugh at Julie’s IKEA Furniture Fairy. What wife doesn’t have one of those? The IKEA Furniture Fairy is responsible for making all those wood and metal pieces look the the displays in the store. This is the bane of every husbands existence! I think my wedding vows went something like “Do you, Brett, promise, Danelle (your new wife), to have and to hold and laugh and to put together IKEA furniture and have no parts left over forever and ever???…..And do you Danelle Promise Brett to ride his ass until all the furniture is put together and ask questions like…what is that part for? and “is that a wrench or a screw driver?” when Brett asks you to hand him the Phillips. I am of course paraphrasing but I am fairly certain the vows went something close to that. Anyhoooooo….I am glad you guys are showing the makeover soon. Its gunna git crazy cray up in here!!!!
Haha – hilarious, as usual. Wish we had been there to witness those vows! Maybe when you have a renewal ceremony? LOL Hope you enjoy the makeover series, have a feeling you will!
You mentioned you didn’t know some of the details of your older coach. I have a 92 CC. I’ve called the factory a few times, the techs there have the original build plans for each coach built. All they need is the serial number off the data plate affixed to the wall near the drivers seat. I’ve gotten repair advice and parts shipped to me. give them a call.
That is amazing to know! Thanks Mike! We did speak to the factory once and were very impressed by their knowledge so will give them a call! Cheers!
I like the new coach and the vid! I live in Cottonwood, not far from where you were and I know FR 525 well. My coach had those mirrors as well on the wall and I took them off and replaced with bead board and a chair rail. I’m in a ’96 35′ Allegro Bus with the one slide out as yours. I like that you are in an older motor home with plans to fix up to your liking. Thanks for sharing your travels, make over on the coach, and your experiences.
Marc
Thanks Marc. Yes we love our older CC and it seems everyone is very happy about our decision too – even though it surprised many. Think you will enjoy the makeover. Cheers!
Great info. We can’t wait to see your ultimate makeover. My husband and I are currently renovating 17 years old 37 ft diesel pusher (Newmar Country Star) so we know how much work it is. On another note, we are preparing for a full time RVing next year and can’t thank you enough for all the blogs you post. We are learning a lot and your book is fantastic. It is packed with so much good advice that we feel we will be ready. Time will tell (lol).
That is all great to hear – thank you. So glad you are finding the blog and book so helpful. We think you will enjoy the makeover series! With the book and the blog, you will be hitting the road well armed, but there is, of course, always more to learn as you go when it comes to RVing. Happy trails! PS. if you have not already, would really appreciate it if you would be kind enough to write an honest Amazon review!